
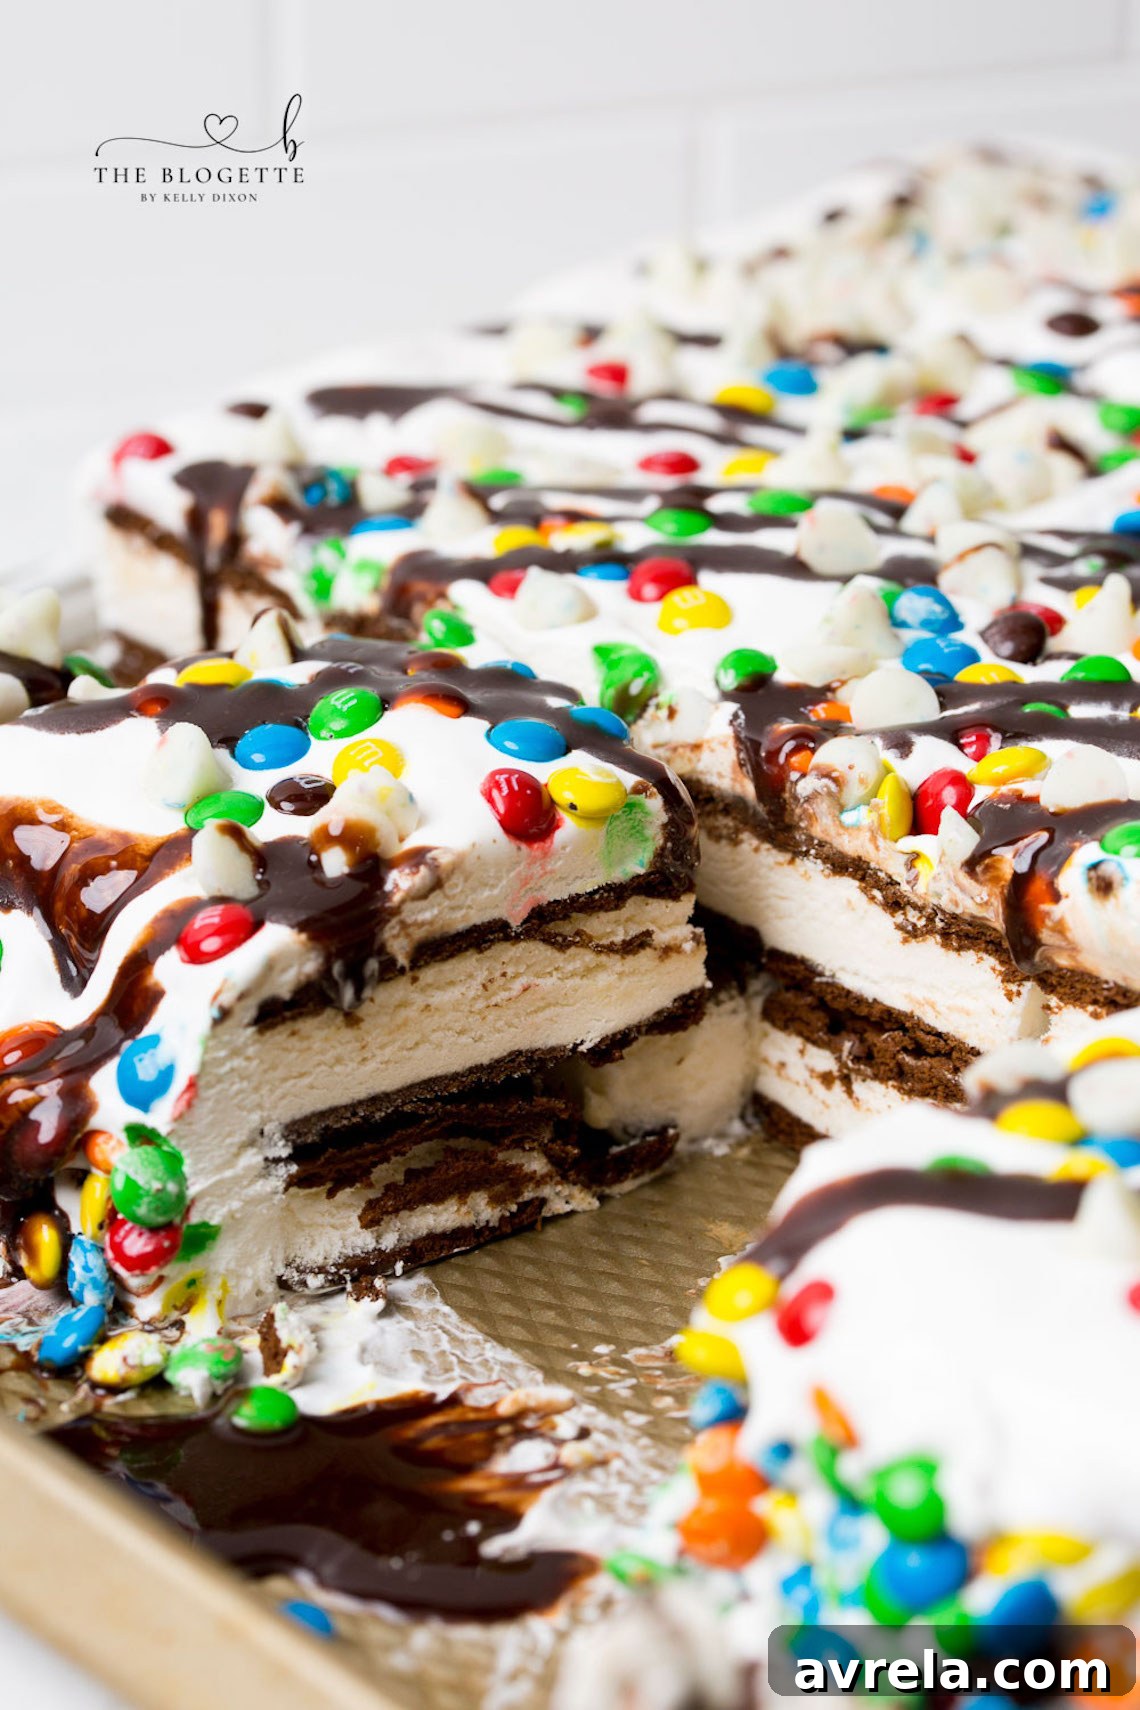
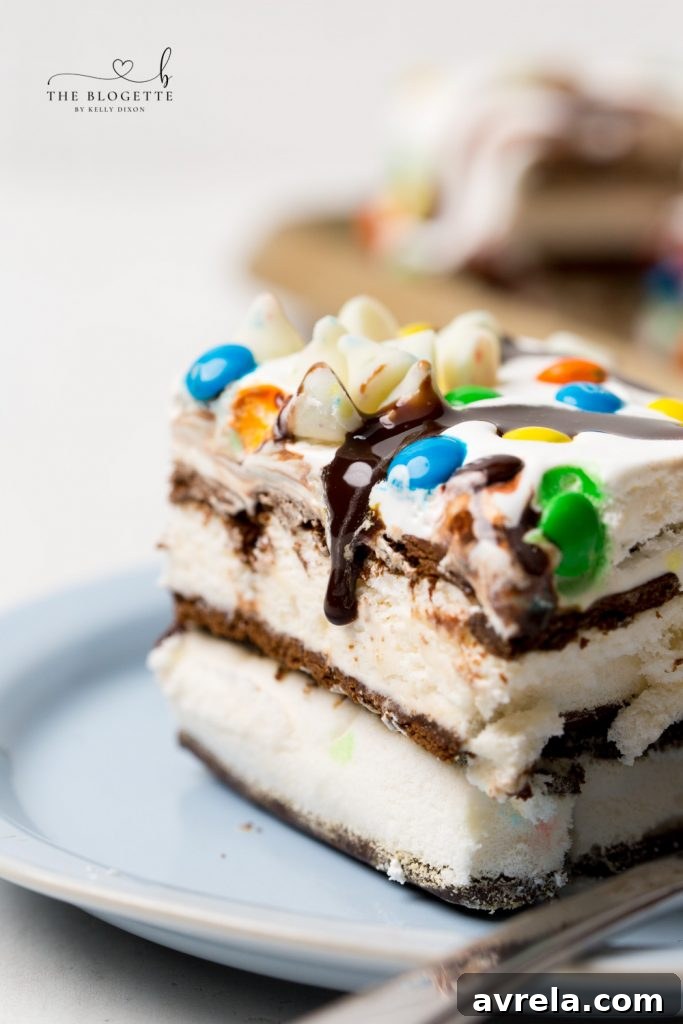
Get ready to discover your new favorite dessert: this incredible Ice Cream Sandwich Cake! Layers of classic ice cream sandwiches are perfectly nestled together, topped with a luscious, creamy frozen frosting, and finished with a generous drizzle of chocolate. If you’re a fan of ice cream cakes but short on time, this super easy, no-bake recipe is an absolute dream come true and guaranteed to impress!
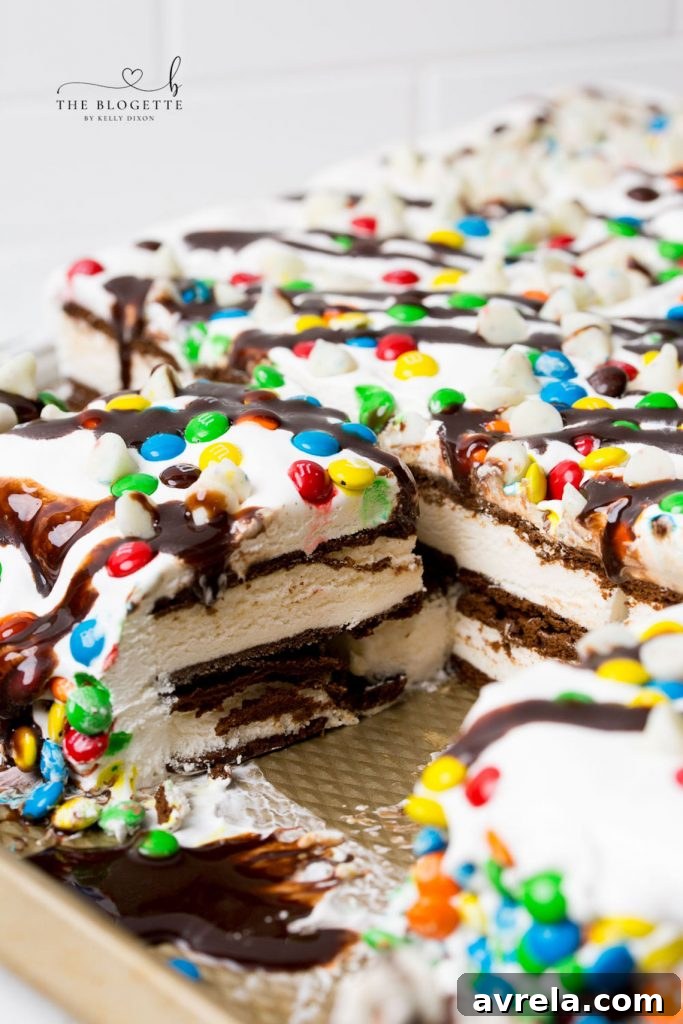
The Ultimate No-Bake Ice Cream Sandwich Cake
This Ice Cream Sandwich Cake isn’t just a dessert; it’s a delightful experience waiting to happen. Imagine a crowd-pleasing treat that looks impressively decadent but takes minimal effort to assemble. It’s the perfect solution when you need a fantastic dessert for family and friends but don’t have the luxury of baking from scratch. What makes it even better? There’s absolutely no oven required! This makes it an ideal choice for scorching summer days when the last thing you want is to heat up your kitchen. Kids, in particular, adore this simple yet spectacular ice cream sandwich cake, making it a year-round favorite for birthdays, holidays, or just because you’re craving something sweet and refreshing.
Love this recipe? Pin it now to save it for later!
Pin It Now
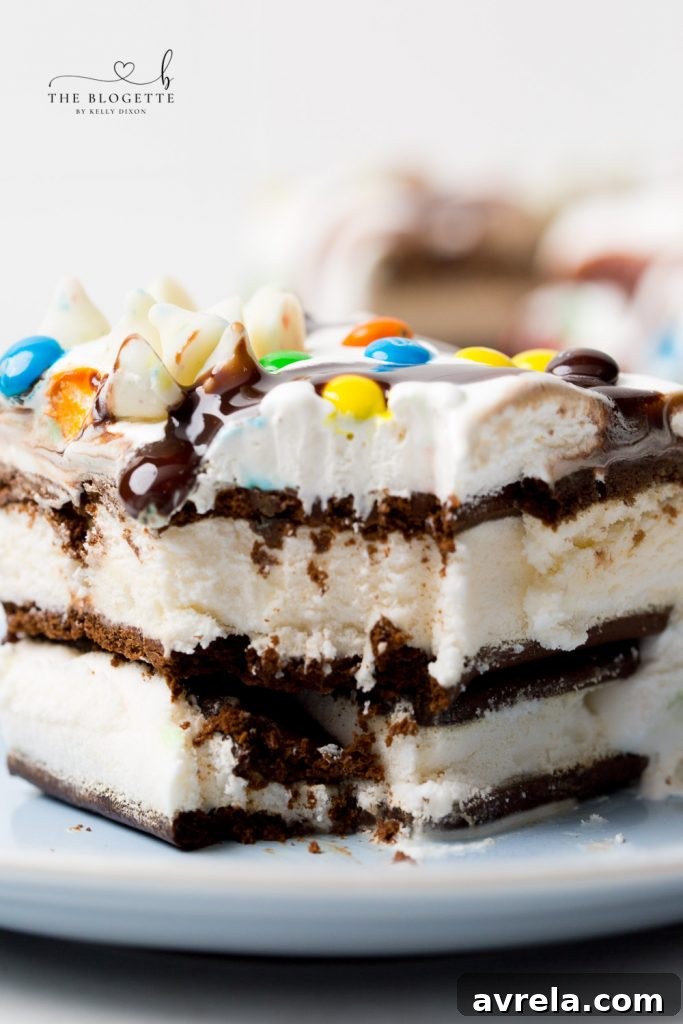
Why This No-Bake Ice Cream Sandwich Cake Will Be Your New Go-To Dessert
Finding a dessert that’s both simple to prepare and universally loved can often feel like searching for a needle in a haystack. However, this No-Bake Ice Cream Sandwich Cake effortlessly ticks all the boxes. It’s a fantastic solution for busy hosts, impromptu gatherings, or simply when you’re craving something sweet and satisfying without any fuss. Here’s why this recipe is destined to earn a permanent and cherished spot in your culinary repertoire:
- Effortlessly Easy & Quick: Forget complicated baking techniques, multiple bowls, and precise measurements. If you can arrange ice cream sandwiches and spread a topping, you can master this cake! It’s perfect for novice bakers, those with limited kitchen skills, or anyone short on time but still wanting to deliver a show-stopping dessert. With minimal prep, you’ll have this cake assembled and chilling in no time.
- No-Bake Bliss: Keep your kitchen cool and comfortable, especially during the sweltering heat of summer. This dessert requires zero oven time, making it an energy-efficient and pleasant choice for warm-weather entertaining. It’s also ideal for dorm rooms, camping trips (if you have freezer access!), or any situation where an oven isn’t available.
- Crowd-Pleasing Flavors: Who doesn’t harbor a nostalgic love for classic ice cream sandwiches? When combined with a creamy, dreamy whipped topping and a rich chocolate drizzle, it transforms into a delightful treat that appeals to all ages, from toddlers to grandparents. It’s a guaranteed hit at any party or family dinner.
- Infinitely Customizable: This recipe is a blank canvas for your creativity! From sprinkles and candies to different ice cream sandwich flavors, the possibilities for personalization are truly endless. Tailor it to match any holiday theme, special event, or simply to satisfy your unique cravings.
- Kid-Friendly & Fun: Not only do children absolutely adore eating this delightful creation, but they can also easily help with the assembly process. This makes it a fantastic and engaging family activity, creating sweet memories along with a sweet treat. It’s a great way to introduce younger chefs to the joy of making desserts.
- Make-Ahead Marvel: Prepare this impressive dessert entirely in advance and store it in the freezer. This invaluable feature takes the stress out of last-minute dessert preparations, allowing you to relax and enjoy your event or simply have a delicious treat ready for unexpected guests.
The Simple Ingredients Behind This Spectacular Frozen Treat
One of the most appealing aspects of this ice cream sandwich cake lies in its beautiful simplicity. You only need a few key ingredients, most of which you probably already have on hand or can easily pick up during a quick trip to any local grocery store. For this recipe, we’ll focus on creating a timeless and irresistible vanilla and chocolate combination, but always remember that customization is not just an option—it’s encouraged!
Ingredients You’ll Need:
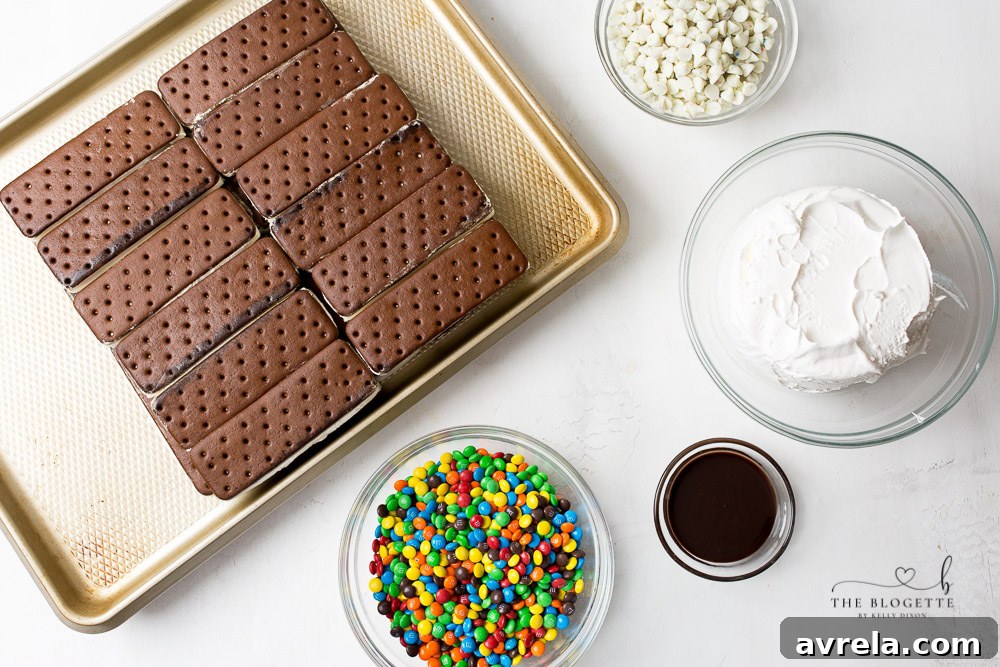
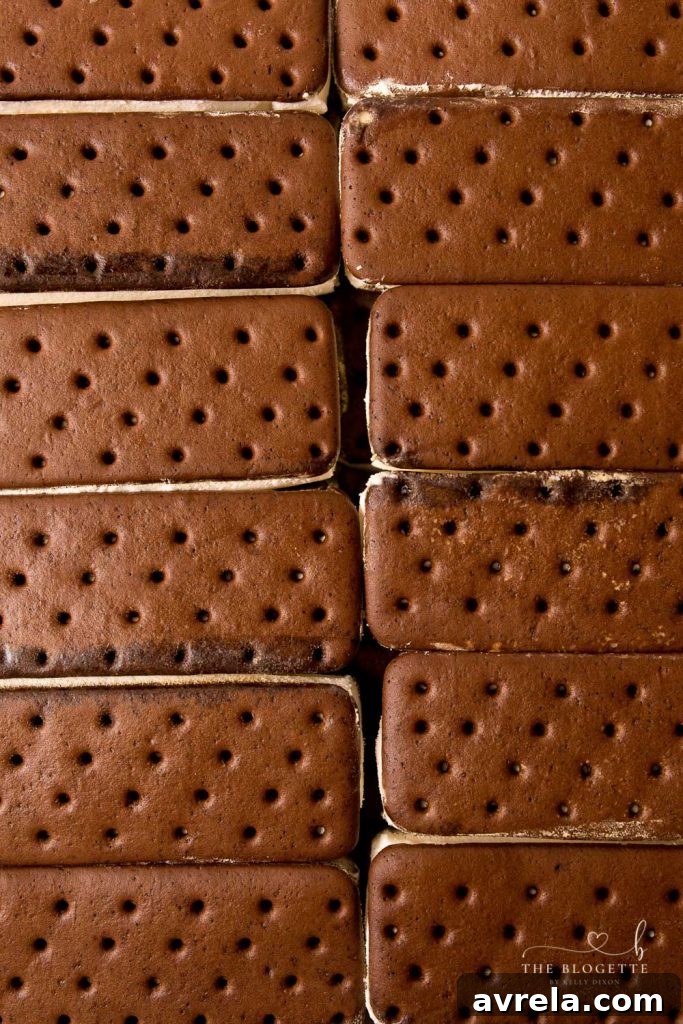
- Ice Cream Sandwiches: These are the fundamental building blocks of our cake! This recipe specifically calls for two boxes, totaling approximately 24 standard rectangular vanilla ice cream sandwiches, to construct a substantial two-layered cake. The crucial detail here is to choose rectangular sandwiches; their uniform shape ensures they fit together snugly, minimizing gaps and creating a sturdy, visually appealing cake. While vanilla is a timeless and versatile choice, feel free to unleash your culinary curiosity and experiment with other flavors you might find, such as rich chocolate, indulgent cookies & cream, or even refreshing mint for a unique twist.
- Cool Whip (or Homemade Whipped Cream): For the deliciously light and creamy frozen topping, a 16-ounce tub of Cool Whip works absolute wonders. It’s wonderfully airy, perfectly fluffy, and provides a delightful textural contrast to the dense ice cream sandwiches. While you certainly have the option to craft your own luscious whipped cream from scratch (using heavy cream, a touch of powdered sugar, and a hint of vanilla extract), Cool Whip offers unparalleled convenience, consistent results, and saves valuable time for this effortless recipe. Just ensure it’s softened slightly at room temperature before you begin spreading for the smoothest, most seamless application.
- Chocolate Syrup: A generous and artful drizzle of chocolate syrup is what truly elevates this dessert, transforming it into a delightful, homemade ice cream sundae experience. Its rich, deep flavor perfectly complements the sweet vanilla ice cream and the creamy whipped topping, creating a harmonious taste profile. You can confidently use your favorite brand of chocolate syrup, or if you’re feeling a bit more ambitious and have the time, a decadent homemade fudge sauce would also be an incredible addition.
- Toppings of Choice: This is truly where you get to let your personal creativity and flair shine! We’ve proudly featured vibrant mini M&M candies in our example photos, which not only add a delightful crunch but also a cheerful burst of color to the cake. However, the possibilities for customization are genuinely endless and exciting. Consider a shower of colorful sprinkles for birthdays, a generous scattering of crushed Oreo cookies for an extra layer of indulgence, finely chopped nuts for a satisfying texture, other festive candies to match a holiday theme, or even fresh, seasonal fruit for a lighter and more refreshing touch.
This cake is such an undeniable hit in my household that my kids frequently request it for their birthdays – and honestly, I’m more than happy to oblige! It’s incredibly versatile; you can effortlessly swap out the M&Ms for vibrant, colorful sprinkles to perfectly match a birthday party theme, or opt for crushed Oreo cookies to create an irresistible cookies-and-cream sensation. Alternatively, incorporate other festive candies or even fresh fruit, depending on the specific event or holiday you’re celebrating. Imagine crafting a patriotic red, white, and blue version for the 4th of July, or a charming green and red-themed cake for Christmas! The adaptability of this recipe means it can truly become a centerpiece for any special occasion.
Step-by-Step Guide: How to Craft Your Perfect Ice Cream Sandwich Cake
Assembling this delightful ice cream sandwich cake is remarkably straightforward, quick, and enjoyable. Follow these simple, clear steps, and you’ll have a stunning, delicious, and perfectly layered dessert ready for the freezer in hardly any time at all!
Instructions:
- Prepare Your Base Layer: Begin by taking your first box of ice cream sandwiches (typically 12 sandwiches). On a large, freezer-safe sheet pan or a sturdy serving platter, arrange these 12 ice cream sandwiches horizontally in a neat 3×4 grid. Gently press them together to form a solid, contiguous base layer. The goal is to minimize any gaps between the sandwiches to ensure a stable foundation.
- Create the Second Layer: Now, take the remaining box of ice cream sandwiches (another 12 sandwiches). Carefully place these vertically on top of the first horizontal layer, again arranging them in a precise 3×4 grid. This alternating direction of the layers is a clever trick that helps to create a more stable and robust cake structure, preventing it from collapsing when sliced. Gently press down on this second layer to secure all the sandwiches in place.
- Apply the Whipped Topping: Open your tub of Cool Whip (remember, it should be softened to room temperature for optimal spreadability). Using a rubber spatula or an offset spatula, begin to spread the Cool Whip evenly and smoothly over the entire top surface and down all the sides of the layered ice cream sandwiches. Aim for a consistent, smooth layer, just as you would when frosting a traditional cake.
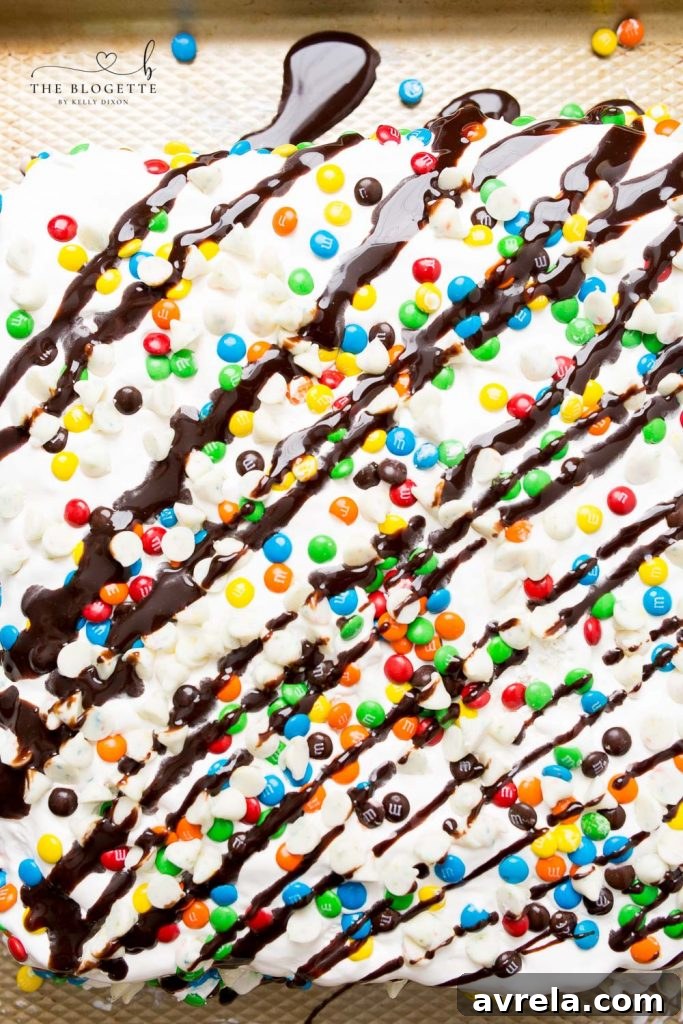
- Add Your Favorite Toppings: Immediately after you’ve finished frosting the cake with Cool Whip, generously sprinkle your chosen toppings over the entire surface. If you’re using delightful candies like M&Ms or crunchy chocolate chips, take a moment to gently press some of them into the sides of the cake. This not only adds an extra decorative flourish but also ensures they adhere well and don’t fall off.
- Drizzle with Chocolate: To complete your masterpiece, artfully drizzle a generous amount of chocolate sauce over the top of the cake. You can opt for a classic, elegant zigzag pattern, create swirls, or even cover the entire top for a more indulgent look – whatever appeals most to your aesthetic and taste buds!
- Freeze and Chill: Carefully place the entire assembled cake, uncovered, into your freezer. Allow it to freeze for a minimum of 2 hours, or ideally until it is thoroughly firm and set. This crucial freezing time allows the ice cream sandwiches to firm up, the Cool Whip to set beautifully, and all the wonderful flavors to meld together perfectly.
- Serve and Enjoy: Once the cake is completely frozen and ready to be devoured, remove it from the freezer. Let it sit at room temperature for approximately 5-10 minutes before you begin slicing. This brief thawing period is key, as it allows the ice cream to soften just enough, making it significantly easier to cut through and ensuring a perfect, creamy, and delightful texture with every single bite. Slice with a sharp knife and serve immediately to hungry crowds!
Expert Tips for Ice Cream Sandwich Cake Success Every Time
While this no-bake recipe is undeniably simple and forgiving, a few expert tips and tricks can make all the difference, ensuring your Ice Cream Sandwich Cake turns out perfectly firm, beautifully presented, and utterly delicious every single time you make it:
- Work Efficiently and Quickly: Ice cream sandwiches, by their very nature, can melt quite rapidly, especially if your kitchen is warm or if you’re taking your time with assembly. Try to layer the sandwiches and spread the Cool Whip as efficiently and swiftly as possible to prevent excessive softening or melting, which can compromise the cake’s structure.
- Utilize Freezer Breaks: If your kitchen happens to be particularly warm, or if you find yourself needing a little more time with the assembly steps, don’t hesitate to take a strategic freezer break. Pop the layered ice cream sandwiches back into the freezer for a quick 10-15 minutes *before* you add the Cool Whip. This crucial step helps them firm up and maintain their desired shape, ensuring a sturdy cake.
- Cool Whip Temperature is Key: While the ice cream sandwiches absolutely need to be frozen, your Cool Whip (or homemade whipped cream) should ideally be softened to room temperature. This makes it significantly easier to spread smoothly and evenly over the delicate ice cream sandwiches without causing them to tear or displace, resulting in a much cleaner finish.
- Ensure Even and Compact Layers: Before applying the topping, take a brief moment to ensure that your ice cream sandwich layers are as even and compact as possible. Gently pressing them together firmly (but not crushing them) creates a robust and stable cake that will slice beautifully and hold its shape well.
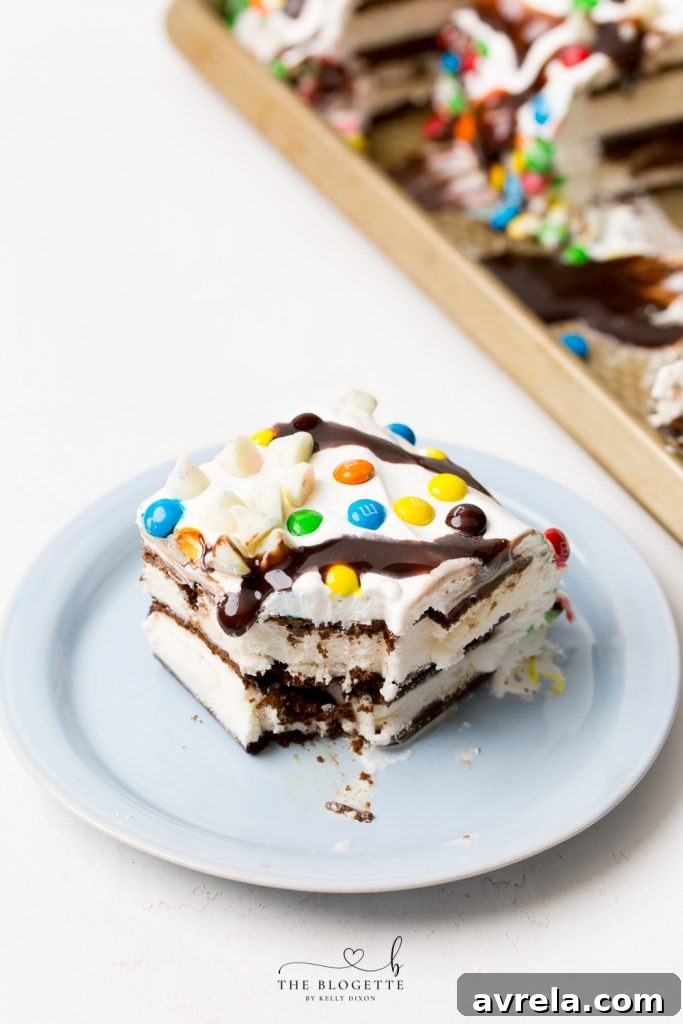
- Use a Warm, Sharp Knife for Serving: For achieving impeccably clean and neat slices, invest in a good, sharp knife. For best results, dip the blade of your knife in hot water and then wipe it completely dry between each cut. This technique prevents the ice cream from sticking to the knife and creates those picture-perfect, Instagram-worthy servings.
- Cover Tightly for Storage: Once the cake is fully frozen, always cover it tightly with at least two layers of plastic wrap, followed by a layer of aluminum foil. This double-layer protection is essential for preventing freezer burn and locking in freshness, ensuring your cake tastes as good as new for days.
Creative Variations and Customization Ideas for Your Ice Cream Cake
The true brilliance of this No-Bake Ice Cream Sandwich Cake lies in its incredible adaptability. Once you’ve mastered the foundational recipe, you’re empowered to unleash your inner pastry chef and experiment with a countless array of flavor combinations and toppings to suit virtually any taste, theme, or celebratory occasion. Here are some inspiring ideas to spark your creativity and get you started:
- Explore Different Ice Cream Sandwich Flavors: Why limit yourself to just vanilla?
- Neapolitan Dream: For a classic and visually appealing treat, alternate layers of chocolate, vanilla, and strawberry ice cream sandwiches. The colorful stripes are always a hit!
- Cookies & Cream Craze: Opt for cookies & cream flavored ice cream sandwiches as your base. Then, generously top the cake with a mountain of crushed Oreo cookies and perhaps a drizzle of white chocolate syrup for ultimate indulgence.
- Mint Chocolate Delight: Imagine mint-flavored ice cream sandwiches paired with a generous scattering of mini chocolate chips or crushed chocolate mint candies. A subtle mint chocolate drizzle would make this a refreshing and elegant dessert, perfect for a St. Patrick’s Day celebration or any mint chocolate aficionado.
- Seasonal Sensations: Keep an eye out for limited-edition ice cream sandwich flavors that appear during various holidays. Think pumpkin spice in the fall, peppermint around Christmas, or even unique fruit flavors in the spring, allowing you to craft truly unique and thematic seasonal cakes.
- Caramel Swirl: Use caramel swirl ice cream sandwiches and top with extra caramel drizzle and chopped pecans.
- Alternative Whipped Topping Choices:
- Homemade Whipped Cream: For a richer, fresher, and more gourmet taste, easily prepare your own whipped cream using cold heavy cream, a touch of powdered sugar, and a splash of pure vanilla extract.
- Cream Cheese Frosting: A softened, slightly tangy cream cheese frosting (ensure it’s not too stiff for spreading) can introduce a delightful counterpoint to the sweetness and add an extra layer of luxurious decadence.
- Flavored Whipped Cream: Infuse your whipped cream with various extracts like almond, coffee, coconut, or even a subtle hint of cocoa powder to match your chosen theme or ice cream flavor.
- Diverse Drizzle and Sauce Options: Beyond the timeless classic chocolate syrup, consider these exciting alternatives:
- Caramel Sauce: A velvety, buttery caramel drizzle is always a beloved choice, especially when paired with vanilla, chocolate, or even coffee-flavored ice cream sandwiches.
- Hot Fudge: A warm hot fudge sauce (chilled slightly to achieve a thicker, more gooey consistency) adds an incredibly rich and indulgent texture that’s hard to resist.
- Berry Coulis: For a lighter, more refreshing option, whip up a fresh berry coulis using pureed strawberries, raspberries, or blueberries, blended with a little sugar. This offers a vibrant, fruity contrast.
- Peanut Butter Drizzle: Melted peanut butter or a peanut butter sauce can add a rich, nutty flavor, especially when paired with chocolate.
- An Array of Endless Toppings: The sky’s the limit when it comes to decorative and flavorful toppings!
- Candy Bar Bits: Crush your favorite candy bars like Snickers, Reese’s peanut butter cups, Heath bars, or Butterfingers to add incredible texture and a burst of familiar flavors.
- Crunchy Nuts: Finely chopped peanuts, pecans, walnuts, or almonds provide a satisfying crunch and a sophisticated flavor profile.
- Fresh Fruit: Vibrant sliced bananas, a medley of fresh berries (strawberries, blueberries, raspberries), or even sweet chopped peaches can add a wonderful element of freshness and a beautiful pop of color.
- Cookie Crumbles: Crushed graham crackers, shortbread cookies, Nilla wafers, or even additional ice cream sandwich cookie bits can create delightful textures.
- Toasted Coconut: Toasted coconut flakes lend a delightful chewiness and a subtle tropical flair, especially good with a pineapple or lime-flavored ice cream sandwich.
- Gummy Candies: For a fun, playful touch, add colorful gummy bears or worms, particularly for children’s parties.
Don’t be afraid to mix and match different elements! The ultimate goal is to have an abundance of fun and create a dessert that perfectly suits your personal preferences and delights everyone who takes a bite.
Storage and Make-Ahead Instructions for Your Convenient Dessert
One of the most significant advantages of this incredible Ice Cream Sandwich Cake is its fantastic make-ahead potential. This valuable feature means less stress and frantic preparation on the day of your event, allowing you considerably more time to relax and enjoy the company of your guests or simply savor the moment!
- Making Ahead: You can confidently prepare this entire ice cream cake up to 3 days in advance of when you plan to serve it. Once the cake has been fully assembled and beautifully decorated with all your chosen toppings, first place it into the freezer uncovered for at least 2 hours to ensure it is thoroughly set and firm. After it has completely firmed up, tightly cover the cake with a generous layer of plastic wrap, and then add an additional, protective layer of heavy-duty aluminum foil. This meticulous double-wrapping technique is absolutely essential as it helps significantly in preventing freezer burn, locking in the cake’s fresh flavors, and preserving its optimal texture.
- Strategic Freezing Tip: Depending on the ambient temperature of your kitchen and how quickly you manage to work through the assembly process, you might find it immensely beneficial to implement a quick freezing step. Consider freezing the initial layers of ice cream sandwiches for approximately 15-20 minutes after you have arranged them, but *before* you apply the Cool Whip topping. This strategic brief freeze helps the sandwiches to firm up sufficiently, which in turn helps them to maintain their perfect shape and prevents them from becoming too soft or mushy during the application of the creamy topping.
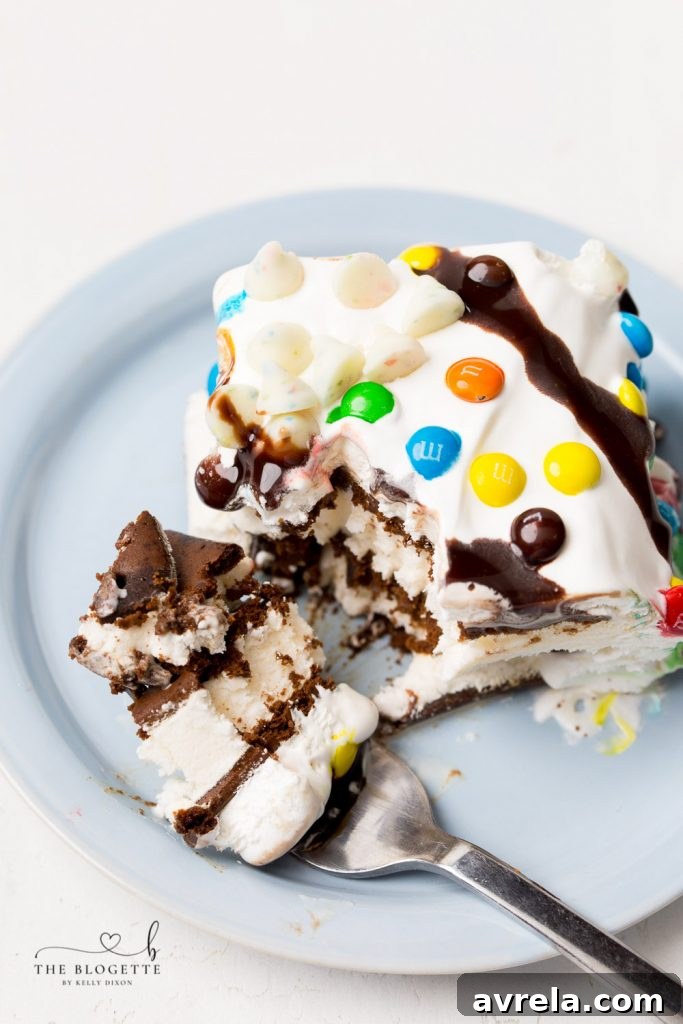
- Thawing Before Serving: When the joyous moment arrives and you’re ready to serve your magnificent cake, carefully remove it from the freezer and unwrap it completely. Allow the cake to thaw at room temperature for an approximate period of 5-10 minutes. This brief and controlled thawing period is crucial; it allows the ice cream to soften just enough to be effortlessly sliced and thoroughly enjoyed, ensuring a beautifully creamy, rather than a rock-hard, texture. The precise thawing time can vary slightly based on the temperature of your room, so it’s always a good idea to keep a watchful eye on it!
- Storing Leftovers: Should you be fortunate enough to have any leftover slices of this delightful cake, they should be immediately returned to the freezer. Ensure they are stored in an airtight container or individually wrapped tightly in plastic wrap and foil to maintain their freshness and prevent freezer burn. Leftovers are best enjoyed within 3-5 days for optimal taste and texture.
Printable Recipe Card: Ice Cream Sandwich Cake
Ice Cream Sandwich Cake
Layered ice cream sandwiches, with a delicious frozen topping, and drizzled in chocolate.
15 minutes
2 hours
2 hours 15 minutes
Equipment
- Sheet pan (or large serving platter)
- Rubber spatula (or offset spatula)
Ingredients
- 2 boxes of ice cream sandwiches (12 per box, total 24 sandwiches)
- 16 oz (two 8-oz tubs) Cool Whip, softened at room temperature
- 8 oz Mini M&Ms (or other desired candy/topping)
- ½ cup vanilla confetti chips (optional)
- ¼ cup chocolate sauce (for drizzling)
Instructions
- Lay the first box of ice cream sandwiches (12 sandwiches) horizontally in a 3×4 grid on a large sheet pan or serving platter. Press them together gently to create a solid first layer.
- Lay the remaining box of ice cream sandwiches (12 sandwiches) vertically on top of the horizontal sandwiches, forming a second 3×4 grid. Gently press down to secure the layers.
- Use the room temperature Cool Whip to spread evenly over the top and sides of the layered sandwiches, just like frosting a cake.
- Generously sprinkle with Mini M&Ms and vanilla confetti chips (if using), pressing some into the sides of the cake for decorative appeal.
- Drizzle with chocolate sauce over the top of the cake.
- Place the cake in the freezer for a minimum of 2 hours, or until thoroughly set.
- Before serving, allow the cake to thaw at room temperature for 5-10 minutes to ensure easy slicing. Slice with a sharp, warm knife and enjoy!
Notes
Helpful Tip! Work quickly when assembling the cake, especially if your kitchen is warm. If the ice cream sandwiches become too soft, place the layered base back in the freezer for 10-15 minutes before applying the Cool Whip. This helps maintain the cake’s structure.
More Easy Dessert Recipes You’ll Love
If you enjoyed making this simple yet spectacular ice cream sandwich cake, then you’ll definitely want to explore these other fantastic and easy dessert recipes. Perfect for satisfying your sweet tooth with minimal effort!
Cookie Monster Ice Cream
No Bake Oreo Cheesecake
Peanut Butter Brownie Trifle
Monster Cookie Balls