
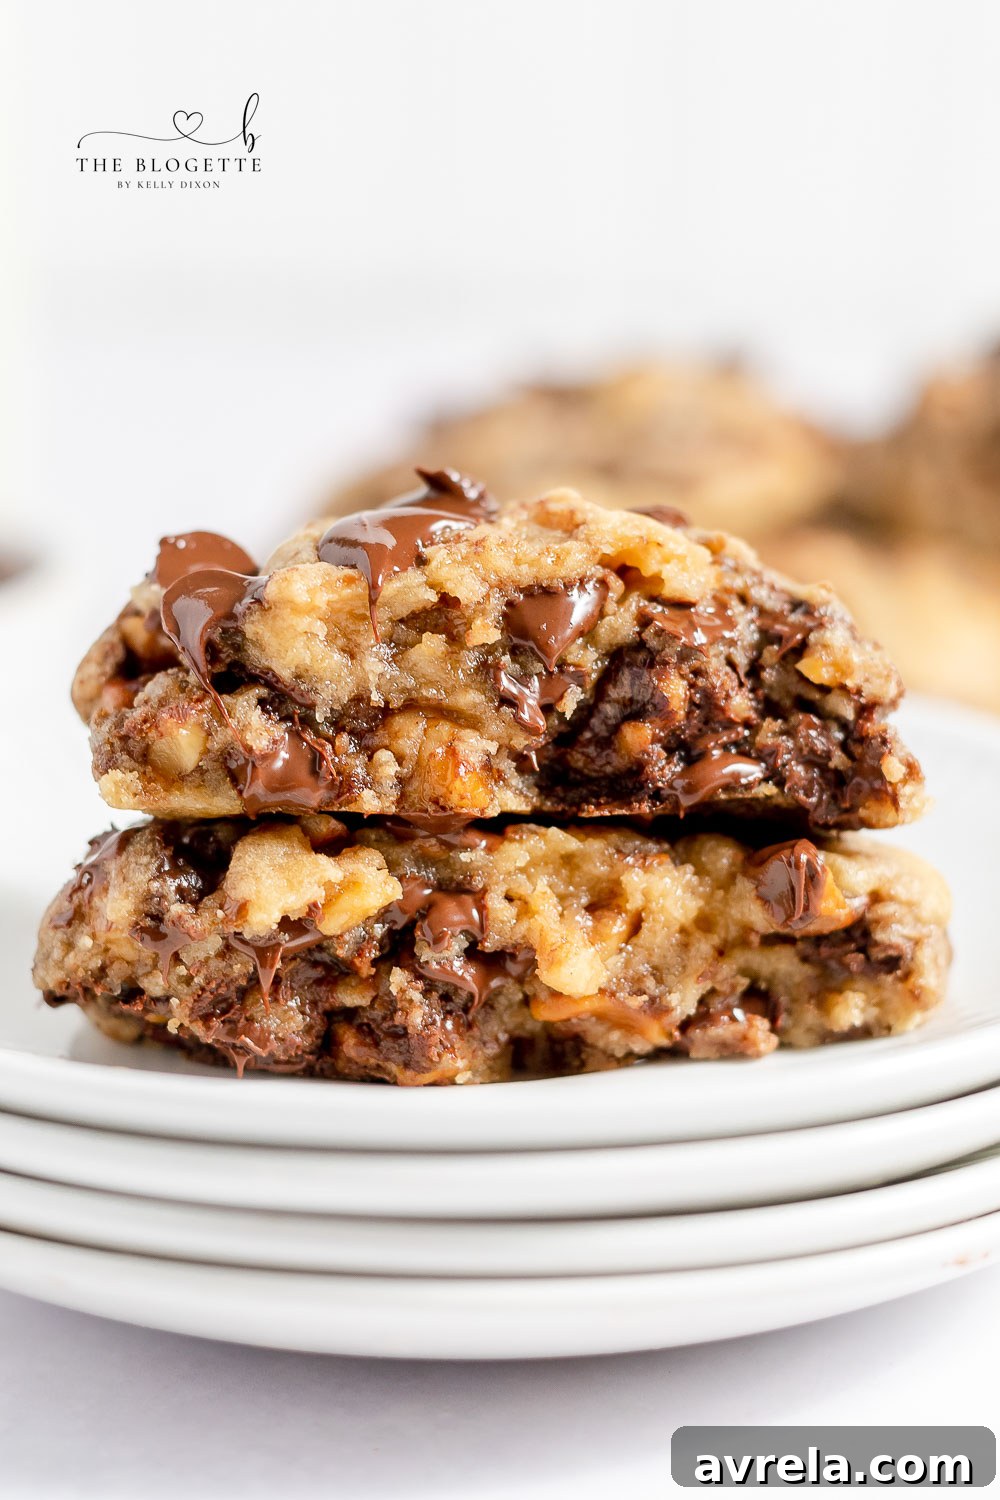
Welcome to the quest for the ultimate chocolate chip cookie! If you’ve been dreaming of those perfectly huge, warm, soft, and impossibly thick bakery-style cookies that melt in your mouth, your search ends here. This isn’t just a recipe; it’s a journey to recreate the legendary Levain Bakery chocolate chip cookies right in your own kitchen. With simple, everyday ingredients and straightforward steps, you’ll soon be enjoying these magnificent treats. Trust us, once you try this recipe, you’ll want to have it on hand forever!
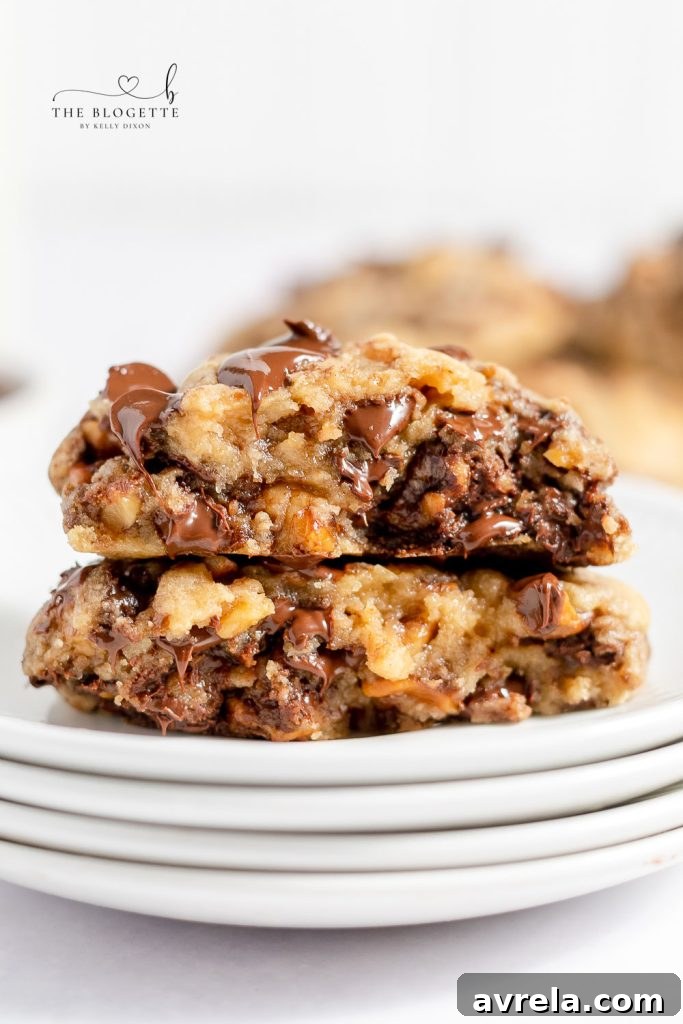
Unveiling the Best Chocolate Chip Cookies: A Bakery Secret at Home
There’s something truly magical about the combination of rich chocolate chips and crunchy, toasted walnuts in a cookie. It elevates the classic chocolate chip cookie to an extraordinary level, making it an absolute dream for any cookie enthusiast. These cookies aren’t just sweet; they are a symphony of textures and flavors – perfectly chewy, intensely chocolatey, and delightfully gooey in the center. When that sweet tooth craving hits, only these thick, substantial cookies will truly satisfy it. Forget thin, crispy cookies; we’re talking about a substantial, satisfying bite every single time, just like you’d find at a gourmet bakery.
Pin this delicious recipe now to save it for later!
Pin It Now
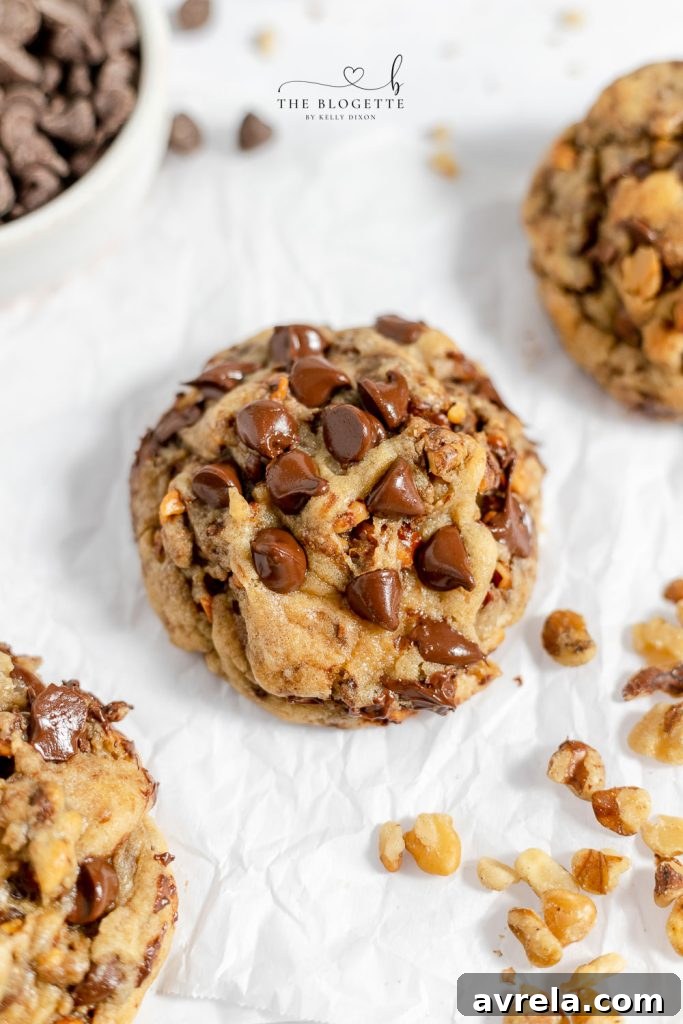
Key Ingredients for Unforgettable Chocolate Chip Cookies
Crafting the perfect chocolate chip cookie doesn’t require exotic ingredients. The magic lies in the balance and quality of these simple staples, each playing a vital role in achieving that signature bakery-style taste and texture. Here’s what you’ll need to gather:
- **All-Purpose Flour:** This provides the essential structure and body for our substantial cookies.
- **Baking Soda:** A crucial leavening agent that helps our cookies achieve their beautiful rise and chewy interior.
- **Salt:** Essential for balancing the sweetness, it enhances all the other flavors and prevents the cookies from tasting bland.
- **Cornstarch:** This is a secret ingredient for achieving incredibly soft, tender, and thick cookies. It helps prevent them from spreading too much, contributing to the bakery-style height.
- **Unsalted Butter:** Room temperature butter is paramount for proper creaming with sugar, which incorporates air and creates a lighter, fluffier dough.
- **Brown Sugar:** Contributes significantly to the cookies’ signature chewiness, moisture content, and a deep, rich, caramel-like flavor.
- **Granulated Sugar:** Provides sweetness and aids in developing those slightly crisp, golden-brown edges.
- **Eggs:** Act as a binder, adding richness to the dough and helping the cookies hold their robust shape.
- **Vanilla Extract:** A foundational flavor enhancer that perfectly complements the chocolate and adds a warm, inviting aroma.
- **Semi-Sweet Chocolate Chips:** The undeniable star of the show! Use good quality chocolate chips for the best melt, flavor, and chocolatey pockets.
- **Chopped Walnuts:** These add a wonderful nutty crunch and an earthy depth of flavor, especially when toasted. They are a classic addition to this style of cookie.
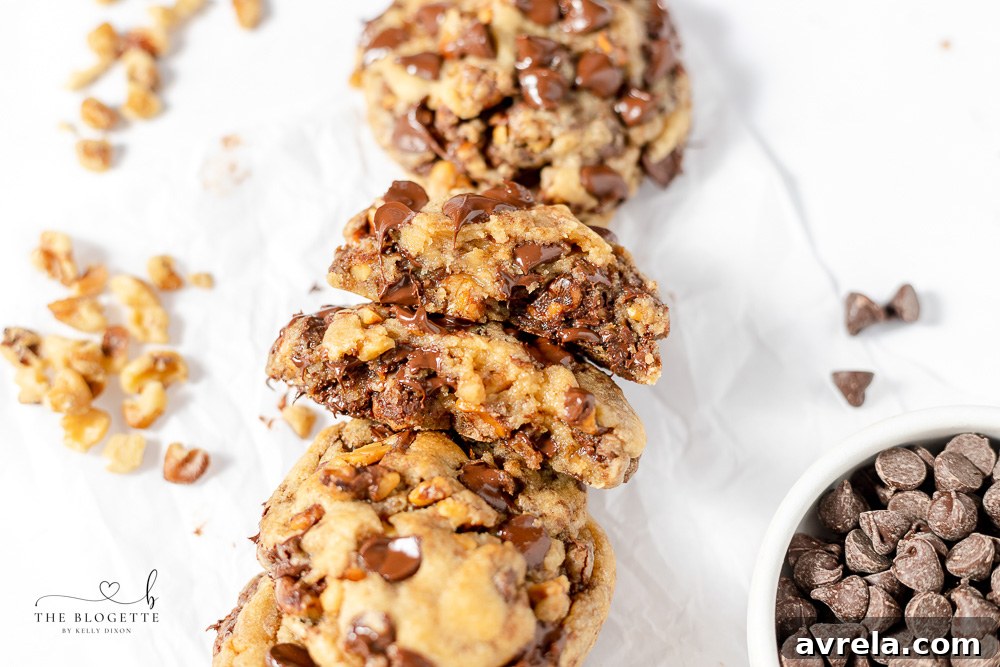
Essential Supplies for Baking Success
Having the right tools makes the baking process smoother, more efficient, and ultimately more enjoyable. Here’s a list of essential supplies you’ll need to confidently tackle these magnificent bakery-style chocolate chip cookies:
- **Baking Sheet:** You’ll need at least one, preferably two, for toasting walnuts and baking your batches of cookies.
- **Parchment Paper:** An indispensable item! It prevents your large cookies from sticking to the pan and makes cleanup an absolute breeze.
- **Electric Mixer (Stand or Handheld):** This tool is highly recommended for effectively creaming butter and sugar together, ensuring a light and airy dough.
- **Large Mixing Bowl:** For combining your wet ingredients and eventually mixing in the dry components.
- **Small Mixing Bowl:** Ideal for whisking together your dry ingredients before incorporating them into the wet mixture.
- **Wire Rack for Cooling:** Allows air to circulate evenly around the cookies, preventing them from becoming soggy on the bottom and ensuring a perfectly set texture.
- **Measuring Cups:** For accurate measurement of flour, sugars, and butter – precision is key in baking!
- **Measuring Spoons:** Essential for precise measurements of baking soda, salt, cornstarch, and vanilla extract.
Crafting Your Bakery-Style Chocolate Chip Cookies: Step-by-Step
Let’s dive into the detailed instructions for making these truly exceptional chocolate chip cookies. Each step is carefully designed to contribute to that perfect Levain-style texture and flavor, guiding you from simple ingredients to a sensational homemade treat.
Instructions for the Perfect Cookies:
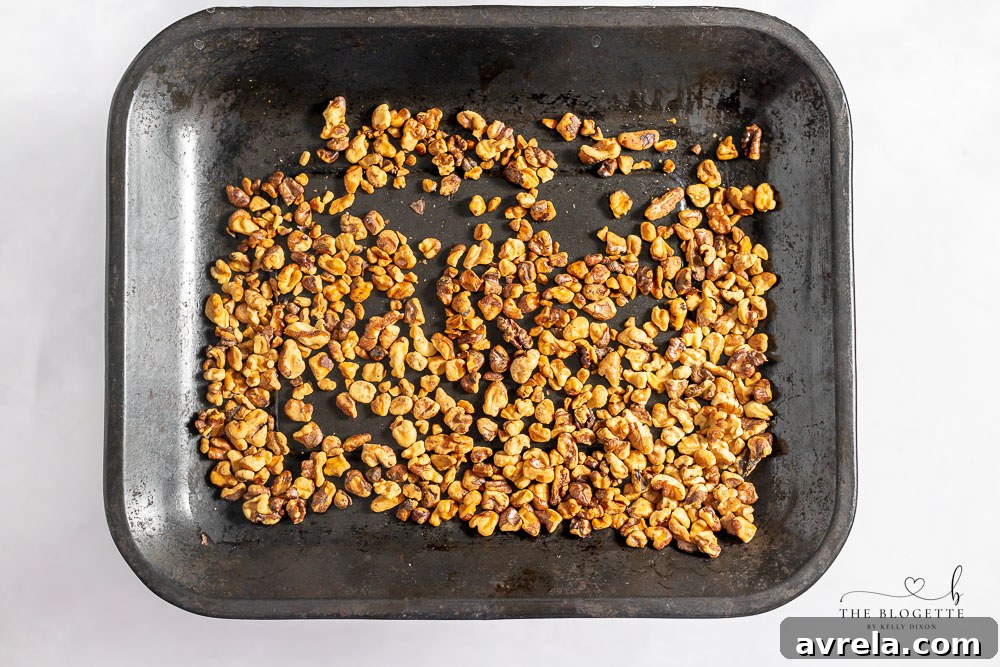
Step 1: Toast Your Walnuts for Enhanced Flavor. Begin by preheating your oven to 350ºF (175ºC). Spread the chopped walnuts evenly in a single layer on a clean baking sheet. Toast them in the preheated oven for approximately 5 minutes, or until they become fragrant and are lightly golden brown. This crucial step intensifies their natural nutty aroma and makes them wonderfully buttery and crunchy, adding an incredible depth of flavor that truly sets these chocolate chip cookies apart. Once toasted, immediately remove them from the oven and let them cool completely on the baking sheet. It’s essential that they are cool before adding them to the dough; hot walnuts would prematurely melt your chocolate chips, which we want to avoid for distinct pockets of chocolate.
Step 2: Prepare Your Dry Ingredients. While the toasted walnuts are cooling, turn your attention to the dry ingredients. In a small mixing bowl, thoroughly whisk together the all-purpose flour, baking soda, salt, and cornstarch. Ensure these are very well combined and there are no lumps. This step ensures that the leavening agents and flavor enhancers are evenly distributed throughout the dough, which is vital for a consistent rise and texture in every single bite of your finished cookies. Once mixed, set this bowl aside.
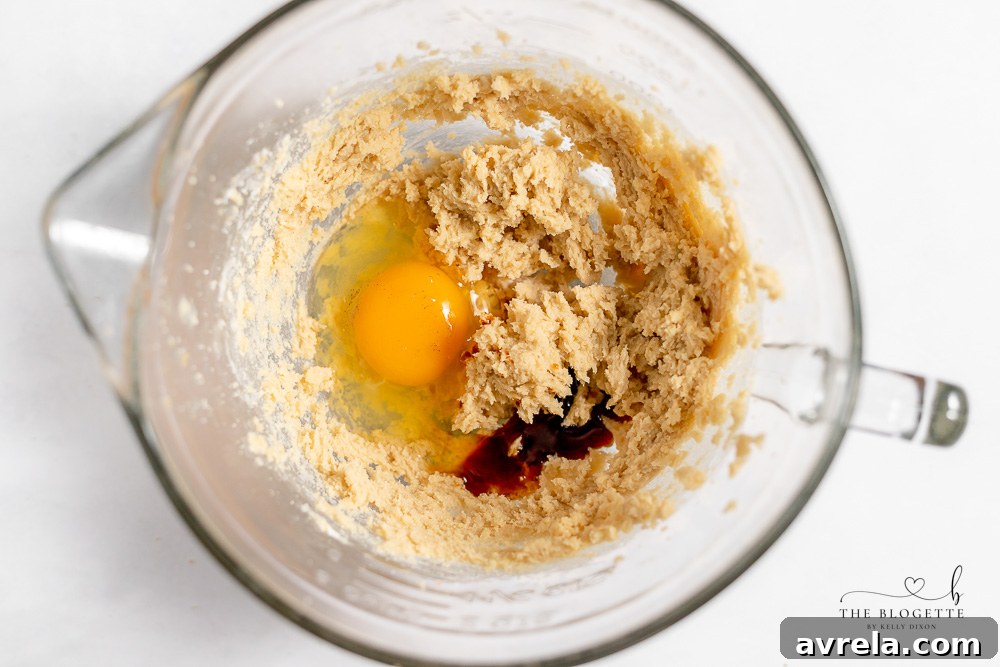
Step 3: Cream the Wet Ingredients. In a large mixing bowl, using an electric mixer (either a stand mixer with the paddle attachment or a powerful handheld mixer), beat the room-temperature unsalted butter, brown sugar, and granulated sugar together on low to medium speed. Continue beating until the mixture becomes light, fluffy, and noticeably pale in color, which typically takes about 2-3 minutes. This crucial creaming process incorporates air into the butter and sugar, forming air pockets that contribute to the cookies’ soft and airy texture. Next, crack in the large egg and add the vanilla extract, beating them until just combined. Remember to scrape down the sides of the bowl as needed to ensure all ingredients are fully incorporated and no dry spots remain.
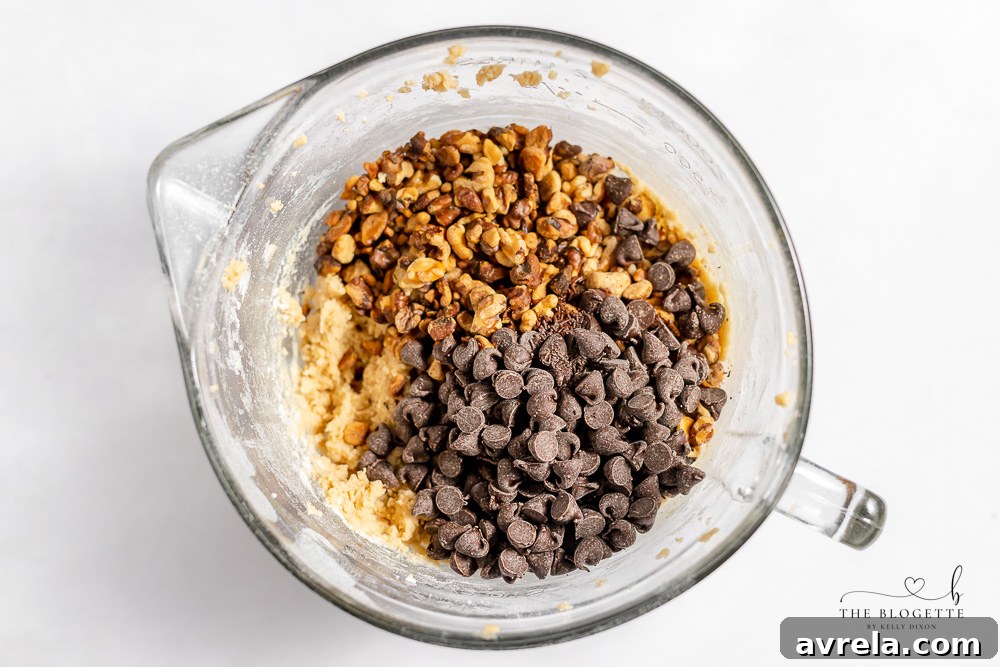
Step 4: Combine Wet and Dry, Then Add Mix-ins. With the wet ingredients perfectly creamed, it’s time to add the dry components. Gradually add the dry ingredients mixture to the wet ingredients in the large bowl, mixing on the lowest speed until the flour is *just* combined. The moment you no longer see significant streaks of flour, stop mixing. Be very careful not to overmix the dough, as overmixing can develop the gluten in the flour too much, leading to tough, dense cookies. Finally, gently fold in the cooled chocolate chips and toasted chopped walnuts until they are evenly distributed throughout the dough. For an extra bakery-style touch, you can reserve a small handful of chocolate chips to press onto the tops of the cookie dough balls before baking, enhancing their visual appeal.
Step 5: Chill the Dough for Bakery-Style Thickness. This step is arguably the most critical for achieving those coveted thick, chewy, bakery-style cookies that are characteristic of Levain Bakery! Cover the bowl with plastic wrap and refrigerate the cookie dough for at least one hour. Chilling the dough serves several important purposes: it allows the butter to firm up, which prevents the cookies from spreading too thin in the oven, and it gives the flour time to fully hydrate, resulting in a more flavorful and tender crumb. For an even thicker cookie with a deeper, more developed flavor, you can chill the dough for up to 24-48 hours. If you’re really short on time but still want the benefits of chilling, you can form the cookie dough balls first, then pop them into the freezer for 15-20 minutes for a quick chill.
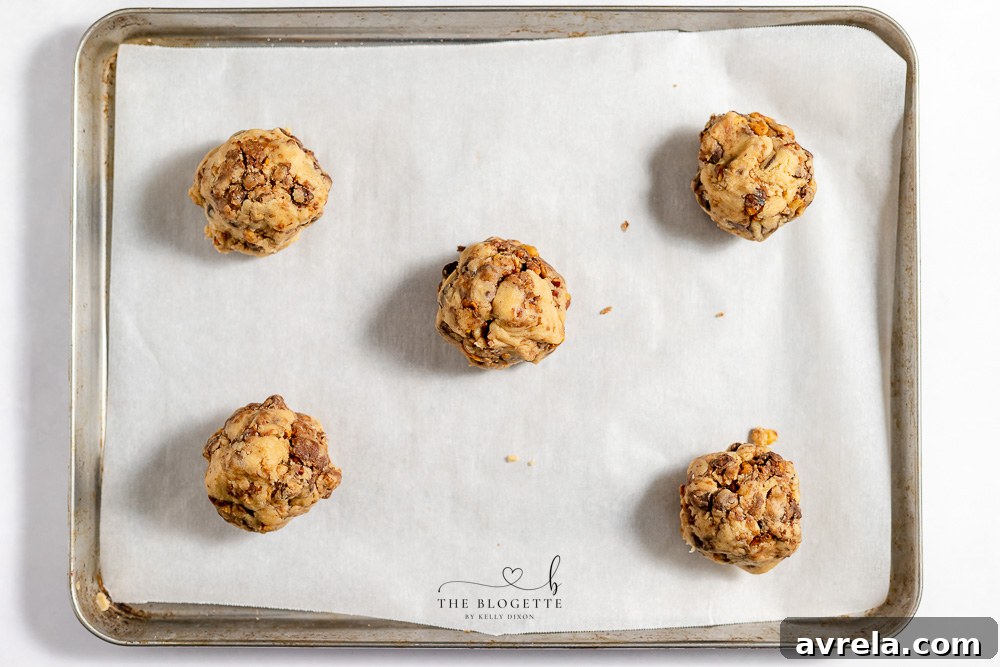
Step 6: Prepare for Baking. Line a large baking sheet with parchment paper. Parchment paper is indispensable here; it not only prevents your large, precious cookies from sticking but also makes cleanup incredibly easy, allowing you to slide them off with minimal fuss. Using a large ice cream scoop (about 1/4 cup size) or your hands, separate the chilled dough into 6 very large, uniform balls. These will be substantial cookies, so it’s crucial to ensure they are placed at least two to three inches apart on the baking sheet to allow ample room for spreading without merging. For that irresistible, artisanal look, gently press any reserved additional chocolate chips onto the tops of each cookie dough ball before baking. This ensures plenty of molten chocolate visible on the surface of the finished cookies.
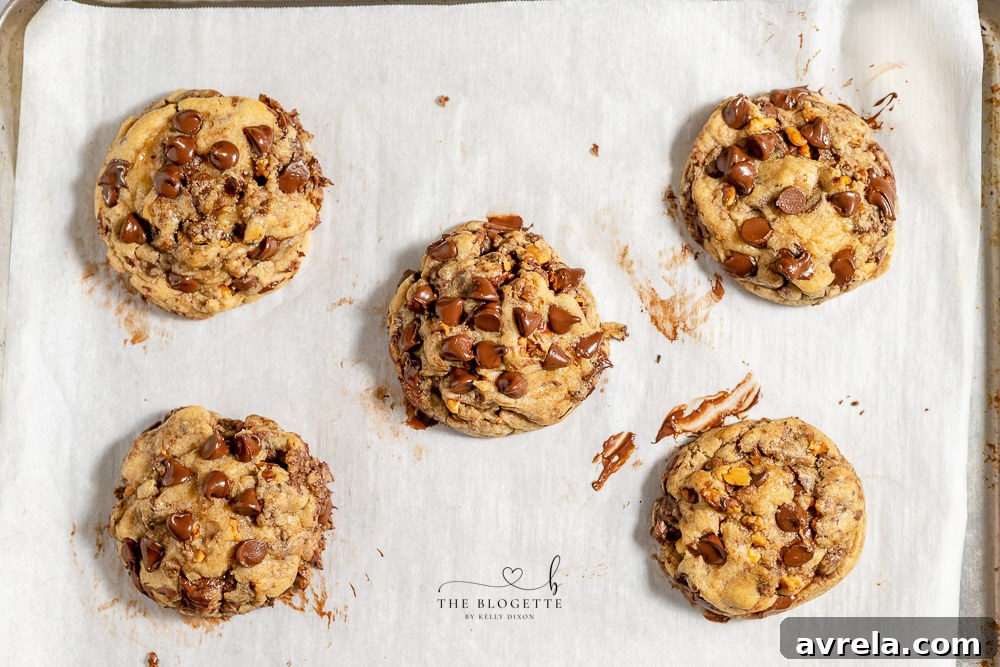
Step 7: Bake to Perfection. Carefully transfer the baking sheet with your cookie dough balls to your preheated 350ºF (175ºC) oven. Bake for 10-12 minutes. Keep a close eye on them during the last few minutes! You are looking for the edges to be set and lightly golden brown, while the centers still look slightly soft, puffy, and perhaps a bit underbaked or shiny. This is the secret to their gooey interior. For a truly gooey, molten center, bake on the shorter side of the time frame (around 10 minutes). If you prefer a more uniformly set cookie that is still soft, bake for the full 12 minutes. Remember, cookies continue to cook slightly as they cool on the hot baking sheet, so don’t be afraid to take them out when they look just barely done. Allow them to cool on the baking sheet for 5-10 minutes before carefully transferring them to a wire rack to cool completely. Or, if you’re like us, enjoy them warm and fresh from the oven!
Enter your email below to subscribe:

Expert Tips for Your Best Chocolate Chip Cookies Ever
The Power of Chilled Dough
Refrigerating the dough is absolutely crucial for making these thick, chewy, bakery-style cookies, reminiscent of Levain Bakery’s famous treats. Do not skip this step! Chilled dough spreads significantly less in the oven because the butter is firm, resulting in a taller, thicker cookie with a more concentrated flavor profile. The chilling time also allows the flour to fully hydrate, leading to a tenderer crumb. If you’re in a hurry, you can speed up the process by forming your cookie dough balls first, then placing them in the freezer for about 15-20 minutes. This quick freeze firms up the butter just enough to prevent excessive spreading and achieve a good rise.
Make-Ahead & Storage Secrets
This cookie dough is fantastic for making ahead, offering ultimate convenience! You can prepare the dough as instructed and refrigerate it in an airtight container or tightly wrapped in plastic wrap for up to 3-4 days. This means you can have freshly baked, warm cookies whenever a craving strikes without the full prep time. For even longer storage, you can easily freeze the scooped cookie dough balls for up to 3 months. Simply scoop and form the balls, then arrange them on a baking sheet and freeze until solid before transferring them to a freezer-safe bag or container. When you’re ready to bake, you can bake them directly from frozen, just add an extra 2-4 minutes to the baking time.
Ingredient Quality and Customization
While this recipe uses simple, accessible ingredients, their quality can make a noticeable difference in the final product. Opt for good quality chocolate chips that melt nicely and offer a rich flavor. For variations, feel free to experiment with different types of chocolate, such as milk chocolate, dark chocolate chunks, or even a mix of several types. If walnuts aren’t your preference, pecans or macadamia nuts make excellent substitutes, offering their own unique flavor and texture. Alternatively, you can omit the nuts entirely for a purely chocolate experience. Just be sure to toast any nuts you use for that extra burst of flavor and crunch!
Frequently Asked Questions About Bakery-Style Chocolate Chip Cookies
Q: Why are my cookies spreading too much and becoming thin?
A: There are a few common reasons for cookies spreading excessively. The most likely culprit for these bakery-style cookies is not chilling the dough long enough. Warm butter in the dough melts quickly in the oven, causing the cookies to flatten out. Ensure your butter is at a cool room temperature when you start, and always chill the dough for the recommended time. Using too little flour or having an oven that isn’t at the correct temperature can also contribute to spreading.
Q: Can I make these chocolate chip cookies without walnuts?
A: Absolutely! While walnuts add a fantastic texture and a lovely nutty flavor that complements the chocolate beautifully, you can easily omit them if you prefer a nut-free cookie or simply don’t have any on hand. If you choose to leave them out, you might consider adding an extra handful of chocolate chips (perhaps a quarter to a half cup) to compensate for the missing volume, or simply enjoy a pure, unadulterated chocolate chip experience. The base dough recipe is incredibly versatile.
Q: How do I store leftover chocolate chip cookies to keep them fresh?
A: To maintain their soft and chewy texture, once completely cooled, store your baked chocolate chip cookies in an airtight container at room temperature. They will stay fresh and delicious for up to 3-4 days. To revive their fresh-baked goodness, you can warm them gently in the microwave for 10-15 seconds. For longer preservation, you can freeze baked cookies for up to 3 months; simply thaw them at room temperature or warm them slightly before serving.
Q: What’s the best way to get that signature “gooey” center?
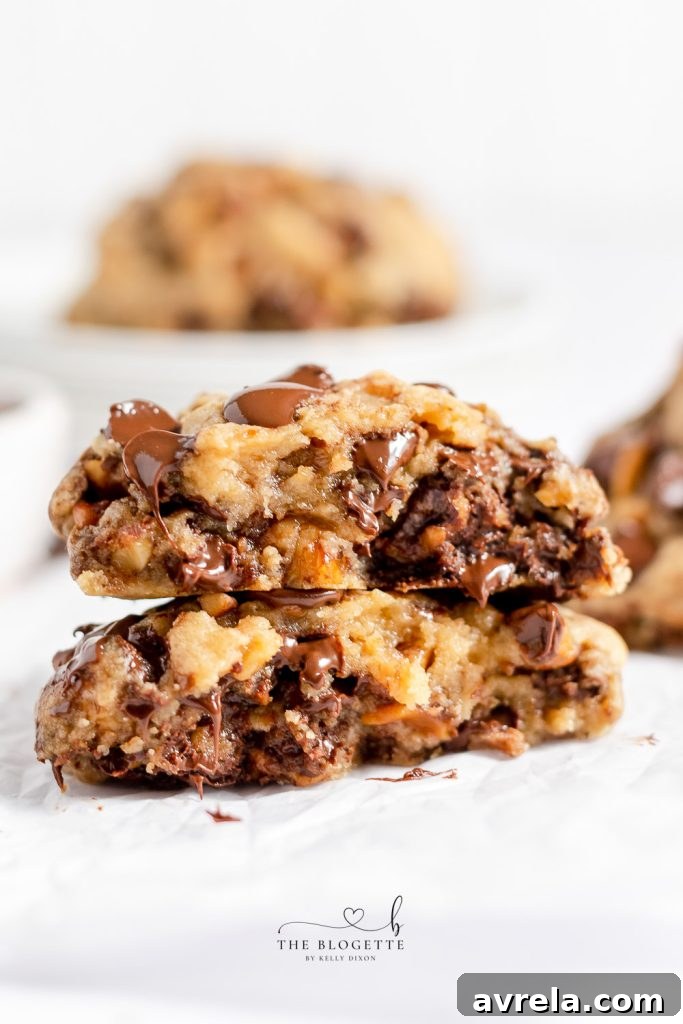
A: The key to achieving that coveted gooey, molten center, characteristic of premium bakery cookies, is to slightly underbake your cookies. Take them out of the oven when the edges are set and lightly golden brown, but the center still looks a bit soft, puffy, and perhaps even slightly shiny. They will continue to set and firm up as they cool on the hot baking sheet for the first 5-10 minutes. Baking for the shorter duration (e.g., 10 minutes) specified in the recipe is ideal for maximizing that irresistible gooiness.
Discover More Irresistible Cookie Creations
Explore Other Favorite Cookie Recipes
Monster Cookie Balls
Chocolate Chip Cookie Bars
Nutella Stuffed Chocolate Chip Cookies
White Chocolate Chip Cookies
Print Recipe
The Ultimate Bakery-Style Chocolate Chip Cookies
15 minutes
12 minutes
1 hour
1 hour
27 minutes
6
large cookies
Equipment
-
Baking Sheet
-
Parchment Paper
-
Electric Mixer
-
Large Mixing Bowl
-
Small Mixing Bowl
-
Wire Rack
-
Measuring Cups & Spoons
Ingredients
- 1⅓ cup all-purpose flour
- ¾ teaspoon baking soda
- ½ teaspoon salt
- 1 Tablespoon cornstarch
- ½ cup unsalted butter, softened
- ⅓ cup brown sugar, packed
- ⅓ cup granulated sugar
- 1 large egg
- 2 teaspoons vanilla extract
- 1 cup semi-sweet chocolate chips (plus more for topping)
- 1 cup chopped walnuts, toasted and cooled
Instructions
-
Preheat your oven to 350ºF (175ºC).
-
Spread the chopped walnuts evenly on a baking sheet. Toast in the preheated oven for 5 minutes until fragrant and lightly golden.
-
Remove the toasted walnuts from the oven and let them cool completely while you prepare the cookie dough. This prevents them from melting the chocolate chips prematurely.
-
In a small mixing bowl, whisk together the all-purpose flour, baking soda, salt, and cornstarch. Set aside.
-
In a large mixing bowl, using an electric mixer, beat the softened unsalted butter and both sugars (brown and granulated) together on low speed for 2-3 minutes until the mixture is light, fluffy, and pale.
-
Beat in the egg and vanilla extract until just combined. Scrape down the sides of the bowl as needed.
-
Gradually add the dry ingredients mixture to the wet ingredients, mixing on low speed until *just* combined. Be careful not to overmix.
-
Gently fold in the chocolate chips and cooled toasted walnuts until evenly distributed.
-
Cover the dough and refrigerate for at least one hour (or up to 48 hours for best results). Chilling is crucial for thick, bakery-style cookies.
-
Line a baking sheet with parchment paper. Divide the chilled dough into 6 very large balls and place them at least two inches apart on the prepared sheet.
-
If desired, gently press a few extra chocolate chips onto the tops of each cookie dough ball for an appealing finish.
-
Bake for 10-12 minutes. The edges should be set and lightly golden brown, while the centers still look slightly soft and gooey. Bake for the shorter time for gooier cookies, and longer for more set cookies.
-
Allow cookies to cool on the baking sheet for 5-10 minutes before transferring them to a wire rack to cool completely. Enjoy warm or at room temperature!
Recipe Video
Notes
Dough Chilling is Essential: Refrigerating the dough is the secret to thick, Levain bakery-style cookies. Don’t skip this step! It prevents spreading and deepens flavor for an incredible result.
Quick Chill Option: If you’re pressed for time, you can form the dough into balls first, then freeze them for 15-20 minutes before baking to get a quick chill.
Make Ahead & Freeze: This dough is perfect for meal prep! Store it in an airtight container in the fridge for several days, or freeze scooped dough balls for up to 3 months. Bake from frozen, simply adding a couple of extra minutes to the bake time.
Customization: Feel free to swap walnuts for other nuts like pecans, or omit them entirely for a purely chocolate experience. You can also use different types of chocolate chips (milk, dark, or white) for delicious variations.