
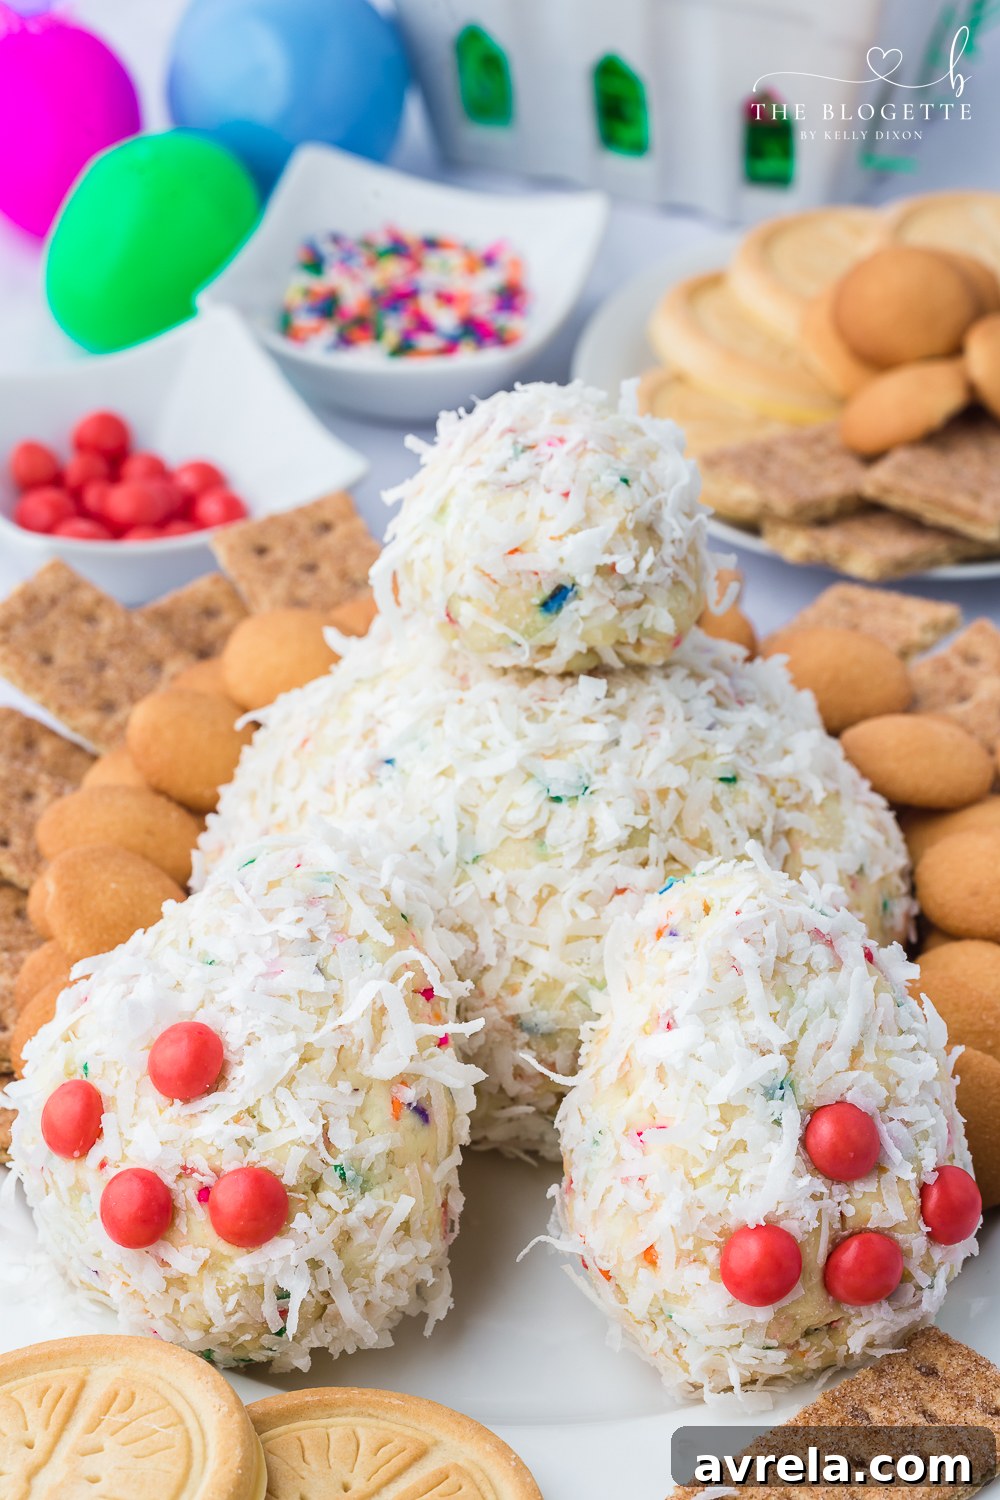
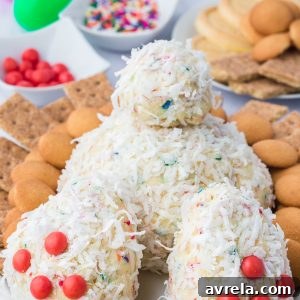
Looking for a show-stopping yet incredibly easy dessert that perfectly captures the spirit of spring and Easter? Our Bunny Butt Cheeseball is not just whimsical and utterly adorable, it’s also wonderfully delicious! This playful centerpiece is guaranteed to bring smiles and delight to your holiday spread. Imagine a rich, sweet cream cheese base, bursting with colorful sprinkles, and lovingly coated in a soft, fluffy layer of shredded coconut, perfectly sculpted to resemble the cutest little bunny bottom. It’s the ultimate no-bake Easter treat that’s as fun to make as it is to eat!
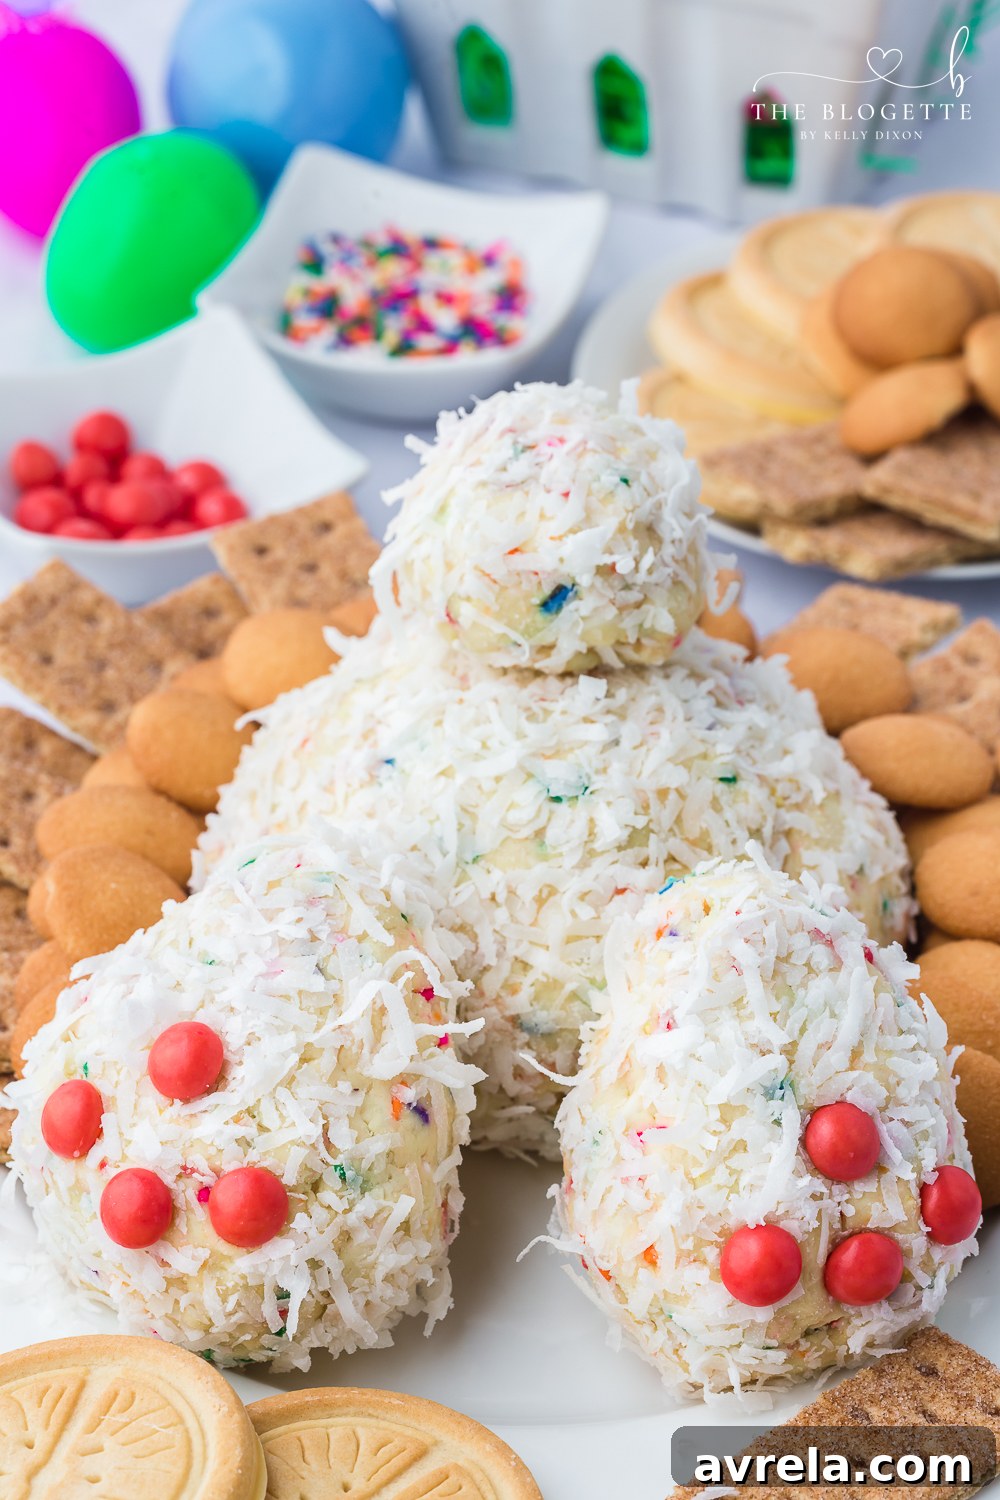
The Ultimate Bunny Butt Cheeseball: A Sweet Easter Delight
This festive Easter dessert is truly a feast for both the eyes and the palate. Its charming appearance makes it an instant conversation starter, while its creamy, sweet flavor profile ensures everyone will come back for more. Whether you’re hosting a grand Easter brunch, a casual spring gathering, or simply looking for a fun activity to do with the kids, this Bunny Butt Cheeseball recipe is a winner. It combines the ease of a no-bake dessert with an undeniable “wow” factor, making it suitable for any skill level in the kitchen.
Serve this sweet cream cheese creation alongside an array of dippers like crisp cookies, classic graham crackers, or vibrant fresh fruit for a delightful appetizer or dessert that will enchant guests of all ages!
Love this recipe? Pin it now to save it for later and share with friends!
Pin It Now
Why This Sweet Bunny Butt Cheeseball Will Be Your New Easter Favorite
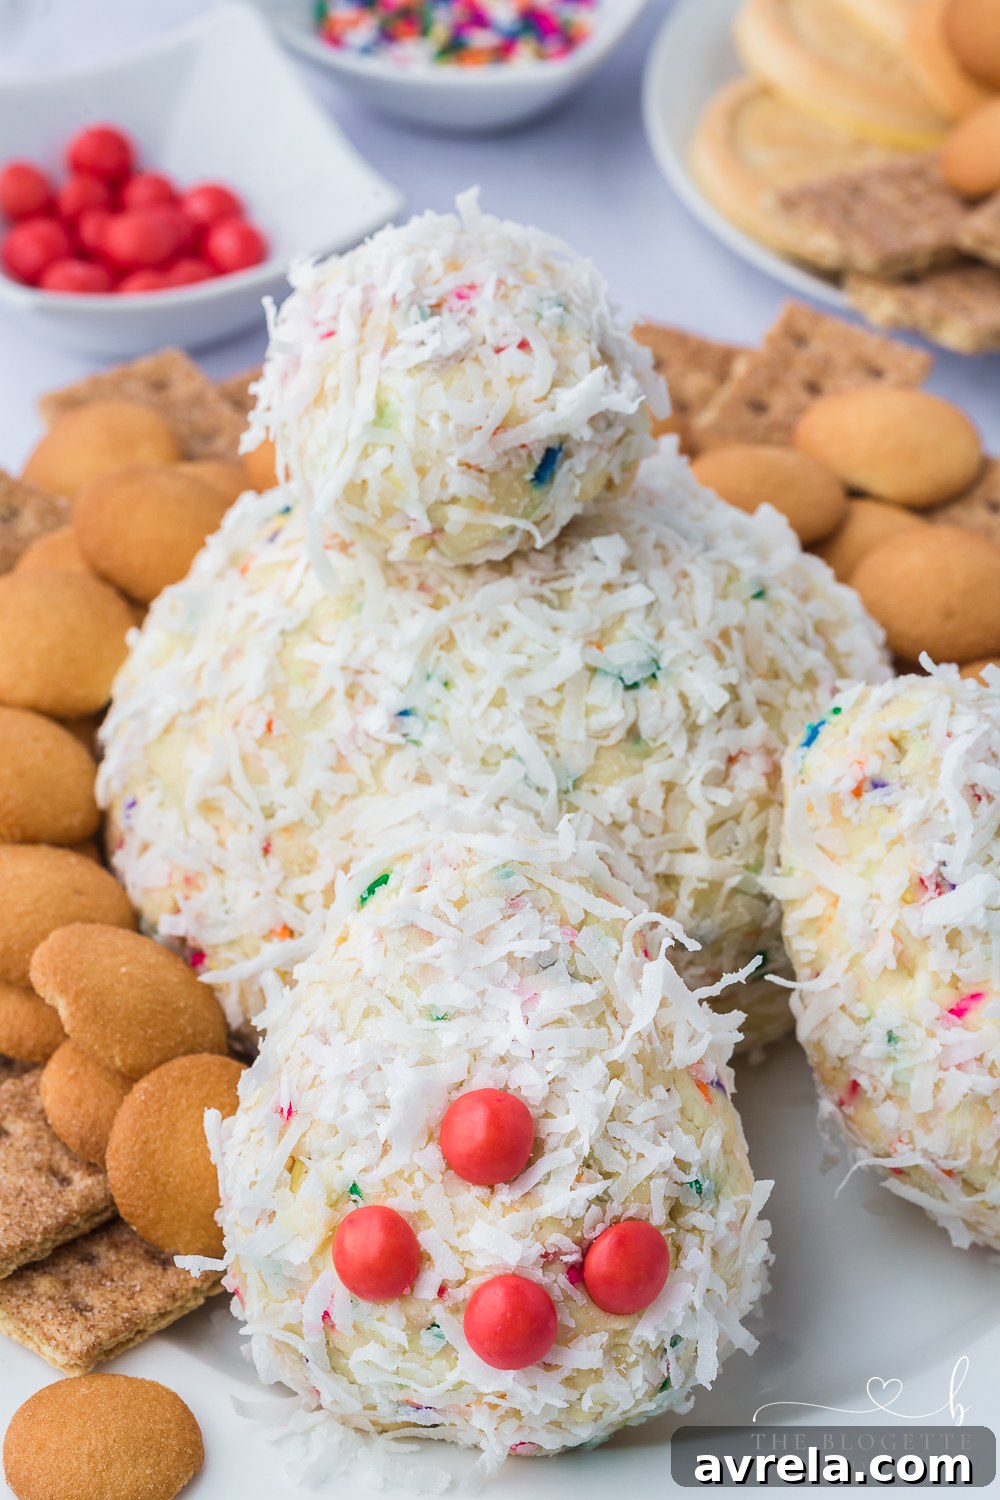
This isn’t just another dessert; it’s an experience that captures the joy and playful spirit of the season! Here’s why this Bunny Butt Cheeseball will quickly become your new favorite Easter tradition and a staple for spring gatherings:
- Unbelievably Easy & No-Bake: Forget complicated baking schedules! This recipe requires zero oven time, making it incredibly simple to prepare. With straightforward steps and common ingredients, even novice chefs can create this masterpiece with confidence and flair.
- Visually Stunning & Whimsical: Its unique and charming design instantly captures attention and serves as a delightful, edible centerpiece. Everyone will be asking, “How did you make that adorable bunny butt?!” It’s perfect for impressing guests with minimal effort.
- Crowd-Pleasing Sweet Flavor: The harmonious combination of rich, sweet cream cheese, melting white chocolate, and a delicate hint of almond is universally loved. It’s creamy, satisfying, and perfectly balanced without being overly heavy, appealing to palates of all ages.
- Customizable Fun: This recipe is incredibly versatile! Easily adapt the flavors, adjust the sweetness, or swap out decorations to suit your personal preferences, dietary needs, or what you simply have on hand in your pantry.
- Perfect for Any Spring Occasion: While it truly shines as an Easter dessert, its charming, spring-themed appeal makes it an ideal treat for other events. Think baby showers, garden parties, spring birthdays, or any gathering that calls for a touch of sweetness, fun, and whimsy.
- Interactive & Engaging: Serving a cheeseball encourages guests to interact with the food and each other. It’s a great conversation starter and an invitation to share a delightful experience.
Gather Your Ingredients for This Adorable Sweet Cheeseball
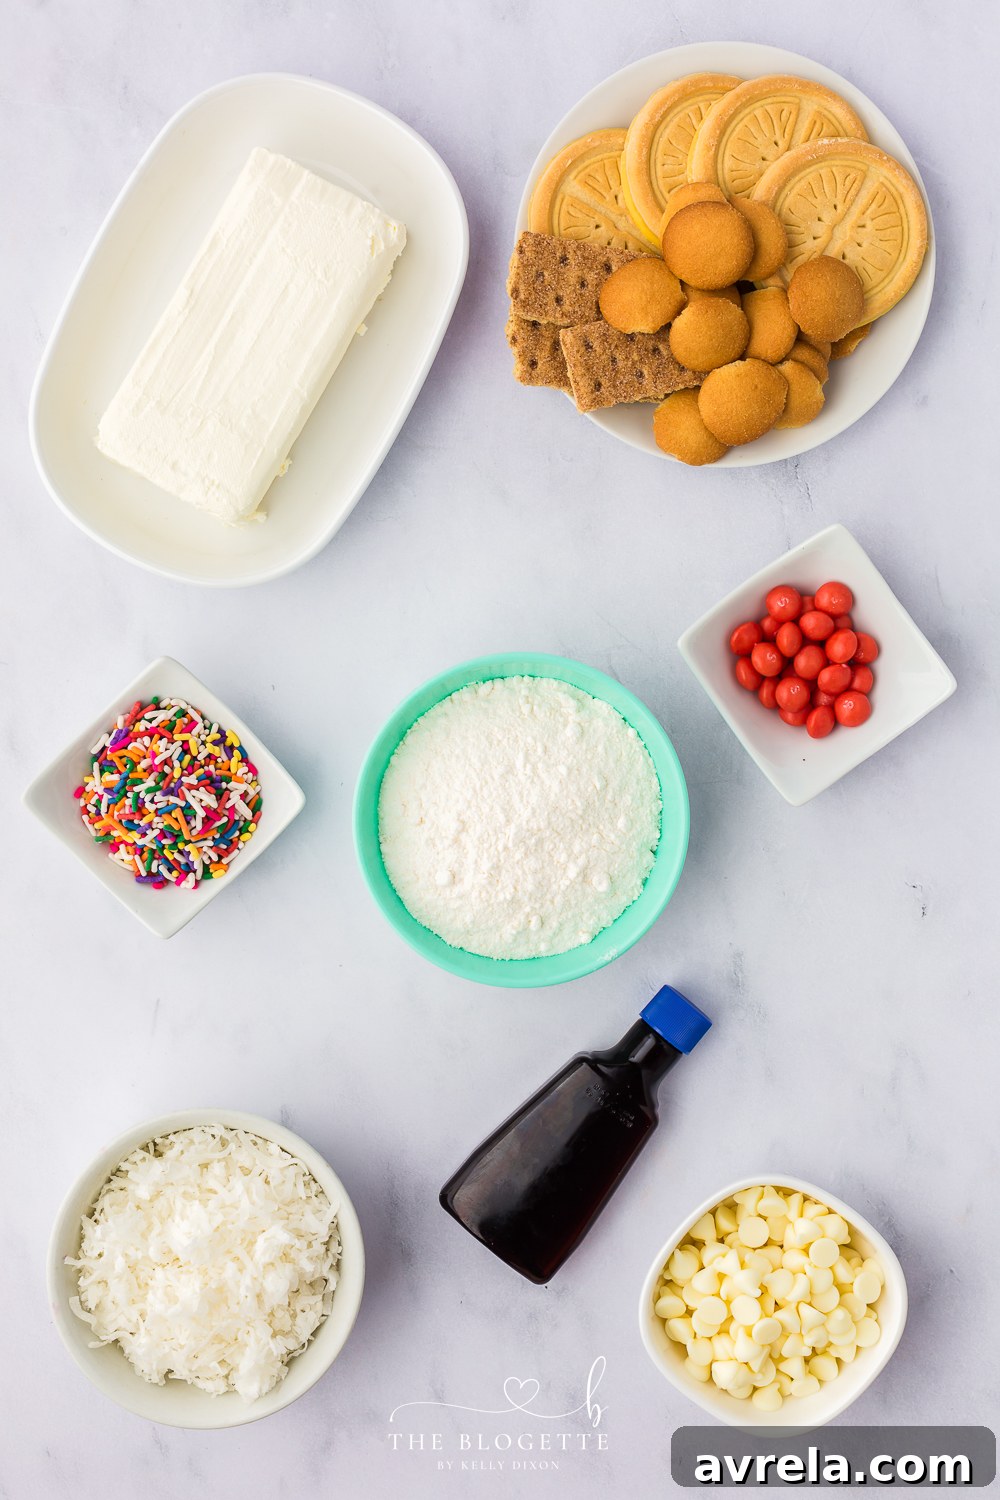
Crafting this delightful Bunny Butt Cheeseball requires a few key ingredients, each playing a crucial role in its texture, flavor, and charming visual appeal. Getting these components right is the first step to a successful and delicious dessert. Here’s a detailed look at what you’ll need and some helpful tips for selecting and preparing each component:
- Cream Cheese: The cornerstone of our sweet cheeseball. For the silkiest, smoothest mixture, it is absolutely essential that your cream cheese is very soft and at room temperature. Ideally, let it sit out for at least one hour (or two) before you begin mixing. This prevents lumps and ensures effortless blending with the other ingredients. Always opt for full-fat cream cheese for the creamiest and most luxurious texture that holds its shape well.
- White Chocolate Chips: These are an optional but highly recommended addition! The white chocolate chips provide a wonderful textural contrast and an extra layer of sweetness that beautifully complements the tangy cream cheese. They will soften within the mixture, creating delightful pockets of flavor. For a more even distribution and a subtle bite, consider using mini white chocolate chips.
- Multicolored Sprinkles (Jimmies): For this specific recipe, the “jimmie” style sprinkles are crucial for achieving the desired look and texture within the cheeseball. Their elongated, cylindrical shape provides a better visual effect and a pleasant, soft chew. Avoid crunchy nonpareils, which tend to dissolve or create an unappealing grittiness. Choose bright, pastel colors to enhance the Easter theme.
- Yellow Cake Mix: This “secret” ingredient is a game-changer! It not only infuses a fantastic, nostalgic cake batter flavor into the cheeseball but also acts as a thickening agent, giving the mixture the perfect doughy consistency for shaping. You’ll need a standard 15.25-ounce box. While yellow cake mix offers a classic vanilla-like base, feel free to get creative: vanilla cake mix works perfectly, strawberry cake mix can add a fruity twist, or even Funfetti cake mix for an extra sprinkle explosion! Just ensure the box size is consistent.
- Almond Extract: A small amount of almond extract genuinely elevates the overall sweetness and provides a delicate, sophisticated nutty aroma that pairs wonderfully with the other flavors. If almond isn’t your preference, or if you simply don’t have it on hand, pure vanilla extract is an excellent and equally delicious substitute that will still provide a warm, inviting aroma.
- Sweetened Shredded Coconut Flakes: This is where the magic happens for creating the iconic “bunny fur”! Sweetened shredded coconut flakes provide that unmistakable fuzzy texture and appearance for our bunny’s exterior. Ensure they are finely shredded for the best, most realistic effect. While unsweetened coconut can be used, the sweetened variety adds to the dessert’s overall appeal and adheres better to the cream cheese.
- Pink Skittles: These vibrant, chewy candies are perfectly shaped and colored for creating those adorable little bunny toes and a heel. Their flat, oval shape and cheerful pink hue are ideal. If pink Skittles are hard to find, small pink or red M&M’s (with the logo side pressed in to hide the letter) or even tiny pink jelly beans can serve as charming alternatives.
- Sweet Dipping Treats: The versatility of a dessert cheeseball lies in the variety of dippers you can offer. This allows your guests to customize their sweet experience. Some perennial favorites include honey or cinnamon graham crackers, delicate shortbread cookies, and refreshing fresh fruit like crisp apple slices or succulent strawberries. Don’t be afraid to think outside the box and offer a diverse selection to cater to every taste!
Step-by-Step Directions to Create Your Adorable Bunny Butt Cheeseball
Creating this whimsical Bunny Butt Cheeseball is a straightforward and enjoyable process that yields impressive results. Follow these detailed steps carefully to ensure your Easter masterpiece comes out perfectly shaped, delicious, and ready to delight!
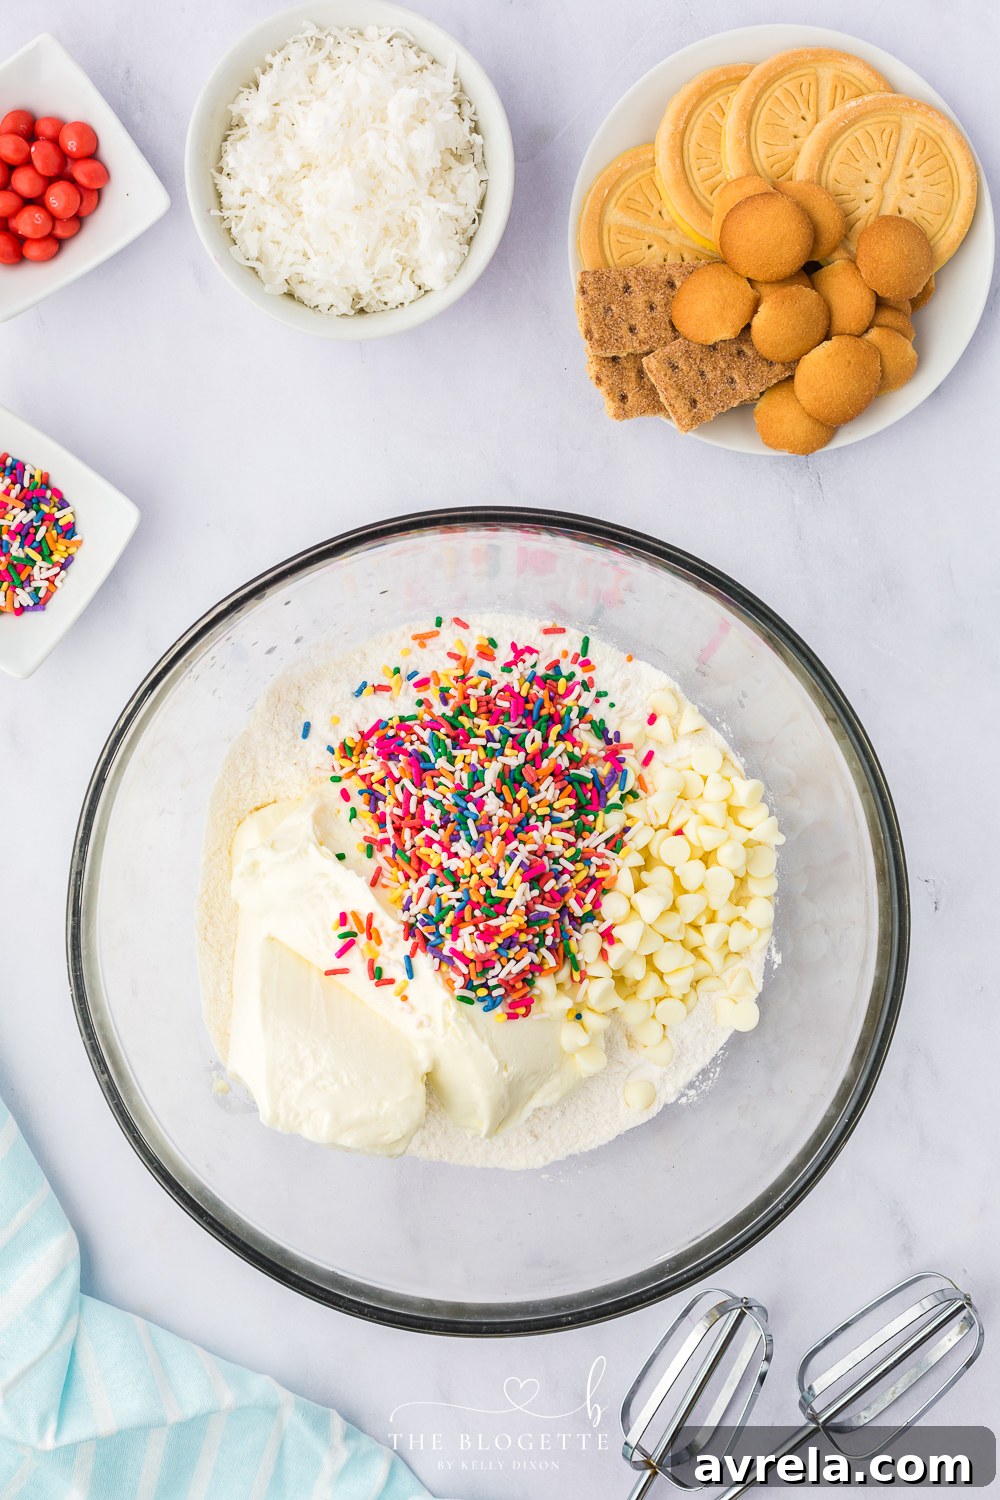
- Prepare the Cheeseball Mixture: In a large mixing bowl, combine the softened cream cheese, white chocolate chips, colorful sprinkles, yellow cake mix (or your chosen substitute), and almond extract. Using either a hand mixer or a stand mixer fitted with a paddle attachment, beat all the ingredients together on medium speed until they are thoroughly combined, uniform in color, and smooth. The mixture will be quite stiff and have a dense, dough-like consistency, which is exactly what you want for shaping. Avoid overmixing, but ensure everything is well incorporated.
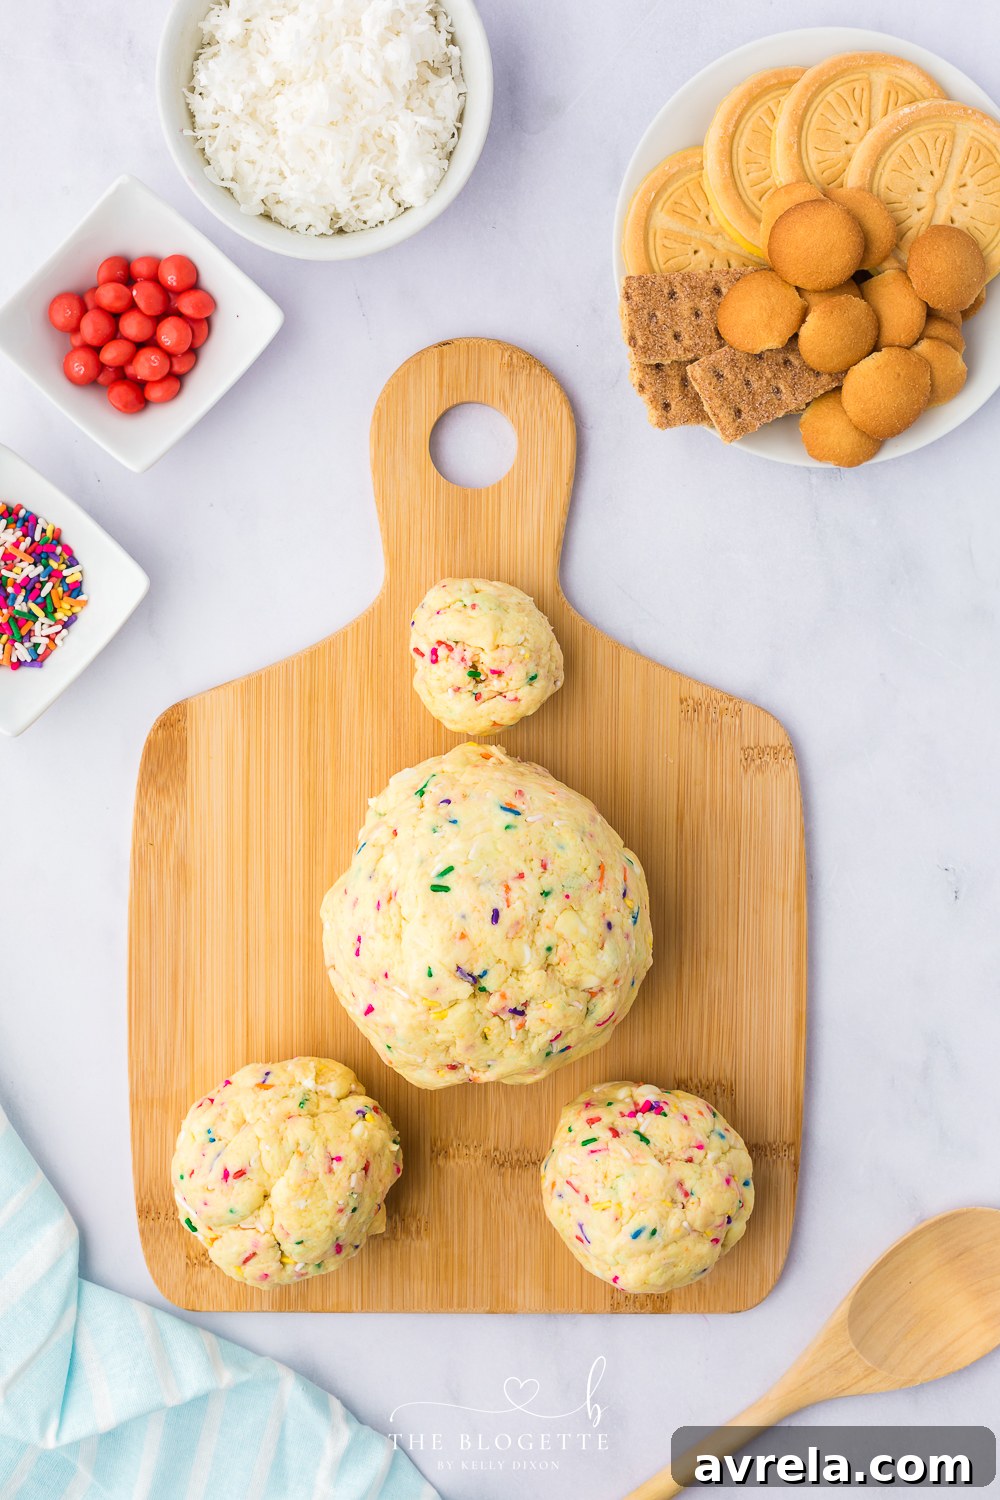
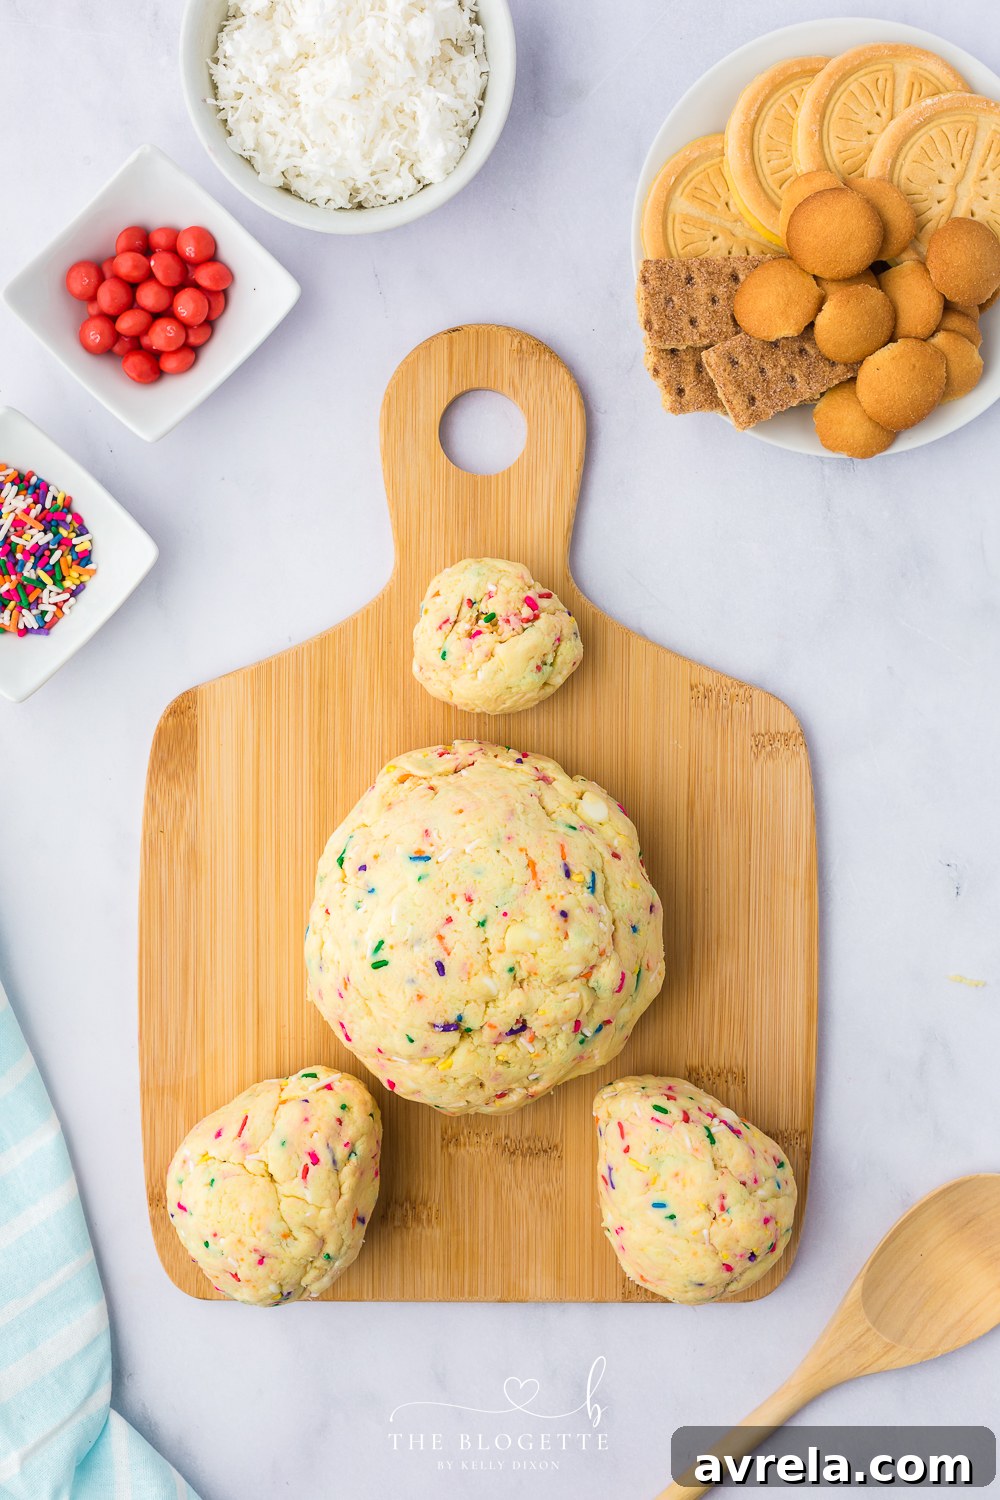
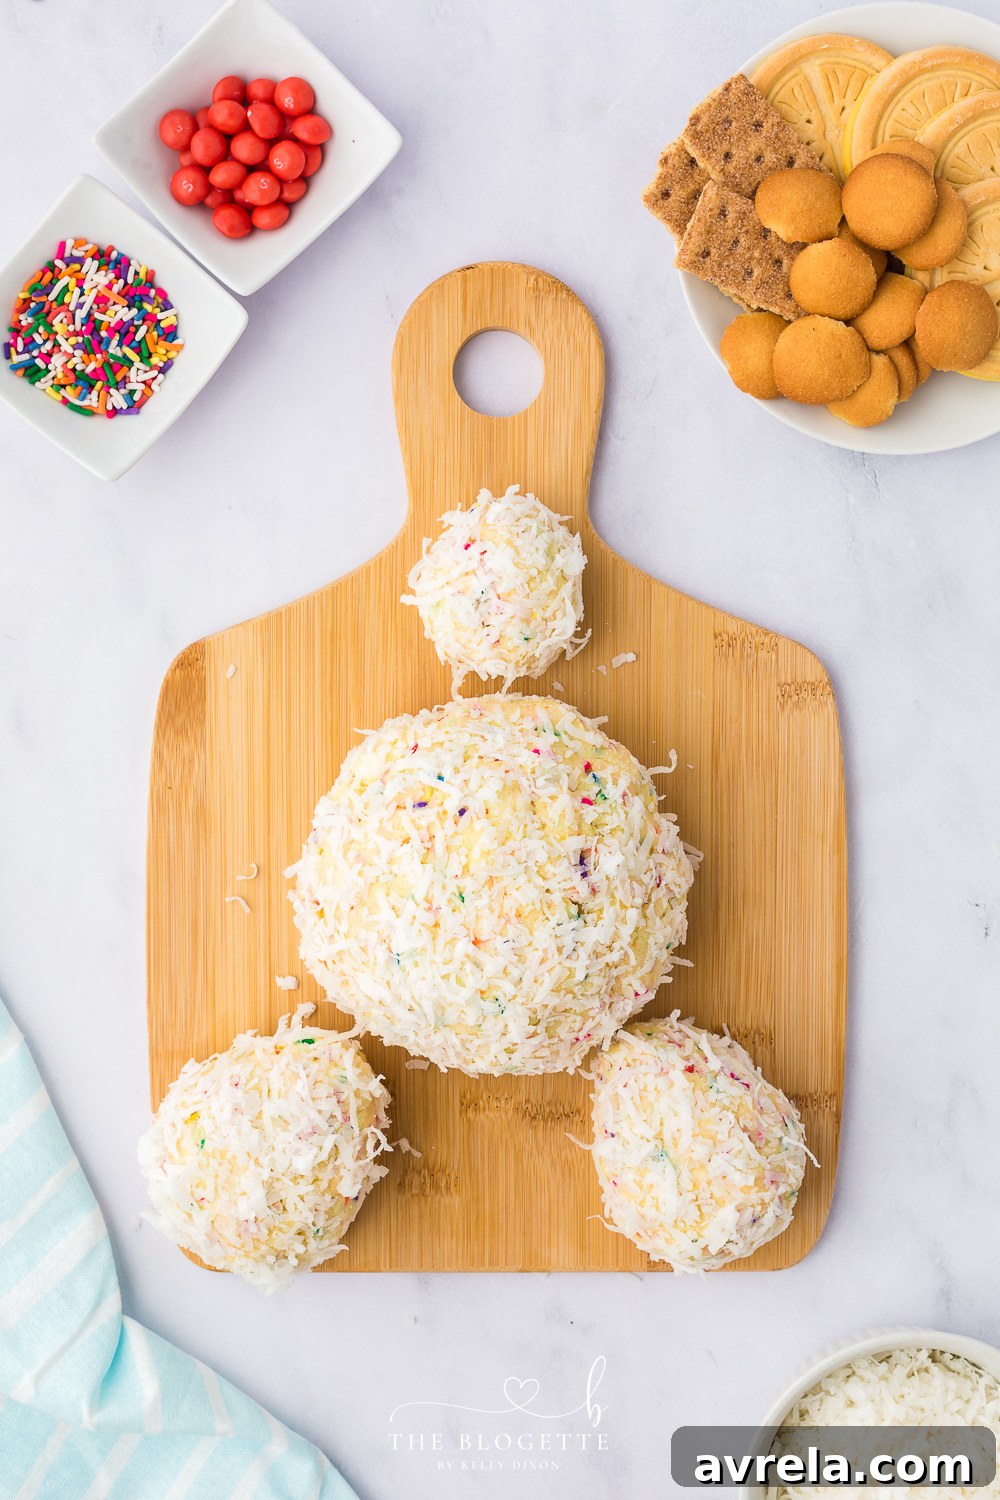
- Shape the Cheeseball Components: Divide your prepared cheeseball mixture into four distinct portions. You’ll need one large ball for the main body of the bunny, two medium-sized balls for the paws (or feet), and one small ball for the adorable fluffy bunny tail. Try to make these portions as smooth and round as possible. Next, take the two medium-sized balls and gently flatten them just slightly. Then, meticulously shape each into a teardrop to perfectly resemble bunny paws.
- Chill Thoroughly and Firm the Paws: Individually wrap each of the four cheeseball portions (the large body, two teardrop paws, and small tail) tightly in plastic wrap. Ensure there are no air gaps to prevent drying. Place all wrapped components in your refrigerator for a minimum of 1 hour. For the best firmness and ease of handling, especially for the delicate paw shapes, allowing them to chill overnight is highly recommended. This crucial step ensures they firm up beautifully, making them much easier to coat and assemble without losing their shape.
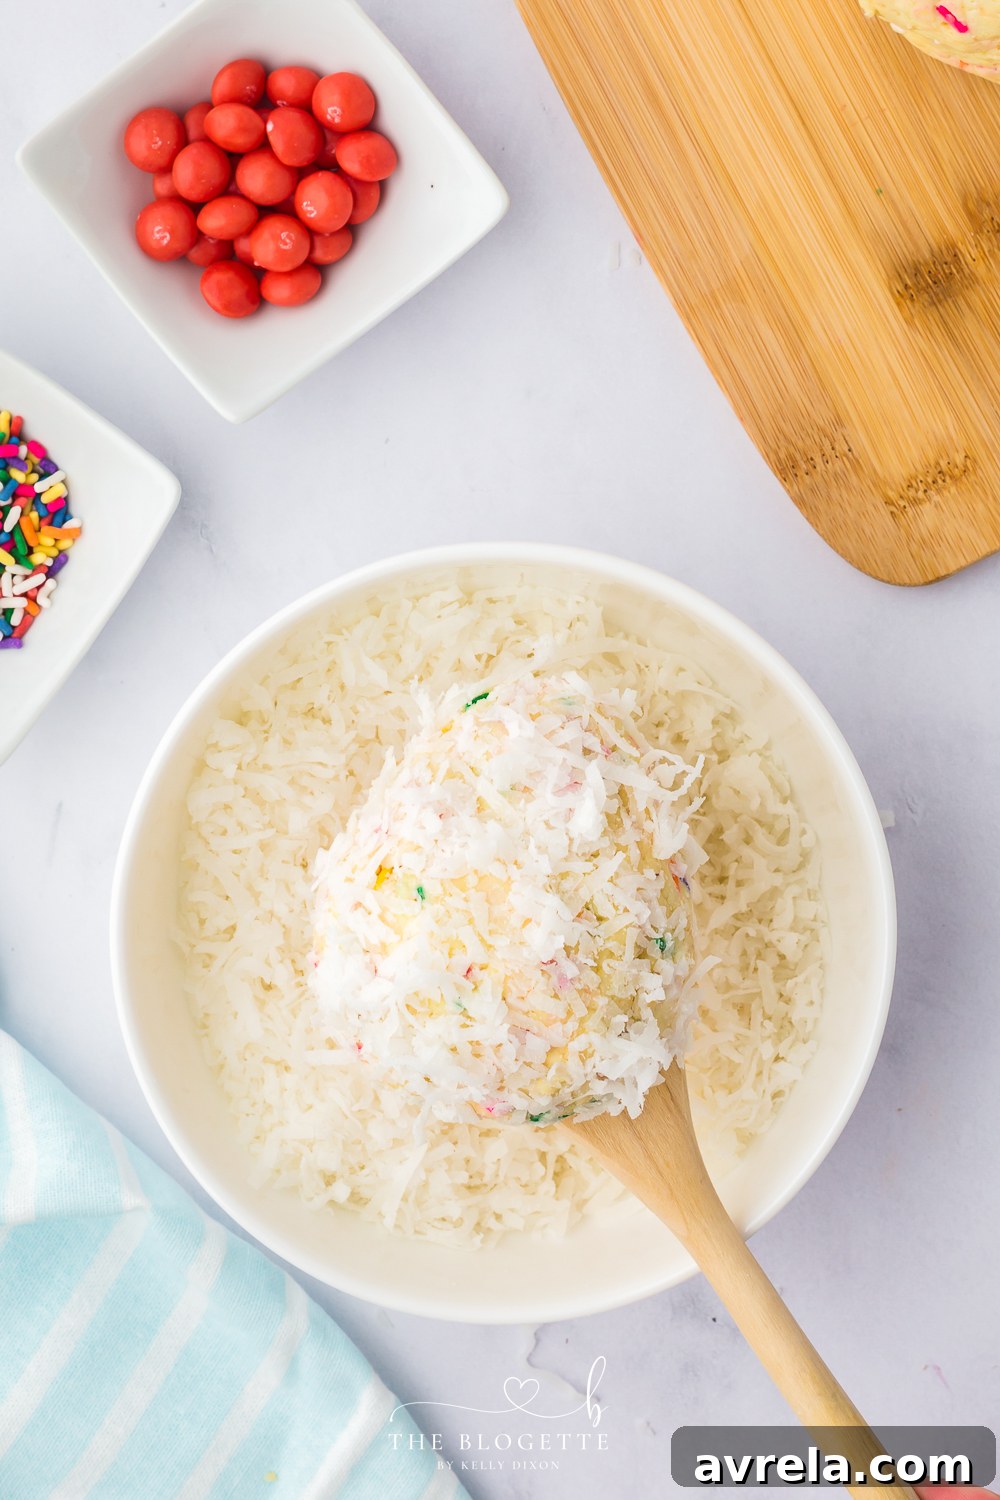
- Coat in Fluffy Coconut “Fur”: Once thoroughly chilled and firm, unwrap each cheeseball part. Pour your sweetened shredded coconut flakes into a shallow bowl or plate. Roll each individual ball generously in the coconut, ensuring you pack the coconut tightly around the cheese. Use your hands to gently press the flakes firmly onto the surface until each part is completely covered and looks like soft, fuzzy bunny fur. This creates the iconic texture and visual appeal.
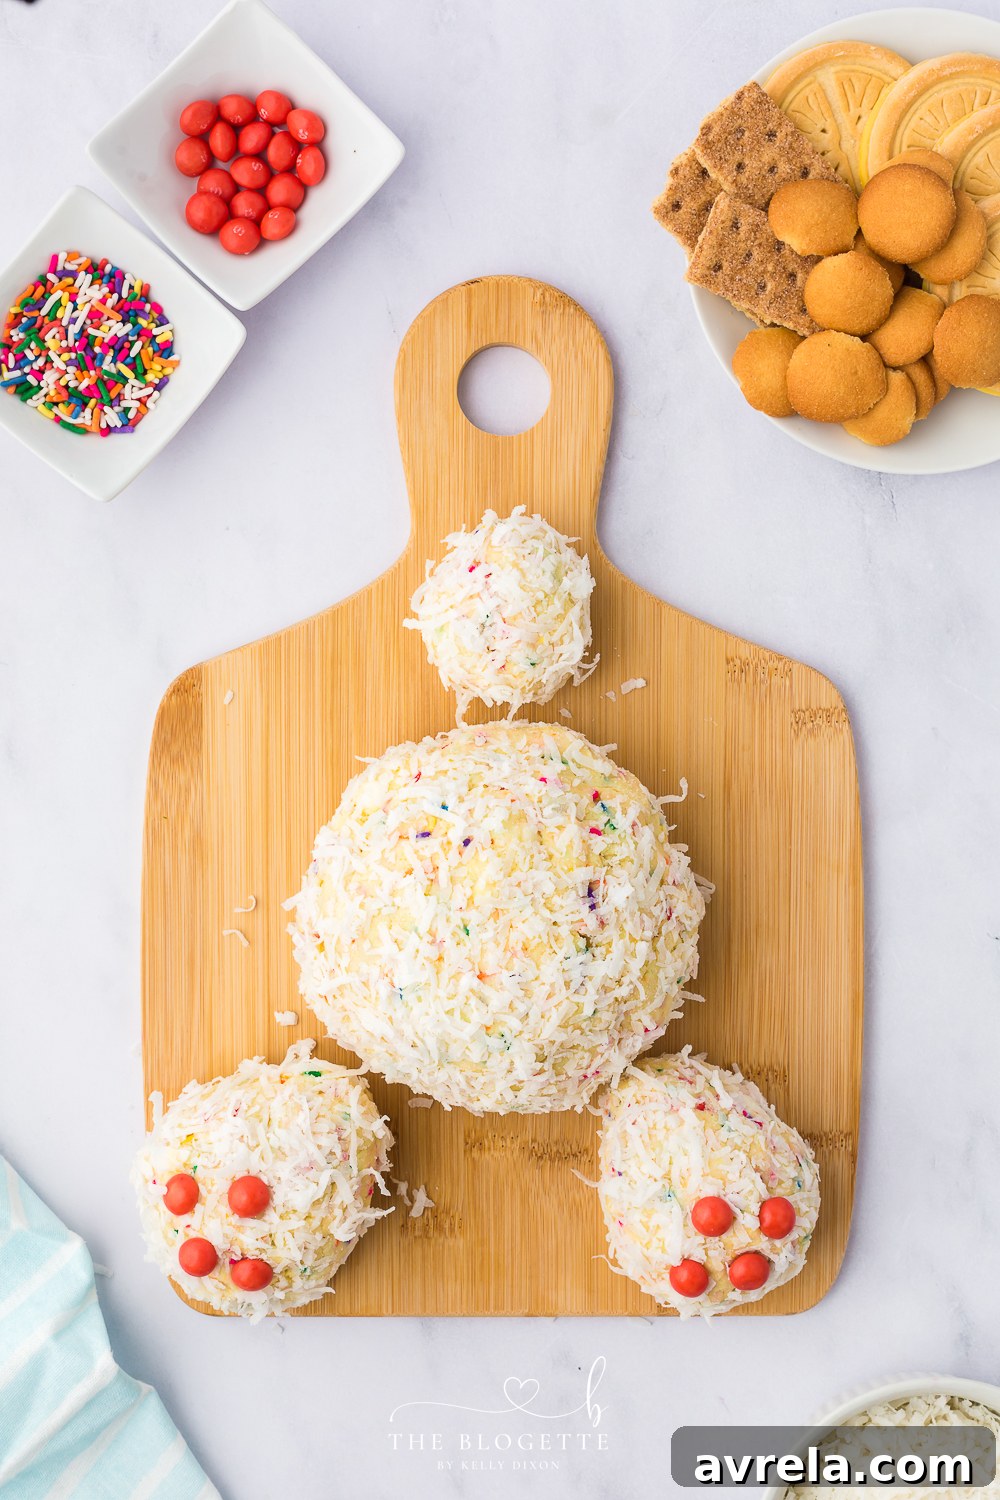
- Assemble Your Bunny Butt: Now for the most exciting part – assembly! Arrange the large coconut-coated ball on your chosen serving platter, placing it slightly towards the back or center. Position the two medium-sized teardrop shapes (the paws) at the bottom-sides of the large ball, as if the bunny is “diving” into the platter. Then, place the small coconut-covered ball (the tail) directly above the paws, in the center of the large ball. To ensure everything sticks together securely, gently scrape away a small amount of coconut from the cheeseball surface where you plan to attach the paws and tail. This exposes the sticky cream cheese underneath, allowing the pieces to adhere more firmly when pressed together.
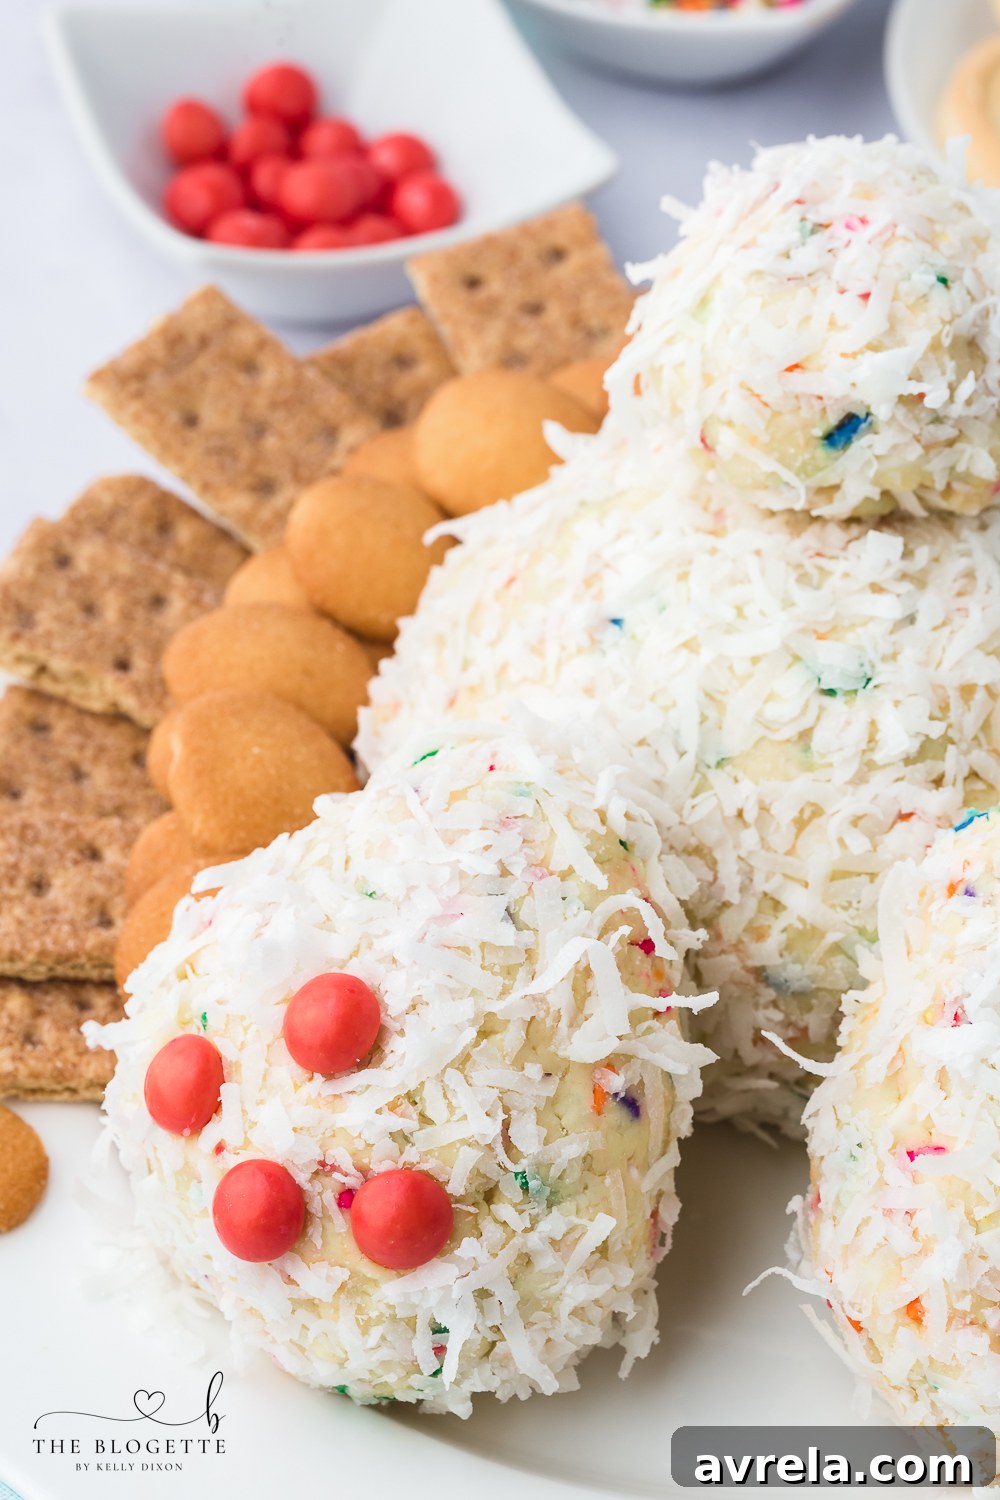
- Decorate with Adorable Toes: Add the delightful finishing touch! Using your pink Skittles, create the adorable bunny toes. For each paw, carefully scrape away a tiny bit of coconut in three small spots for the toes and one slightly larger spot for the heel. Gently press the Skittles into these exposed cream cheese spots. A crucial tip for a flawless look: remember to press the “S” side of the Skittle into the cheeseball so the letter isn’t visible, ensuring a perfectly smooth and realistic “toe” appearance.
- Serve Chilled and Enjoy: Your magnificent Bunny Butt Cheeseball is now complete and ready to impress! For the best taste, texture, and structural integrity, it’s essential to serve it chilled. This allows the flavors to meld beautifully and maintains its firm shape, making it easier for guests to scoop. Arrange it on your serving platter with your chosen dippers and get ready for the compliments!
Want to save this delightful Bunny Butt Cheeseball recipe for later?
Get it straight to your inbox! Enter your email below to receive the full recipe along with other exclusive sweet treats and holiday ideas.
Enter your email address to get this recipe delivered directly to you!
Subscribe to our Newsletter
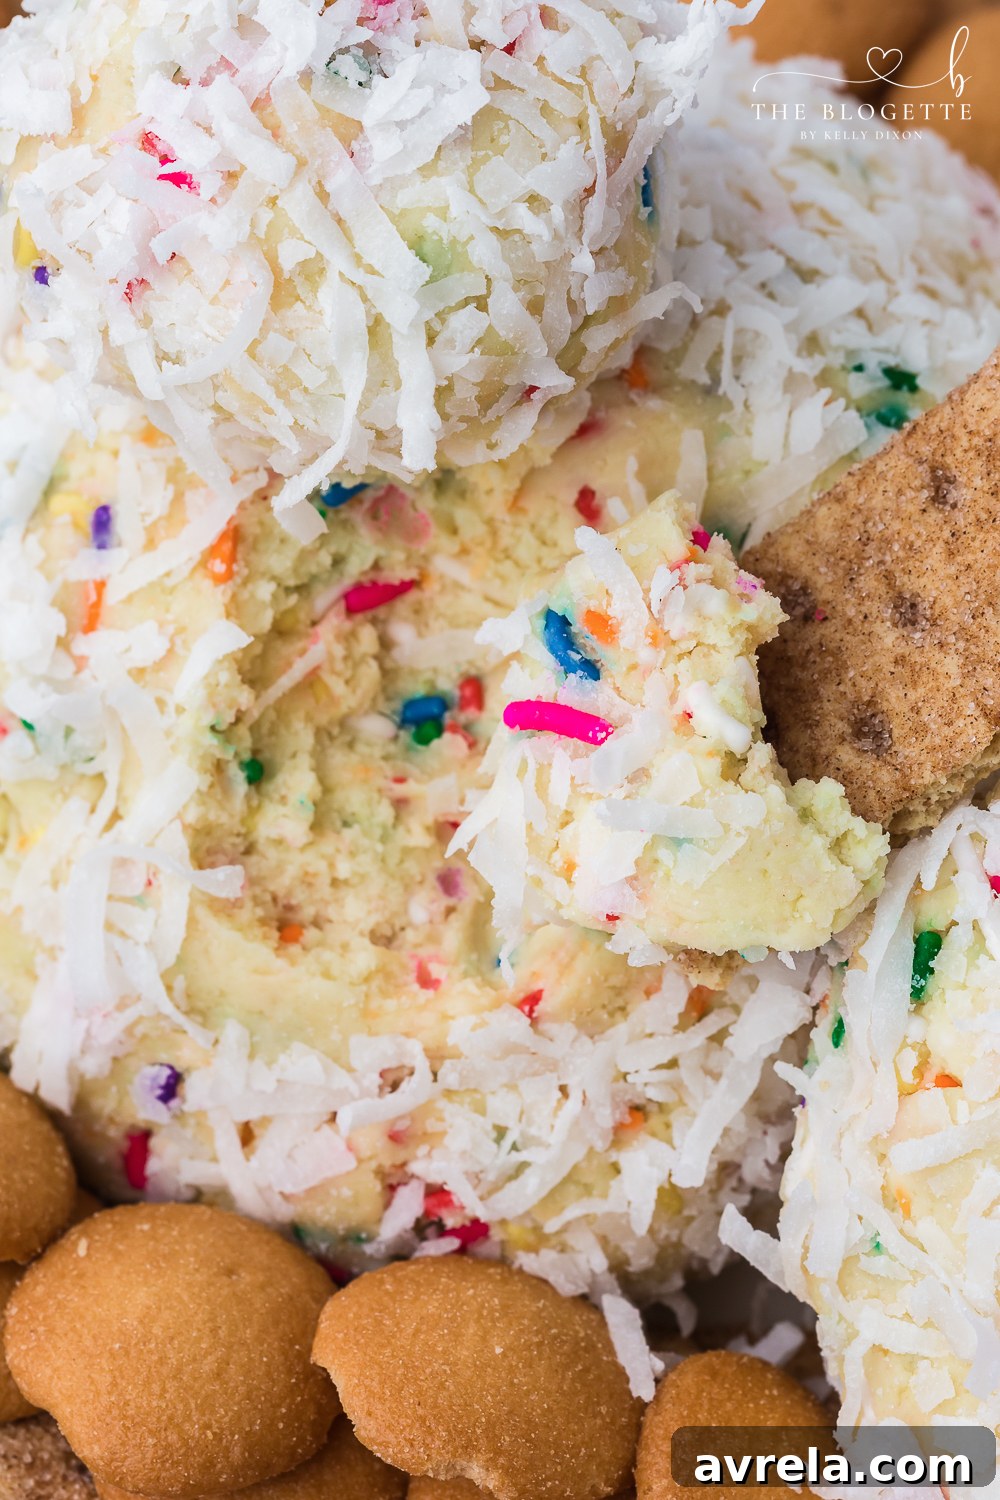
Perfect Dipping Options for Your Sweet Dessert Cheeseball
A sweet cheeseball is only as good as the delightful dippers you pair it with! Offering a variety ensures there’s something for everyone to scoop up this charming treat. Here are some fantastic suggestions to complement the creamy, sweet flavor of your Bunny Butt Cheeseball, categorized for easy selection:
Creative Dipping Pairings to Enhance Your Cheeseball:
- Graham Crackers: A timeless and universally loved choice! Their mild sweetness and satisfying crunch make them an ideal canvas for the creamy cheeseball. Try honey or cinnamon sugar varieties for extra flavor.
- Vanilla Wafers: These light, airy, and delicately sweet cookies provide a melt-in-your-mouth experience that pairs beautifully with the rich cream cheese.
- Teddy Grahams: Especially fun for younger guests, these adorable bear-shaped crackers add a playful touch and a subtle honey or chocolate flavor, depending on your choice.
- Apple Slices: Crisp, slightly tart apple slices (such as Granny Smith or Honeycrisp) offer a refreshing contrast to the sweetness, adding a healthy and vibrant element to your spread.
- Strawberries: Fresh, juicy strawberries are a natural and elegant partner, bringing a burst of natural sweetness, a lovely soft texture, and a beautiful red hue.
- Pretzel Sticks/Twists: For those who adore a sweet and salty combination, pretzels are an unexpected but absolutely delicious choice. They provide a satisfying crunch that balances the smooth cheeseball perfectly.
- Shortbread Cookies: Buttery and wonderfully crumbly, shortbread cookies elevate the elegance of your dessert, offering a rich and decadent base for the cheeseball.
- Waffle Cookies (e.g., Stroopwafels): Thin and subtly crispy, waffle cookies offer a unique texture and often subtle caramel notes that enhance the overall flavor profile of the dessert.
- Golden Oreos: A modern fan favorite, these vanilla sandwich cookies bring a familiar, comforting sweetness and a satisfying crunch that kids and adults alike will enjoy.
- Biscoff Cookies (Speculoos): For a gourmet touch, Biscoff cookies offer a distinct spiced, caramelized flavor that is incredibly addictive and pairs exceptionally well with the sweet cream cheese.
- Animal Crackers: Another fun option for kids and themed parties, these bring a classic, simple crunch.
- Marshmallows: For an extra soft and sweet bite, large or mini marshmallows can be a delightful, fluffy dipper.
Bunny Butt Cheeseball Recipe Card
Pin Recipe
Print Recipe
Bunny Butt Cheeseball
10
1
1
10
8
Essential Equipment
-
Large Mixing Bowl
-
Hand or Stand Mixer
-
Rubber Spatula
-
Plastic Wrap
-
Serving Platter
Ingredients for Your Bunny Butt Cheeseball
- 16 oz cream cheese softened to room temperature
- 2/3 cup white chocolate chips (mini chips recommended)
- 1/3 cup multicolor sprinkles (Jimmies style for best texture)
- 1 15.25 ounce package yellow cake mix (or vanilla, Funfetti, or strawberry cake mix)
- 1 teaspoon almond extract (or pure vanilla extract)
- 1 14 ounce bag sweetened coconut flakes (finely shredded)
- 8 pink Skittles (or pink/red M&M’s, small pink jelly beans)
Detailed Instructions for Your Bunny Butt Cheeseball
-
Mix the Cheeseball Base: In a large mixing bowl, combine the softened cream cheese, white chocolate chips, multicolor sprinkles, yellow cake mix, and almond extract. Use a hand mixer or stand mixer to beat on medium speed until all ingredients are thoroughly combined and the mixture is stiff and doughy. Scrape down the sides of the bowl as needed to ensure even mixing.
-
Shape the Components: Divide the mixture into four distinct portions: one large ball (for the bunny’s body), two medium-sized balls (for the paws), and one small ball (for the tail). Gently flatten the two medium balls just slightly, then shape them into distinct teardrops to resemble bunny paws. Ensure all shapes are as smooth as possible.
-
Chill Firmly: Individually wrap each shaped cheeseball part (the large body ball, two teardrop paws, and small tail ball) tightly in plastic wrap to prevent them from drying out. Place them in your refrigerator for at least 1 hour, or ideally, allow them to chill overnight. This crucial step ensures they firm up beautifully, making them much easier to handle and preventing them from losing their shape during assembly.
-
Coat with Coconut “Fur”: Once thoroughly chilled and firm, unwrap the cheeseball parts. Pour the sweetened shredded coconut flakes into a shallow bowl or plate. Roll each individual ball generously in the coconut, packing it tightly around the cheese and pressing firmly with your hands until each part is completely covered. This creates the soft, fuzzy “bunny fur” texture and iconic look.
-
Assemble the Bunny Butt: On your chosen serving platter, arrange the large coconut-coated ball to form the main body. Position the two teardrop-shaped paws at the bottom-sides of the large ball, as if peeking out. Place the small coconut-covered ball (the tail) directly above the paws, centered on the large ball. To ensure everything adheres securely, gently scrape away a small amount of coconut from the cheeseball surfaces where you plan to attach the paws and tail. This exposes the sticky cream cheese underneath, allowing the pieces to press and stick together more firmly.
-
Add Adorable Toes: For the finishing touch, use your pink Skittles to create the bunny’s adorable toes. On each paw, carefully scrape away tiny bits of coconut to create three small spots for the toes and one slightly larger spot for the heel. Gently press the pink Skittles into these exposed cream cheese spots. Remember to press the “S” side of the Skittle inward so the letter isn’t visible, ensuring a perfectly smooth and realistic “toe” appearance.
-
Serve Chilled and Enjoy: Your magnificent Bunny Butt Cheeseball is now complete! For optimal flavor, texture, and structural integrity, serve it chilled. This ensures the flavors have melded beautifully and the cheeseball maintains its firm, scoopable shape. Arrange it on your serving platter with a generous selection of sweet dipping treats like graham crackers, vanilla wafers, fresh fruit, shortbread cookies, or pretzel sticks. Enjoy your charming and delicious Easter dessert!
Recipe Notes & Expert Tips for Success
Storage Instructions: If you find yourself with any delightful leftovers from your Bunny Butt Cheeseball (which is rare!), you can easily store them. Wrap the cheeseball tightly in plastic wrap, ensuring it’s completely sealed, or transfer it to an airtight container. Keep your cheeseball in the refrigerator, where it will remain fresh and delicious for approximately 2-3 days. For the best flavor and texture, it’s generally recommended to enjoy it within this timeframe. While you can attempt to freeze it, be aware that the texture, particularly of the cream cheese and coconut, might not thaw perfectly, potentially becoming a bit grainy.
Can I make this ahead of time and freeze it? Absolutely! This is a fantastic make-ahead recipe, especially useful when preparing for a busy holiday. You can prepare the individual cheeseball components (the large body, paws, and tail) ahead of time and freeze them for up to 3 months. To do this, wrap each shaped ball tightly in multiple layers of plastic wrap, then place them in a resealable freezer bag to protect against freezer burn. When you’re ready to assemble your charming bunny, transfer the frozen balls to the refrigerator overnight to thaw completely. This ensures the coconut adheres well and the pieces stick together firmly during assembly, leading to a perfect presentation.
My bunny feet and tail won’t stick to the body. What should I do? This is a common concern, especially if your cheeseball is very cold! The stickiness of the cream cheese is key for adhesion. First, ensure you’ve thoroughly scraped away enough coconut from the connecting points to expose the sticky cream cheese underneath before pressing the pieces together. If they still seem a bit wobbly or don’t adhere firmly, you can give them more structural support by using a couple of plain wooden toothpicks. Insert a toothpick into the main body of the bunny where you want to attach a paw or the tail, then gently press the appendage onto the top of the toothpick. Just be sure to alert your guests about the toothpicks for safety!
What else can I add for additional flavors or decorations? This Bunny Butt Cheeseball is already a sweet sensation and a visual delight, but it’s also incredibly versatile for customization! Here are a few creative ideas to get even more festive:
- Extra Coconut Flavor: For an even more intense coconut flavor and fuzzier internal texture, consider adding an additional ¼ cup of finely shredded coconut directly into the cream cheese mixture when you’re mixing the ingredients, in addition to coating the outside.
- Enhanced Sweetness: If you prefer a slightly sweeter profile, mix in ¼ cup of powdered sugar (confectioners’ sugar) with the cream cheese mixture. This also helps achieve an even smoother and creamier consistency.
- Cream Cheese Frosting Swirl: Instead of just plain cream cheese, you can incorporate a small amount (about 1/4 cup) of store-bought or homemade cream cheese frosting into the mixture for an extra sweet, cake-like flavor and richer texture.
- Vibrant Food Coloring: For a truly whimsical and vibrant bunny, consider adding a drop or two of pink, light blue, or pastel green food coloring to the cream cheese mixture before shaping. This can create a surprising pop of color when served.
- Chocolate Drizzle: Once assembled and chilled, for an extra indulgent touch, you could lightly drizzle melted white or milk chocolate over the entire bunny or specifically around its base for an “earthy” look.
- Green “Grass” Effect: To truly set the scene for spring, tint some extra shredded coconut flakes with green food coloring. Spread this green coconut on your serving platter to create a charming bed of edible “grass” around your bunny butt!
- Candy Flowers or Edible Decorations: Small edible sugar flowers, mini marshmallow “puffs,” or even tiny jelly beans can be added around the bunny on the platter for extra charm and springtime appeal.
- Citrus Zest: For a bright, zesty twist, add 1 teaspoon of finely grated lemon or orange zest to the cream cheese mixture. It cuts through the sweetness beautifully.
Additional Info & Frequently Asked Questions (FAQs)
Still have questions about creating the perfect Bunny Butt Cheeseball? We’ve got you covered with answers to common queries to ensure your dessert is a hopping success!
- Can I make a savory version of this cheeseball? While this particular recipe is designed as a sweet dessert, the concept of a “bunny butt cheeseball” can absolutely be adapted to savory ingredients! Imagine a cream cheese base with finely chopped herbs (chives, dill), garlic powder, and shredded cheddar cheese, shaped similarly and coated in finely chopped fresh parsley or pecans. You would need to adjust the ingredients entirely, but the fun shaping technique would remain the same.
- Is this recipe gluten-free? As written, this recipe is not gluten-free due to the inclusion of regular yellow cake mix. However, you can easily adapt it to be gluten-free by substituting the regular yellow cake mix with a certified gluten-free yellow or vanilla cake mix. Always double-check all ingredient labels for hidden gluten to ensure it meets your dietary needs.
- Can I use un-sweetened coconut flakes instead? Yes, you can use unsweetened coconut flakes if that’s what you have on hand or if you prefer less sweetness. However, the sweetened coconut flakes contribute to the overall dessert profile and tend to adhere slightly better due to their natural stickiness. If using unsweetened, you might consider adding an extra tablespoon or two of powdered sugar to the cream cheese mixture to balance the overall sweetness of the cheeseball.
- How should I serve this cheeseball for a party? What’s the best presentation? Present your delightful Bunny Butt Cheeseball on a large, flat serving platter that offers ample space. Artfully arrange the various sweet dipping options you’ve chosen around the bunny. For a truly festive and immersive look, consider creating a “grass” effect by scattering green-tinted coconut flakes (made by mixing coconut with a drop of green food coloring) or fresh mint leaves around the base of the bunny. A small serving knife or a cute spreader can be placed nearby for guests who prefer to apply the cheeseball to their dippers.
- Can children help make this Bunny Butt Cheeseball? Absolutely! This is a fantastic and fun recipe for getting kids involved in the kitchen. They can help with many steps: mixing the ingredients (under supervision), rolling the balls into shapes, coating them in the fluffy coconut, and especially enjoy the creative task of decorating the adorable toes with Skittles. It’s a wonderful, memorable, and mess-friendly Easter activity that fosters creativity and helps build kitchen confidence.
- How long can the cheeseball sit out at room temperature? Due to the cream cheese, it’s best not to leave the cheeseball at room temperature for more than 2 hours to ensure food safety and maintain its firm texture. Always serve chilled and promptly refrigerate any leftovers.
This Bunny Butt Cheeseball is truly more than just a dessert; it’s a delightful experience that embodies the joy, charm, and whimsy of the Easter season. With its adorable design and irresistible sweet flavor, it’s sure to be the star of your holiday table, sparking smiles and happy conversations. Gather your ingredients, invite your loved ones to join the fun, and get ready to create a memorable treat that will have everyone hopping with delight!
Don’t forget to share your amazing Bunny Butt Cheeseball creations with us! We love seeing how you bring these festive and easy recipes to life. Wishing you a very Happy Easter and a wonderful, sweet spring season!