
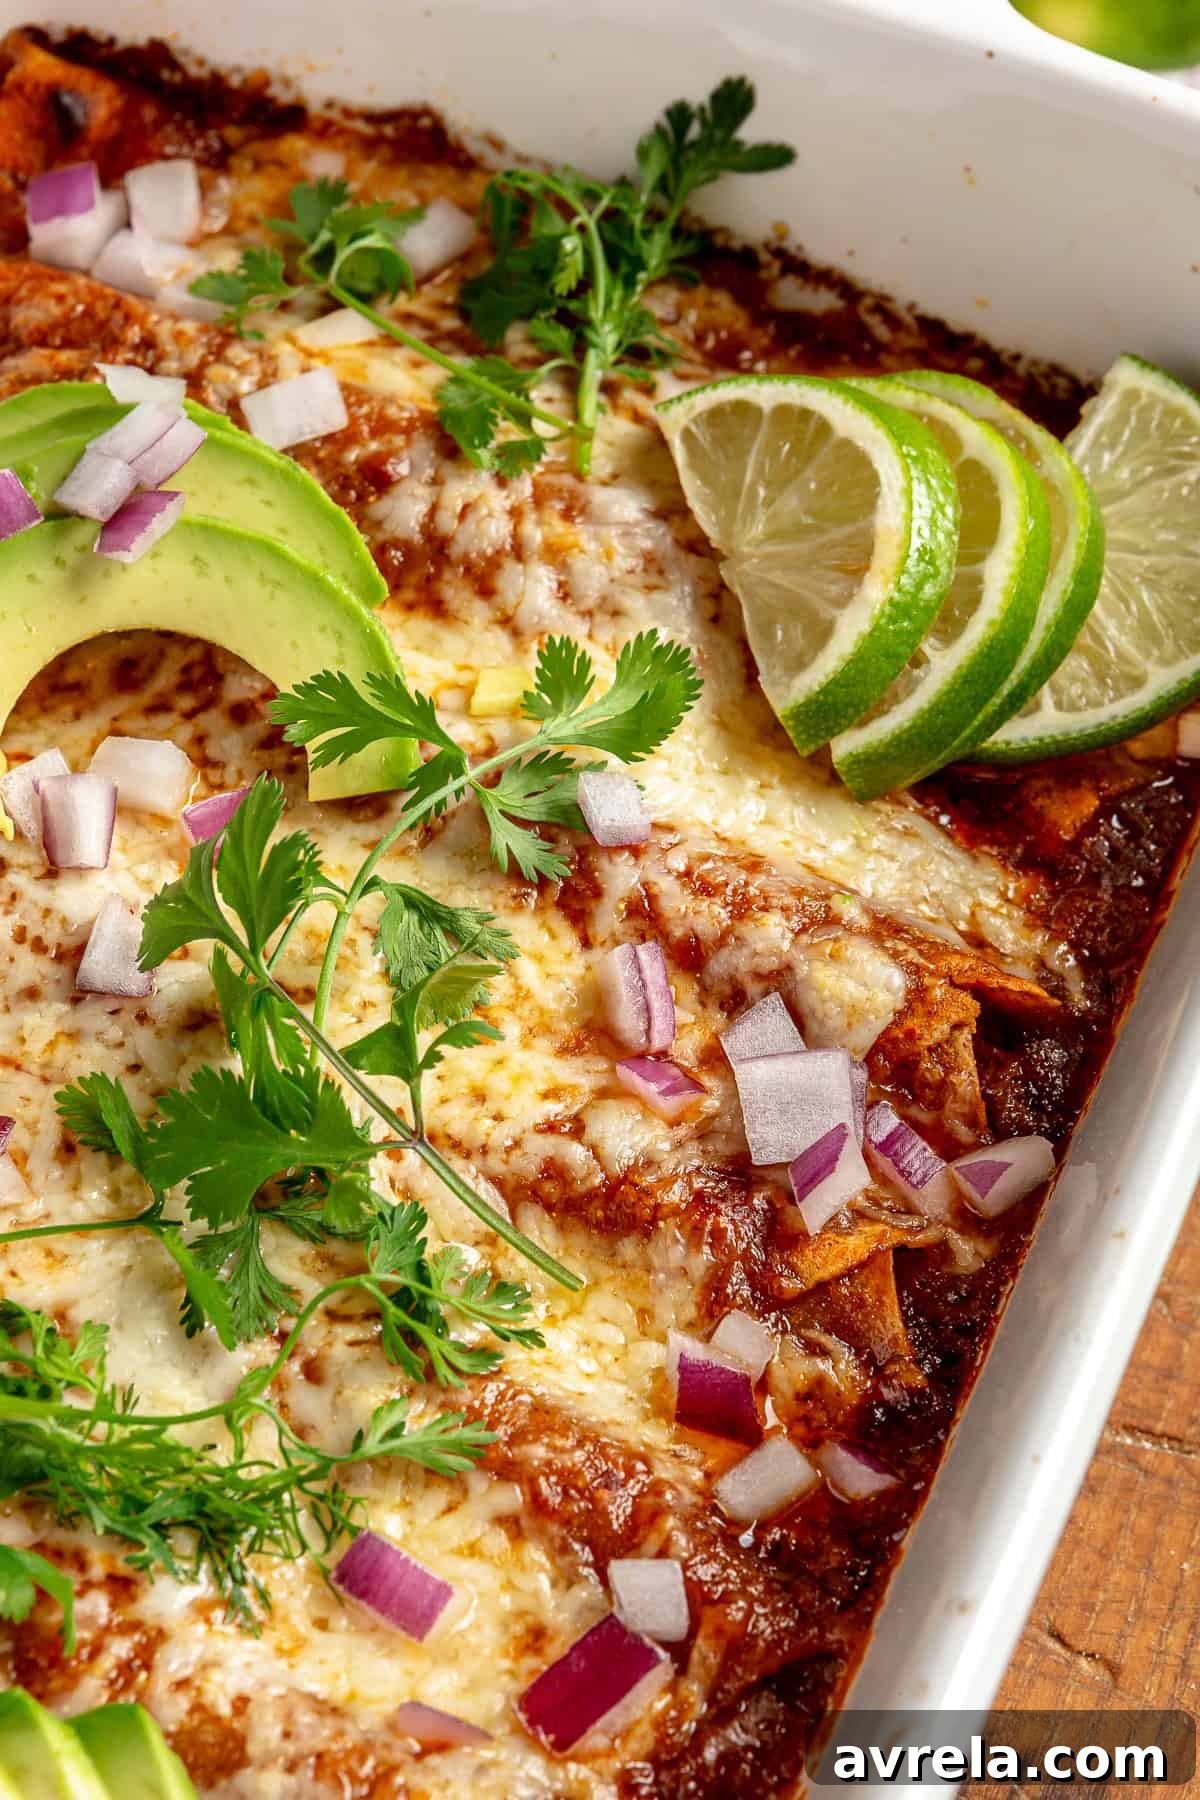
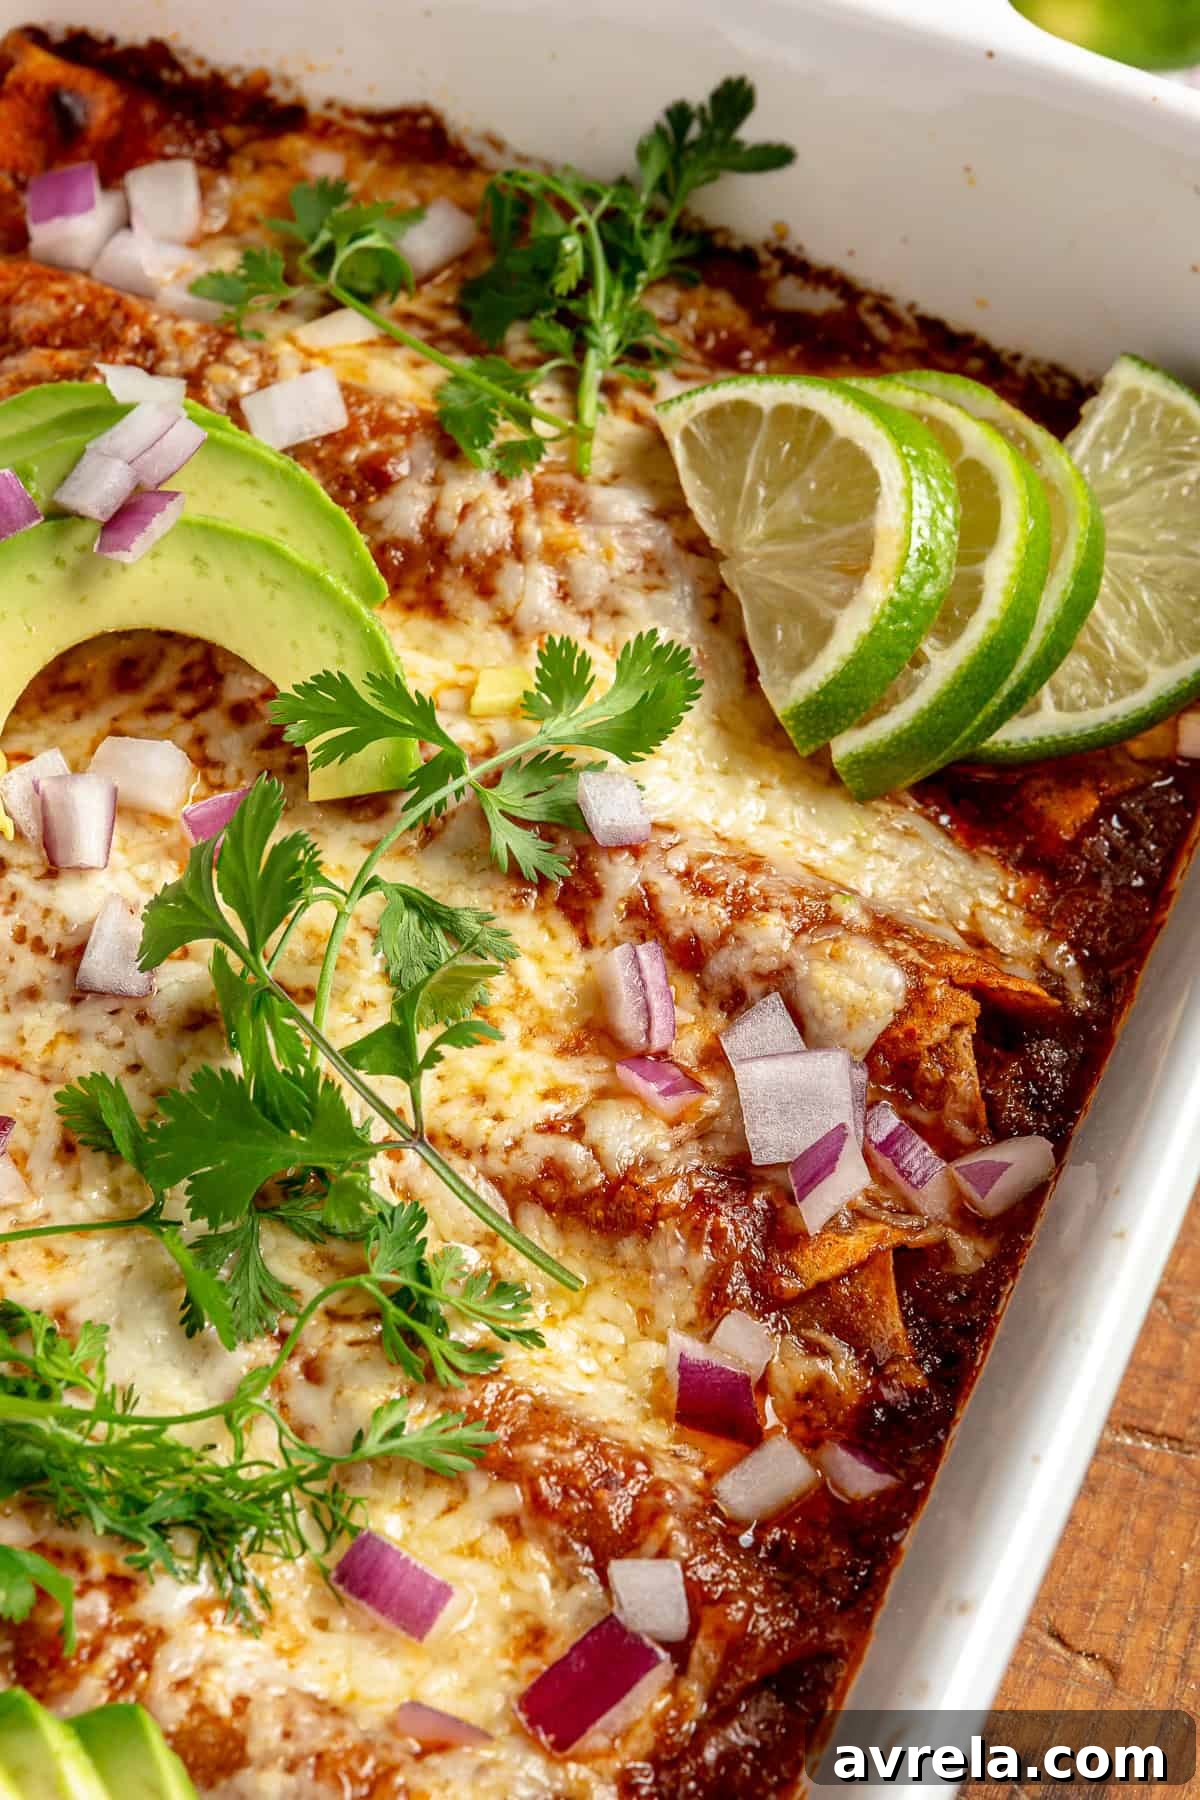
As a devoted fan of Mexican cuisine, I’m always on the lookout for a dish that truly captures the vibrant flavors and satisfying warmth of this incredible food culture. While tacos often steal the spotlight as my go-to, these ultimate Freezer-Friendly Beef Enchiladas are a formidable contender, offering an experience so rich and comforting, they just might become your new favorite. Whether you’re whipping up a batch to enjoy fresh for dinner tonight or preparing them in advance to stash in your freezer for those inevitably hectic evenings, these enchiladas promise an amazing taste sensation every single time.
Is there anything more delightful than easy-to-make, perfectly seasoned, and utterly delicious beef enchiladas? I’m confident that once you try this recipe, you’ll find yourself making them on repeat. Especially if you’re already a fan of my One-Pan Enchilada Skillet, you’ll discover that these enchiladas are simply too good to pass up. They offer a harmonious blend of tender, flavorful beef, creamy refried beans, and a rich, savory enchilada sauce, all encased in soft tortillas and topped with gooey cheese. It’s a complete meal that delivers on both taste and convenience, making it a perfect addition to any meal rotation.
Ultimate Freezer-Friendly Beef Enchiladas: Your Go-To High-Protein Meal Prep Solution
Life, especially with new additions like baby Hayes, teaches you the invaluable lesson of preparation. Welcoming our little one home has been pure bliss, and while we’re still navigating the beautiful chaos of establishing a new routine, maintaining a healthy and nourishing diet remains a top priority. I quickly realized that spontaneous, elaborate cooking would be a luxury I wouldn’t always have, making ahead-of-time meal planning absolutely essential. My husband, Bridge, and I were incredibly grateful for the Chicken Pot Pie from my cookbook that I froze before Hayes arrived – it was a true lifesaver during those first busy weeks.
This experience reinforced my commitment to creating and sharing more freezer-friendly, prep-ahead meals, and these Freezer-Friendly Beef Enchiladas have quickly risen to the top of my list. They represent the perfect intersection of convenience, nutrition, and incredible flavor. High in protein, bursting with a delicious blend of seasoned beef, creamy refried beans, and a delectable enchilada sauce, this is a wholesome meal you can confidently serve any day of the week, knowing it was made with care and packed with goodness. It’s designed to simplify your life without compromising on the rich, satisfying taste that homemade meals bring.
The Heart of the Meal: Premium Grass-Fed Beef and the Perfect Enchilada Sauce
Let’s dive into what makes these enchiladas truly exceptional, starting with the star ingredient: organic, grass-fed ground beef. This superfood forms the high-quality, high-protein base of our dish. Expertly seasoned and cooked to perfection, the beef is incredibly flavorful and rich in nutrients. I’m a huge advocate for ground beef due to its versatility, ease of cooking, and dense nutritional profile. For more insights into why I’ve come to love it as a dietitian, you can read my detailed blog post here.
The seasoned beef is further enhanced with mild green chiles and cooked in collagen-boosting bone broth, creating a savory mixture that’s satisfying enough to eat on its own. But the magic truly unfolds when this incredible beef filling is paired with our creamy, fiber-rich refried beans. These aren’t just any refried beans; they’re elevated with more broth, fragrant garlic and onion, chili powder, salt, and a touch of ghee, making them irresistibly smooth and flavorful. Are you drooling yet?
If not, you surely will be when you envision the assembly process: warming your chosen tortillas (I highly recommend Siete Foods cassava tortillas for their excellent texture and gluten-free nature), dipping each one in a vibrant red enchilada sauce, then generously filling them with the unbelievably tasty beef and bean mixture. Each tortilla is rolled tightly, nestled into a baking dish, and then completely covered with the remaining enchilada sauce and a generous layer of shredded cheese. The layers of flavor and texture come together to create a truly unforgettable experience.
And to truly bring all those amazing flavors into perfect harmony, don’t forget the vibrant garnishes. A sprinkle of fresh cilantro, slices of creamy avocado, and a bright squeeze of lime juice will elevate your enchiladas from delicious to absolutely divine. These simple additions provide a burst of freshness that cuts through the richness, creating a perfectly balanced bite every time.
The Best Beef Enchiladas for Any Occasion
These Freezer-Friendly Beef Enchiladas are, without a doubt, a culinary game-changer. They excel whether you’re planning a convenient, healthy, and delicious meal to enjoy right away, or if you’re preparing for future gatherings with friends and family. The beauty of this recipe lies in its incredible adaptability and consistent deliciousness. No matter how or when you choose to serve them, your taste buds are guaranteed to celebrate!
Bridger and I have become completely obsessed with these enchiladas. Honestly, I could easily devour another batch right now. So, you can probably guess what I’ll be doing during Hayes’ next nap – prepping our next pan to ensure we always have this incredible meal on hand! I truly hope you love these enchiladas as much as we do, and that they bring joy and ease to your meal times.
Essential Enchilada Ingredients: What You’ll Need
To create these incredibly satisfying freezer-friendly beef enchiladas, gather the following high-quality ingredients. Each component plays a crucial role in building the depth of flavor that makes this dish so special.
For the Beef:
- Avocado oil
- Yellow onion
- Garlic cloves
- Organic grass-fed ground beef (90% lean / 10% fat or 85% lean for extra moisture)
- Kosher salt
- Chili powder
- Smoked paprika
- Garlic powder
- Dried oregano
- Ground cumin
- Mild green chiles
- Low-sodium beef bone broth
For the Beans:
- Ghee
- Yellow onion
- Garlic cloves
- Chili powder
- Kosher salt
- Refried beans (Trader Joe’s fat-free refried beans are highly recommended)
- Low-sodium beef broth
To Assemble:
- Cassava flour tortillas (such as Siete Foods)
- Red enchilada sauce (I prefer Siete Foods)
- Shredded goat cheddar cheese
To Garnish:
- Fresh cilantro, chopped
- Large avocado, sliced thin
- Lime wedges
Step-by-Step Guide: How To Make Flavorful Beef Enchiladas
Making these beef enchiladas is a rewarding process that guarantees a delicious meal every time. Follow these detailed steps to achieve perfect results, whether you plan to bake them fresh or freeze them for later enjoyment.
For the Beef Filling:
- In a large skillet, heat the avocado oil over medium heat.
- Once the oil is hot, add the diced yellow onions and ground beef. Break up the meat with the back of a wooden spoon. Cook undisturbed for about five minutes, allowing the beef to brown nicely on one side. Then, stir and continue cooking until the meat is no longer pink, which should take an additional 3-5 minutes.
- If there’s any excess grease or liquid, carefully drain it off. Add the kosher salt, chili powder, smoked paprika, garlic powder, dried oregano, and ground cumin. Stir well to ensure the meat is evenly coated with all the fragrant spices. Allow the spices to toast for about 2 minutes to deepen their flavor.
- Stir in the mild green chiles and low-sodium beef bone broth. Bring the mixture to a simmer and cook, uncovered, until most of the liquid in the pan has reduced and the sauce has thickened, which typically takes about 4 more minutes.
- Remove the beef filling from the heat and let it cool completely to room temperature before proceeding with assembly.
For the Creamy Refried Beans:
- In a medium pot, add the ghee and heat it over medium heat.
- Once the ghee is hot and melted, add the diced yellow onions. Cook until they become translucent, which usually takes about 5 minutes. Then, add the minced garlic and cook for another 2 minutes, or until it becomes fragrant. Stir in the chili powder and kosher salt, toasting the chili powder lightly for about 1 minute to release its aroma.
- Add the refried beans to the pot. Using a spoon or whisk, mix vigorously to thoroughly combine all the ingredients until smooth.
- Begin to add the low-sodium beef broth in 1/4 cup increments. Stir well after each addition, continuing to add broth until the beans achieve a wonderfully creamy and smooth consistency. Once you’ve reached the desired texture with the appropriate amount of broth, cook the bean mixture on low heat for approximately 3 minutes.
- Remove the refried beans from the heat and allow them to cool completely to room temperature before assembling the enchiladas.
To Assemble, Bake Fresh, or Freeze:
- Pour half of the red enchilada sauce into a shallow bowl, preparing for tortilla dipping.
- Heat a medium, nonstick skillet over medium-low heat. Working one tortilla at a time, add it to the dry pan and heat for about 15 seconds per side, or until the tortilla becomes pliable and easy to roll without breaking.
- Once warmed, carefully dip each tortilla into the enchilada sauce, ensuring both sides are coated. Allow any excess sauce to drip off briefly before placing the tortilla into a 9×13-inch baking pan.
- Fill each tortilla with two tablespoons of the creamy refried beans and two tablespoons of the seasoned beef filling. Roll each tortilla tightly and arrange them in the baking pan, seam side down. Repeat this process until all tortillas are filled and arranged in the pan.
- Once all the enchiladas are assembled, pour the remaining red enchilada sauce evenly over them, ensuring every enchilada is well coated. Finally, generously sprinkle the shredded goat cheddar cheese over the top.
- To Bake Fresh: Preheat your oven to 375°F (190°C). Tightly wrap the baking dish with aluminum foil to prevent the enchiladas from drying out. Transfer the covered dish to the middle rack of the preheated oven and bake for 20-25 minutes. Remove the foil and continue baking for another 10 minutes, or until the cheese is beautifully bubbly and melted. For an extra crispy top, you can broil on high for 2-3 minutes, but watch carefully to prevent burning! Garnish with fresh cilantro, sliced avocado, and a squeeze of lime before serving. Enjoy!
- To Freeze for Later: Once assembled and covered with sauce and cheese, securely wrap the entire baking dish with plastic wrap, then an additional layer of aluminum foil. This double wrapping helps prevent freezer burn. Label with the date and cooking instructions. Freeze for up to 3 months.
Reheating Frozen Enchiladas: Your Guide to a Seamless Meal
- Preheat the Oven: Set your oven to 375°F (190°C).
- Prepare the Dish: Remove the enchiladas directly from the freezer. If they are already in a freezer-safe baking dish, you can place them straight into the oven. Otherwise, transfer them to an appropriate oven-safe dish.
- Cover with Foil: To maintain moisture and prevent the enchiladas from drying out, cover the dish tightly with aluminum foil. This helps them heat evenly without becoming tough.
- Bake Covered: Place the covered dish in the preheated oven and bake for approximately 45 minutes. This extended covered baking time allows the core of the frozen enchiladas to heat through thoroughly.
- Uncover and Continue Baking: After 45 minutes, carefully remove the foil. Continue baking for an additional 15 minutes. This crucial step helps the cheese melt beautifully and develop a slight crispness on the tortillas, enhancing the overall texture.
- Check for Doneness: Ensure the enchiladas are heated all the way through and the cheese is bubbling and golden. If they need a little more time, bake for a few extra minutes.
- Serve: Once fully reheated, remove the dish from the oven and let it rest for 2-3 minutes before serving. This allows the heat to redistribute and makes them easier to handle. Garnish as desired with cilantro, avocado, and lime.
Additional Tips for Freezing and Reheating:
- Thawing Option: For quicker reheating, you can thaw the enchiladas in the refrigerator overnight. Thawed enchiladas will require less baking time; aim for 20-25 minutes covered, then 5-10 minutes uncovered.
- Preventing Sogginess: To achieve the best texture and avoid soggy tortillas, ensure the enchiladas are wrapped very tightly when freezing to prevent ice crystal formation. During reheating, covering them initially locks in moisture, while uncovering later allows excess moisture to evaporate, preventing a watery consistency.
Beef Enchiladas Recipe: Customizations and Common Questions
One of the beauties of these Freezer-Friendly Beef Enchiladas is their versatility. Feel free to adapt the recipe to your preferences or dietary needs with these simple substitutions and answers to common questions.
Ingredient Swaps:
- Dairy Alternatives: If goat cheddar isn’t your preference or isn’t available, feel free to substitute with regular shredded cheddar, Monterey Jack, or even a spicy pepper jack for an extra kick. For the ghee, regular butter works perfectly well if you don’t have dietary restrictions.
- Tortilla Choices: While I love Siete Foods cassava flour tortillas for their gluten-free properties and excellent pliability, traditional flour tortillas or your favorite gluten-free tortillas will also work. Just be aware that some gluten-free options might require a little testing to ensure they hold up well during the prep and cooking process.
- Meat Options: For a lighter alternative, ground chicken or ground turkey can easily replace the grass-fed ground beef without sacrificing flavor. Adjust seasoning as needed for your chosen meat.
- Refried Beans: I’ve found that the fat-free refried beans from Trader Joe’s create an exceptionally creamy bean mixture in this recipe. However, any good quality refried beans can be used.
- Enchilada Sauce: While red enchilada sauce provides a classic flavor, you could experiment with a green enchilada sauce for a different, tangy profile.
Are enchiladas better with corn or flour tortillas?
Traditionally, corn tortillas are more commonly used in authentic Mexican enchiladas, offering a distinct flavor and texture. However, the “better” choice truly comes down to personal preference and dietary considerations. Flour tortillas are a popular option for their softness and ease of rolling, especially if you don’t have any dietary restrictions. For those seeking gluten-free options, like myself, cassava tortillas (as used in these Freezer-Friendly Beef Enchiladas) or other GF varieties are excellent choices that provide a wonderful texture and hold up well to the rich fillings.
What else can you put in enchiladas?
The beauty of enchiladas is their incredible flexibility! You can really use almost any combination of ingredients you like. Beyond the classic ground beef, turkey, or chicken, consider adding sautéed vegetables such as bell peppers, zucchini, or corn for extra nutrients and flavor. Different cheeses like Oaxaca, Cotija, or even a simple cheddar blend can be incorporated. For serving, don’t forget toppings like a dollop of sour cream or Greek yogurt, a scoop of fresh salsa, or a generous dollop of guacamole. The options are truly limitless, allowing you to customize your enchiladas to suit any craving or dietary need!
Looking for More Easy, Healthy, and Delicious Recipes?
If you loved these Freezer-Friendly Beef Enchiladas and are seeking more convenient and wholesome meal ideas, explore some of my other popular recipes:
- Baked Beef Tacos
- Crockpot Beef Barbacoa
- One-Pan Enchilada Skillet
- Creamy Crockpot Sesame Chicken
- One-Pan Beef and Broccoli
Click here to watch the reel I made of this recipe!
Freezer-Friendly Beef Enchiladas
Rating: 5 out of 5 stars (from 1 vote)
By Rachael DeVaux
Prep: 20 mins | Cook: 40 mins | Total: 1 hr
Servings: 4
Print Recipe
These Freezer-Friendly Beef Enchiladas are perfect to enjoy fresh, or keep in the freezer for when you need dinner in a pinch. Either way, your tastebuds will thank you, they’re too good!