
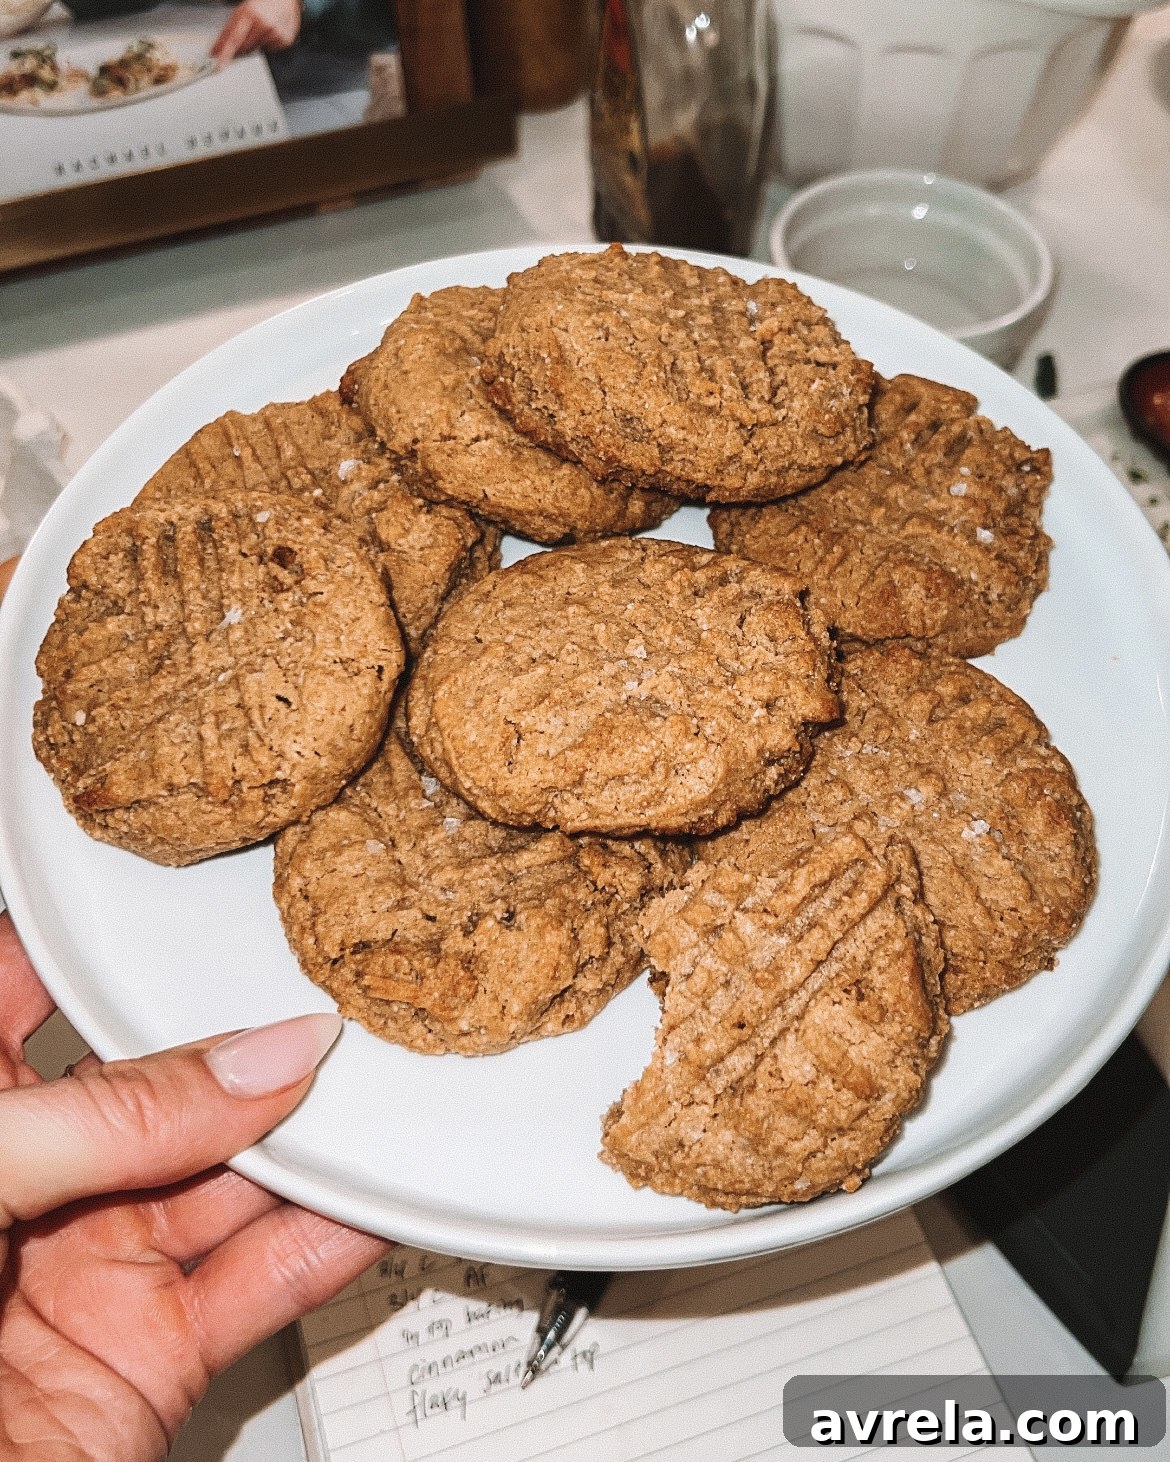
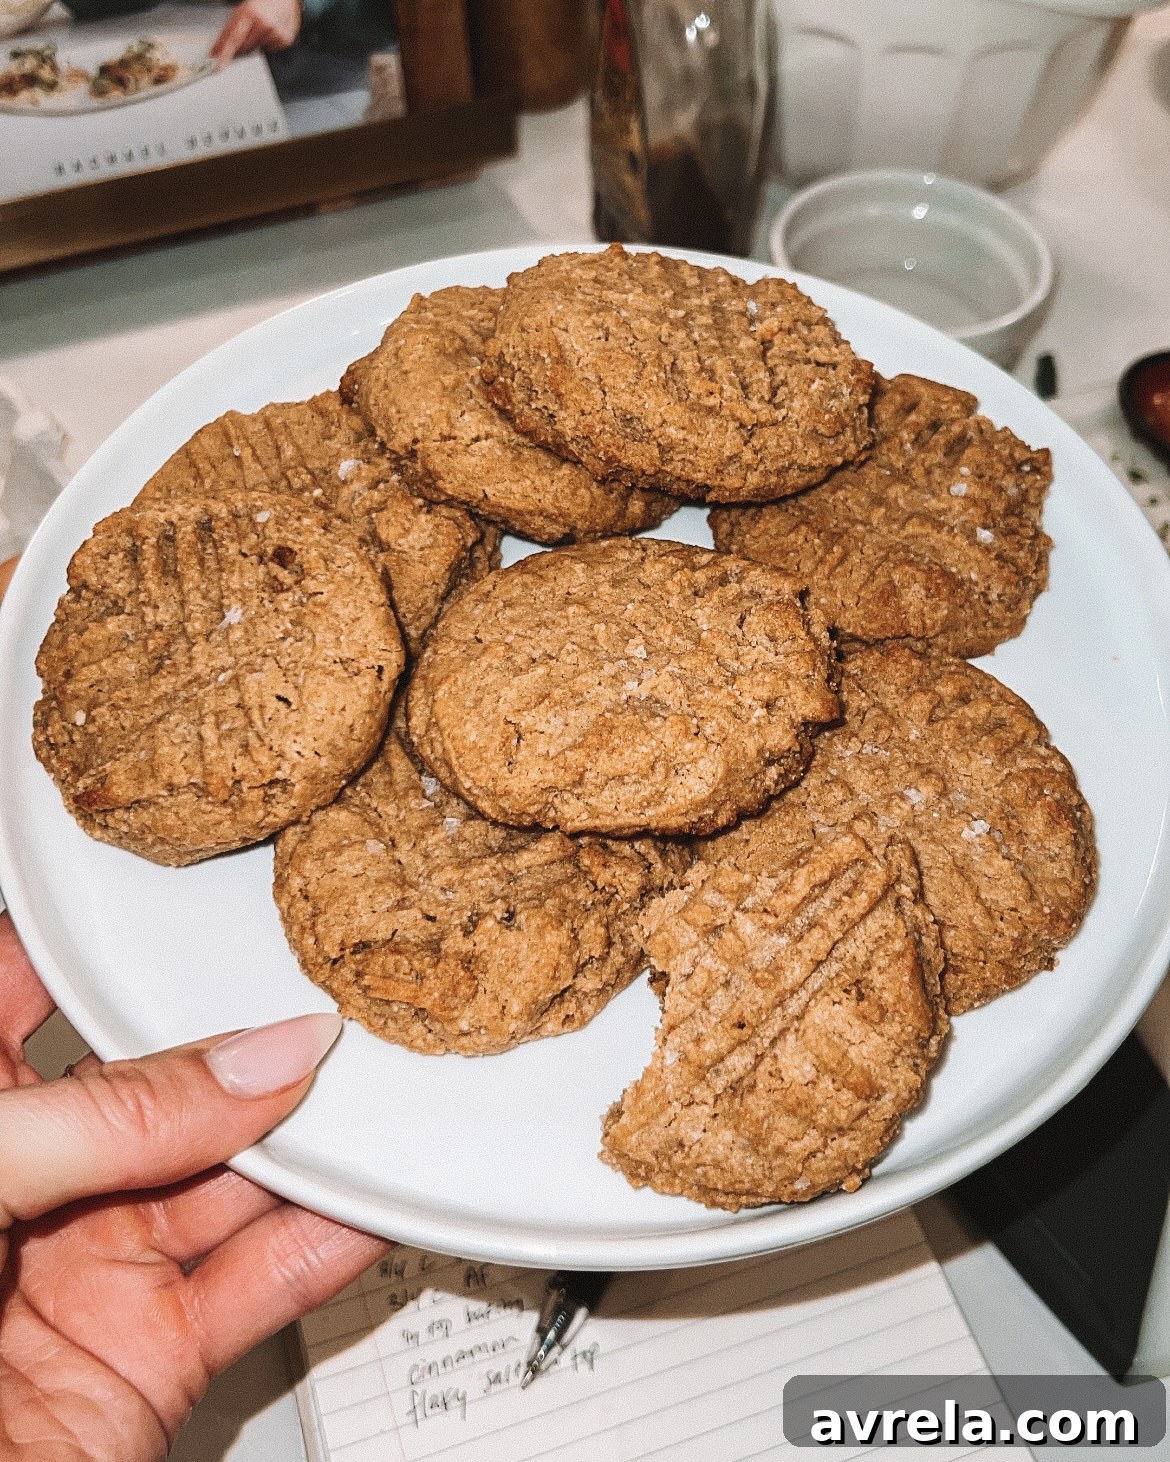
Explore the making of these delightful cookies! Watch my recipe reel on Instagram for a visual guide.
Irresistible Gluten-Free Peanut Butter Cookies: A Simple & Healthy Treat
★
★
★
★
Rachael DeVaux
10 minutes
15 minutes
25 minutes
1 dozen cookies
Print Recipe
These Gluten-Free Peanut Butter Cookies are the ultimate answer to your sweet cravings! Perfectly balanced, not overly sweet, and incredibly satisfying, they’re designed to curb your sweet tooth without compromising on taste or your dietary preferences. With a delightful texture and rich peanut butter flavor, these cookies will become your new go-to for a wholesome, guilt-free treat.
Why You’ll Love These Gluten-Free Peanut Butter Cookies
In a world where healthy eating often feels like a compromise, these gluten-free peanut butter cookies stand out as a true delight. They offer the classic comfort of a homemade peanut butter cookie but with a wholesome twist. Whether you’re managing a gluten intolerance, trying to reduce refined sugars, or simply seeking a delicious and quick dessert, this recipe is crafted for you.
- Naturally Gluten-Free: Made with almond flour, these cookies are safe and delicious for those avoiding gluten.
- Refined Sugar-Free: Sweetened primarily with maple syrup, offering a natural and less processed alternative to white sugar.
- Quick and Easy: From mixing to baking, these cookies are ready in just 25 minutes, making them perfect for last-minute cravings or busy schedules.
- Rich and Satisfying: The combination of natural peanut butter and almond flour creates a deeply flavorful and satiating treat.
- Minimal Ingredients: You likely already have most of these simple, wholesome ingredients in your pantry.
Forget bland, crumbly gluten-free baked goods. These cookies are wonderfully soft, chewy, and packed with that irresistible peanut butter goodness everyone loves. They are ideal for a mid-afternoon snack, a post-dinner dessert, or even a healthy breakfast accompaniment.
Ingredients
-
1 pasture-raised egg
A crucial binder for these gluten-free cookies, the egg helps hold everything together and contributes to a tender texture. Opting for pasture-raised eggs can also provide richer flavor and nutritional benefits.
-
3 tbsp maple syrup
Our natural sweetener of choice. Maple syrup offers a subtle caramel note and a pleasant sweetness without the need for refined sugars. Ensure you use pure maple syrup, not pancake syrup, for the best flavor and health benefits. You could substitute with honey or agave nectar, adjusting for sweetness.
-
2 tbsp melted coconut oil
Coconut oil adds moisture and healthy fats to the cookies, helping them achieve a soft chewiness. Make sure it’s melted and then slightly cooled before adding to prevent scrambling the egg. Unsalted butter or a neutral-flavored oil like avocado oil could be used as alternatives.
-
1 tsp vanilla extract
A baking staple, vanilla extract enhances all the other flavors in the cookie, adding depth and warmth. Pure vanilla extract is always recommended for superior taste.
-
3/4 cup organic peanut butter, (no added sugar)
The star of the show! Use organic, natural peanut butter with no added sugar or hydrogenated oils. The only ingredients should be peanuts and possibly salt. This ensures the best flavor and a healthier cookie. Creamy peanut butter works best for a smooth dough, but crunchy can add a nice texture variation.
-
3/4 cup almond flour
This is the key to our gluten-free texture. Almond flour is finely ground blanched almonds, providing a delicate crumb and a boost of protein and healthy fats. It’s important to use almond flour, not almond meal, for the best texture. Do not substitute with other gluten-free flours like coconut flour without significant recipe adjustments, as they absorb liquids very differently.
-
1/4 tsp baking soda
Baking soda acts as a leavening agent, helping the cookies rise slightly and achieve a soft, chewy interior. Ensure your baking soda is fresh for optimal results.
-
cinnamon (optional, to taste)
A dash of cinnamon can add a lovely warmth and subtle spice that complements the peanut butter flavor beautifully. Adjust the amount to your preference, or omit if you prefer a pure peanut butter taste.
-
flakey sea salt (to top)
A sprinkle of flaky sea salt on top of the cookies before baking is a game-changer. It not only adds a beautiful visual appeal but also enhances the sweet and savory notes of the peanut butter, creating a gourmet touch.
Instructions
-
Prepare Your Oven: Preheat your oven to 350 degrees F (175 degrees C). While the oven heats, line a baking sheet with parchment paper. Parchment paper is essential for preventing sticking and ensuring easy cleanup.
-
Combine Wet Ingredients: In a medium-sized mixing bowl, whisk together the pasture-raised egg, maple syrup, melted and slightly cooled coconut oil, and vanilla extract until well combined. Next, add the organic peanut butter to this mixture. Continue whisking until the mixture is smooth and creamy, ensuring there are no lumps of peanut butter.
-
Incorporate Dry Ingredients: Gently fold in the almond flour, baking soda, and a pinch of cinnamon (if using) into the wet mixture. Use a spatula or wooden spoon to mix until just combined. Be sure to press down any small clumps of almond flour against the side of the bowl until the dough is smooth and uniform. Avoid overmixing, as this can lead to tougher cookies.
-
Form and Shape Cookies: Using a cookie scoop (approximately 1.5-2 tablespoons per cookie) or two spoons, drop rounded balls of dough onto the prepared parchment-lined baking sheet, leaving about 2 inches between each cookie. Now for the classic peanut butter cookie look: use the tines of a fork to gently press down on each dough ball, creating a criss-cross pattern. This helps flatten the cookies for even baking and gives them their signature appearance. Finally, sprinkle a tiny pinch of flakey sea salt over the top of each cookie.
-
Bake to Perfection: Place the baking sheet in the preheated oven and bake for 8-12 minutes. Baking times can vary depending on your oven, so keep an eye on them. The cookies are ready when their edges are lightly golden brown and the centers are just set. They may still seem soft in the middle but will firm up as they cool.
-
Cool and Enjoy: Once baked, remove the cookies from the oven and let them cool on the baking sheet for at least 10 minutes. This crucial cooling time allows them to firm up properly and prevents them from breaking when transferred. After cooling, transfer them to a wire rack to cool completely. Then, they are ready to be savored!
Expert Tips for the Best Gluten-Free Peanut Butter Cookies
Achieving cookie perfection is all about the details. Here are some pro tips to ensure your gluten-free peanut butter cookies turn out wonderfully every time:
- Choose Quality Peanut Butter: The type of peanut butter makes a huge difference. Always opt for natural, creamy peanut butter with only peanuts (and maybe salt) in the ingredients list. Avoid brands with added sugars, oils, or emulsifiers, as these can affect the cookie’s texture and overall health profile.
- Measure Almond Flour Accurately: Almond flour can be tricky. Too much, and your cookies will be dry; too little, and they might spread too much. Use a light hand or a kitchen scale for precise measurement.
- Don’t Overbake: Gluten-free cookies can go from perfectly baked to dry and crumbly very quickly. Keep a close watch on them, especially during the last few minutes. They should be just golden at the edges. Remember, they continue to cook slightly on the hot baking sheet even after removal from the oven.
- Cool Completely: Patience is key! Gluten-free cookies are often more delicate when warm. Allowing them to cool fully on the baking sheet before transferring helps them set and prevents them from falling apart.
- Consider Add-Ins: Elevate your cookies with a handful of additions. Mini chocolate chips (dairy-free for a vegan option), chopped nuts (like walnuts or pecans), or a swirl of jam can transform these simple cookies into an even more decadent treat.
- Make Them Vegan: To make these cookies vegan, simply replace the pasture-raised egg with a “flax egg” (1 tablespoon ground flaxseed mixed with 3 tablespoons water, let sit for 5 minutes until gel-like).
Storage and Shelf Life
These gluten-free peanut butter cookies store beautifully, allowing you to enjoy them for days after baking:
- Room Temperature: Store cooled cookies in an airtight container at room temperature for up to 5-7 days.
- Refrigerator: For extended freshness, especially in warmer climates, store them in an airtight container in the refrigerator for up to 2 weeks.
- Freezer: These cookies freeze exceptionally well! Place cooled cookies in a single layer on a baking sheet to flash freeze for about an hour, then transfer them to a freezer-safe bag or container. They can be stored in the freezer for up to 3 months. Thaw at room temperature or warm slightly in the microwave for a quick treat.
Frequently Asked Questions About Gluten-Free Peanut Butter Cookies
- Q: Are these cookies suitable for individuals with nut allergies?
- A: No, this recipe heavily relies on peanut butter and almond flour, making it unsuitable for those with peanut or tree nut allergies. Always be mindful of allergies when preparing or serving.
- Q: Can I use a different type of flour besides almond flour?
- A: Almond flour has a unique fat and moisture content that is critical to this recipe’s success. Substituting with other gluten-free flours like coconut flour or oat flour would require significant adjustments to the liquid ratios and may result in a different texture. It’s best to stick with almond flour for this specific recipe.
- Q: Can I reduce the amount of maple syrup?
- A: While you can slightly reduce the maple syrup if you prefer a less sweet cookie, be aware that it also contributes to the cookie’s moisture and texture. Drastically reducing it might make the cookies drier or more crumbly. Start by reducing by 1/2 tablespoon if you wish to experiment.
- Q: My cookies spread too much! What went wrong?
- A: This could be due to a few factors: your oven temperature might be too low, your coconut oil was too warm when added, or your peanut butter might be too runny. Ensure your oven is accurately preheated, the coconut oil is just melted and cooled, and your peanut butter is thick and natural (not overly oily).
- Q: Can I make these ahead of time?
- A: Absolutely! The cookie dough can be prepared and refrigerated for up to 2-3 days. If chilling the dough, you might need to let it sit at room temperature for a few minutes before scooping, or you may need to press them with the fork more firmly.