
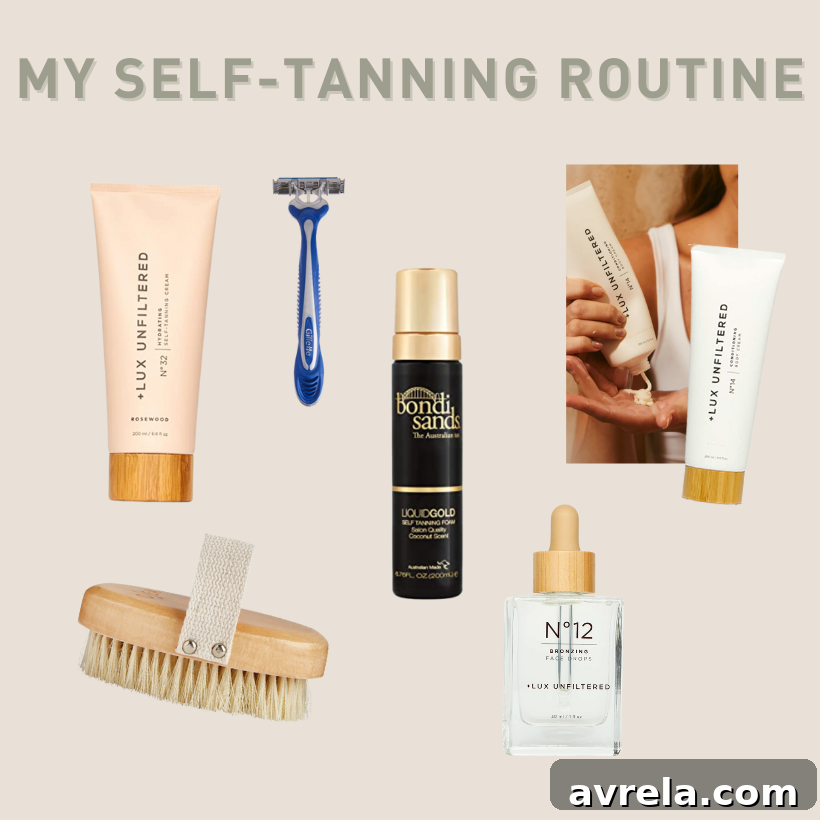
Achieve a Flawless, Year-Round Bronze: My Ultimate Self-Tanning Routine
Who doesn’t adore that sun-kissed glow? While a beautiful tan can make you feel radiant and confident, the traditional method of lounging under the sun’s powerful rays is, unfortunately, detrimental to your skin and overall health. Extended sun exposure is a leading cause of premature aging, sunspots, and significantly increases the risk of skin cancer. For those of us with busy schedules, finding hours to bake in the sun simply isn’t feasible, nor is it a healthy choice. This is where the magic of self-tanning steps in, offering a safe, convenient, and equally stunning alternative to achieve that coveted bronze look without any of the risks. Over the years, I’ve transformed my self-tanning journey from a hit-or-miss endeavor into a precise science, allowing me to maintain a beautiful, natural-looking tan all year long. I’ve experimented with countless products and refined my application techniques to ensure a streak-free, orange-free finish every single time. If you’re ready to unlock the secrets to a perfect, effortless, and healthy glow, then you’re in the right place. Let me walk you through my tried-and-true self-tanning routine, honed to perfection to ensure you never look like an Oompa Loompa again.
Why Choose Self-Tanning for Your Glow?
Embracing self-tanning goes far beyond just getting a nice color; it’s a commitment to skin health and smart beauty. The benefits are numerous and compelling:
- Skin Health Preservation: The most significant advantage is protecting your skin from harmful UV radiation. By avoiding sunbeds and prolonged sun exposure, you drastically reduce your risk of developing melanoma and other skin cancers.
- Prevent Premature Aging: UV rays are notorious for accelerating skin aging, leading to wrinkles, fine lines, and loss of elasticity. Self-tanners allow you to maintain youthful, supple skin for longer.
- Even & Controlled Tan: With self-tanning, you have complete control over the depth and evenness of your tan. Say goodbye to awkward tan lines and uneven patches caused by sun exposure.
- Year-Round Radiance: Whether it’s the dead of winter or a cloudy spring day, you can enjoy a beautiful glow whenever you desire, boosting your mood and confidence regardless of the weather outside.
- Time-Saving: Forget spending hours under the sun or at a tanning salon. A full self-tanning routine can be completed in a fraction of the time, fitting perfectly into even the busiest schedules.
- Customizable Shade: Many self-tanning products offer different shades or buildable formulas, allowing you to tailor your tan to your natural skin tone and desired intensity.
The Foundation: Preparing Your Skin for a Flawless Tan
The secret to a perfect, long-lasting self-tan isn’t just about the product; it’s overwhelmingly about the preparation. Skipping these crucial first steps is the most common reason for streaky, patchy, or uneven results. Think of your skin as a canvas; you want it to be smooth, clean, and even for the best possible outcome.
Thorough Exfoliation: The Key to an Even Canvas
Exfoliating is arguably the most vital step in the entire self-tanning process. It’s not just about sloughing off dead skin; it’s about creating an even surface that will absorb the self-tanner uniformly. Without proper exfoliation, the tanner can cling to dry patches, leading to darker spots on areas like elbows, knees, and ankles. This is what often results in that dreaded patchy or muddy look.
- Why it’s Crucial: Removes dead skin cells, smooths rough areas, and promotes even absorption of the tanning product, ensuring a streak-free and natural-looking finish that fades beautifully.
- How to Do It: Use a physical exfoliant like a body scrub, an exfoliating mitt, or a dry body brush. Focus on rougher areas like elbows, knees, ankles, and hands. Avoid oil-based scrubs as they can leave a residue that acts as a barrier to the self-tanner.
- Timing: Exfoliate 24 hours before you plan to apply your self-tanner. This gives your skin enough time to recover and settle after the scrubbing.
Shaving & Hair Removal: For a Silky Smooth Finish
Just like exfoliation, ensuring your skin is hair-free (if that’s your preference) is essential for an impeccably smooth and even tan. Hairs can prevent the self-tanner from reaching your skin directly, leading to speckled results, especially on legs. Moreover, shaving or waxing after applying self-tanner can inadvertently remove the tan, creating undesirable patches.
- Why it’s Important: Ensures direct contact between the self-tanner and your skin, preventing speckled appearances and facilitating a smooth, consistent application.
- Timing: Perform any hair removal (shaving, waxing, epilating) at least 24 hours before you plan to self-tan. This allows your pores to close and any minor irritations to subside, preventing the tanner from settling into open pores as tiny dark dots.
Choosing Your Self-Tanner: Finding Your Perfect Match
The market is flooded with self-tanning products, and finding the right one can feel overwhelming. The “best” product largely depends on your skin type, desired depth of tan, and personal preference for application method. I’ve experimented with various formulations, and understanding the differences can help you make an informed choice for your own routine.
- Mousses: Often a favorite for beginners and experienced users alike. Mousses are lightweight, easy to spread, and typically dry quickly. They usually come with a guide color, making it easier to see where you’ve applied the product.
- Lotions & Creams: These tend to be more moisturizing and can be great for dry skin. They often develop a more gradual tan, which is excellent for those who prefer a subtle build-up or are new to self-tanning.
- Gels: Similar to mousses in application, gels absorb quickly and provide a deep tan. They’re often lightweight and non-sticky.
- Drops: These are a game-changer for customizing your tan. You simply mix a few drops with your regular moisturizer (face or body) to create a custom tanning lotion. Ideal for maintaining a glow or subtly enhancing your natural color.
- Sprays: Can provide a very even finish, but require a steady hand and practice to avoid overspray and streaks. Excellent for hard-to-reach areas if you have help.
When selecting a product, consider factors such as the shade range (opt for something that complements your natural undertones), ingredients (look for nourishing components like hyaluronic acid or vitamin E), and user reviews. Always remember, a patch test on a small, inconspicuous area 24 hours before a full application is highly recommended, especially if you have sensitive skin.
The Application Process: Mastering the Art of the Streak-Free Tan
Once your skin is perfectly prepped and you’ve chosen your weapon of choice, it’s time for the main event: applying the self-tanner. This step requires patience and attention to detail, but with practice, you’ll become a pro at achieving a seamless, natural-looking glow.
Pre-Tan Hydration & Barrier Creation
Before you even open your self-tanner, apply a small amount of oil-free moisturizer to notoriously dry areas where tanner tends to grab more intensely. This includes your elbows, knees, ankles, wrists, and knuckles. This creates a protective barrier, preventing these areas from absorbing too much product and appearing unnaturally dark.
Applying the Self-Tanner: Methodical & Even
Always work in a well-lit area. I cannot stress enough the importance of a tanning mitt. This essential tool protects your hands from staining and helps distribute the product smoothly and evenly. Start with a small amount of product on the mitt.
- Lower Body First: Begin with your legs. Apply the product in long, sweeping upward motions. Work in sections, ensuring complete coverage before moving to the next. Use less product around your knees and ankles, blending it outwards from the main application.
- Upper Body: Move to your torso, working from the stomach upwards to the chest and back. For your back, you might need a back applicator or a helping hand. Use the same long, sweeping motions.
- Arms: Apply to your arms, again using less product on your elbows. Blend carefully around your wrists.
- Hands & Feet: These are the trickiest areas. Use the residual product left on your mitt (or a tiny fresh dot) and lightly buff it over your hands and feet. Pay special attention to blending around knuckles, in between fingers and toes, and up towards the wrist and ankle bones. A clean makeup brush can be excellent for blending these delicate areas.
- Face (Optional): If your product is suitable for the face, apply it sparingly, blending into your hairline and down your neck. Alternatively, use specific facial tanning drops or a gradual facial tanner.
Drying Time & Waiting: Patience is a Virtue
This is crucial for avoiding streaks and transferring color to clothing or bedding. Most self-tanners require several hours to fully develop, but the initial drying time is important.
- Dry Completely: Allow the self-tanner to dry fully before putting on any clothes. This can take anywhere from 10-30 minutes, depending on the product and humidity. Stand in front of a fan or use a hairdryer on a cool setting to speed up the process.
- Wear Loose Clothing: Once dry, wear loose, dark clothing to avoid rubbing off the product and causing streaks.
- Avoid Water: Do not shower, sweat excessively, or get wet for the development time recommended on your product (usually 6-8 hours).
- Rinse: After the development time, take a lukewarm shower to rinse off the guide color. Avoid harsh scrubbing during this first rinse.
Maintaining Your Glorious Glow: Prolonging Your Tan
You’ve achieved a beautiful, golden tan! Now, the goal is to keep it looking fresh and even for as long as possible. Maintenance is just as important as the initial application and ensures a graceful fade, preventing patchiness.
Regular Moisturizing: Your Tan’s Best Friend
Hydrated skin not only feels better but also holds onto a tan longer and helps it fade more evenly. Dry skin causes skin cells to shed more rapidly, taking your tan with them.
- Why it’s Crucial: Keeps your skin supple, preventing cracks and dryness where the tan could become patchy. It significantly extends the life of your self-tan.
- How to Do It: Apply a rich, non-oil-based moisturizer at least once, ideally twice, daily after your tan has fully developed and you’ve had your first rinse.
- Product Choice: Look for hydrating ingredients like hyaluronic acid, glycerin, or shea butter. Some moisturizers also contain a hint of gradual tanner, which is excellent for subtle top-ups.
Repeat: When and How to Reapply
Self-tans typically last between 5-10 days, depending on your skin type, how well you prepped, and how diligently you moisturize. You’ll notice it gradually starting to fade.
- Re-exfoliate: Before reapplying a full tan, ensure you gently exfoliate again to remove any remaining old tan and dead skin cells. This prevents color build-up and ensures a fresh, even base for your next application.
- Top-Ups: For a quick refresh between full applications, consider using a gradual tanning lotion every 2-3 days. This adds a subtle boost of color and keeps your tan looking consistent.
- Full Reapplication: Plan for a full reapplication every 7-10 days, following all the preparation and application steps meticulously.
Common Self-Tanning Mistakes to Avoid for a Natural Look
Even with the best products, certain errors can sabotage your self-tanning efforts. Being aware of these common pitfalls can help you achieve a consistently beautiful tan.
- Skipping Skin Preparation: As emphasized, not exfoliating or shaving 24 hours prior is a recipe for disaster, leading to patchy and uneven results.
- Applying Too Much Product: Overloading areas, especially knees, elbows, hands, and feet, will result in unnaturally dark spots. Less is often more with self-tanner.
- Forgetting a Tanning Mitt: Bare hand application leads to stained palms and an inconsistent finish. Always use a mitt for even application and clean hands.
- Ignoring Tricky Areas: Rushing through areas like the back of your neck, armpits, behind the knees, and your back can leave obvious white spots.
- Not Allowing Enough Drying Time: Dressing too quickly or getting wet before the tan has fully developed will cause streaks, rub-offs, and an uneven finish.
- Neglecting Hands and Feet: These areas are often tell-tale signs of a fake tan if not blended properly. Use minimal product and blend meticulously.
- Failing to Moisturize: Lack of post-tan hydration causes the tan to fade quickly and unevenly, leading to patchiness.
- Using Oil-Based Products Post-Tan: Oils can break down the DHA (the active ingredient in self-tanner), causing your tan to disappear faster. Stick to oil-free moisturizers.
Expert Tips for a Truly Natural-Looking Tan
Beyond the fundamental steps, these extra tips can elevate your self-tanning game and ensure your glow looks as authentic as possible:
- Start Light: If you’re new to self-tanning or unsure of a product, always opt for a lighter shade or a gradual tanner first. You can always build up the color.
- Patch Test: Before a full body application, do a patch test on a small, hidden area (like your inner arm) to check for allergic reactions and to see how the color develops on your skin.
- Use a Fan for Faster Drying: A cool fan or hairdryer can significantly speed up the drying process, reducing the risk of streaks and transfer.
- Wear Loose, Dark Clothing: After application, choose loose, dark clothing to prevent the product from rubbing off and to avoid staining lighter fabrics.
- Consider a Back Applicator: For those tricky-to-reach areas on your back, a specialized back applicator or asking a friend for help can make all the difference.
- Blend into Hairline and Neck: If tanning your face, blend the product meticulously into your hairline and down your neck to avoid harsh lines. Use a damp cloth to lightly wipe eyebrows and the hairline if needed.
- Wipe Nails & Cuticles: Immediately after application, use a damp cloth or cotton swab to wipe your fingernails, toenails, and cuticles. These areas can absorb excess product and turn orange.
- Shower with Lukewarm Water: For your first post-tan rinse, use lukewarm water and avoid hot water or harsh scrubbing, which can strip away your tan.
Embracing self-tanning has completely transformed how I achieve my desired bronze glow. It’s a commitment to both beauty and health, allowing me to enjoy a radiant complexion without compromising my skin. By following this meticulous routine – from rigorous preparation and careful application to diligent maintenance – you too can master the art of the perfect, streak-free, and natural-looking self-tan. Ditch the sun damage and welcome a year-round luminous glow that will have everyone asking where you’ve been on vacation. With a little practice and the right approach, you’ll be radiating confidence and a beautiful bronze hue every single day.