
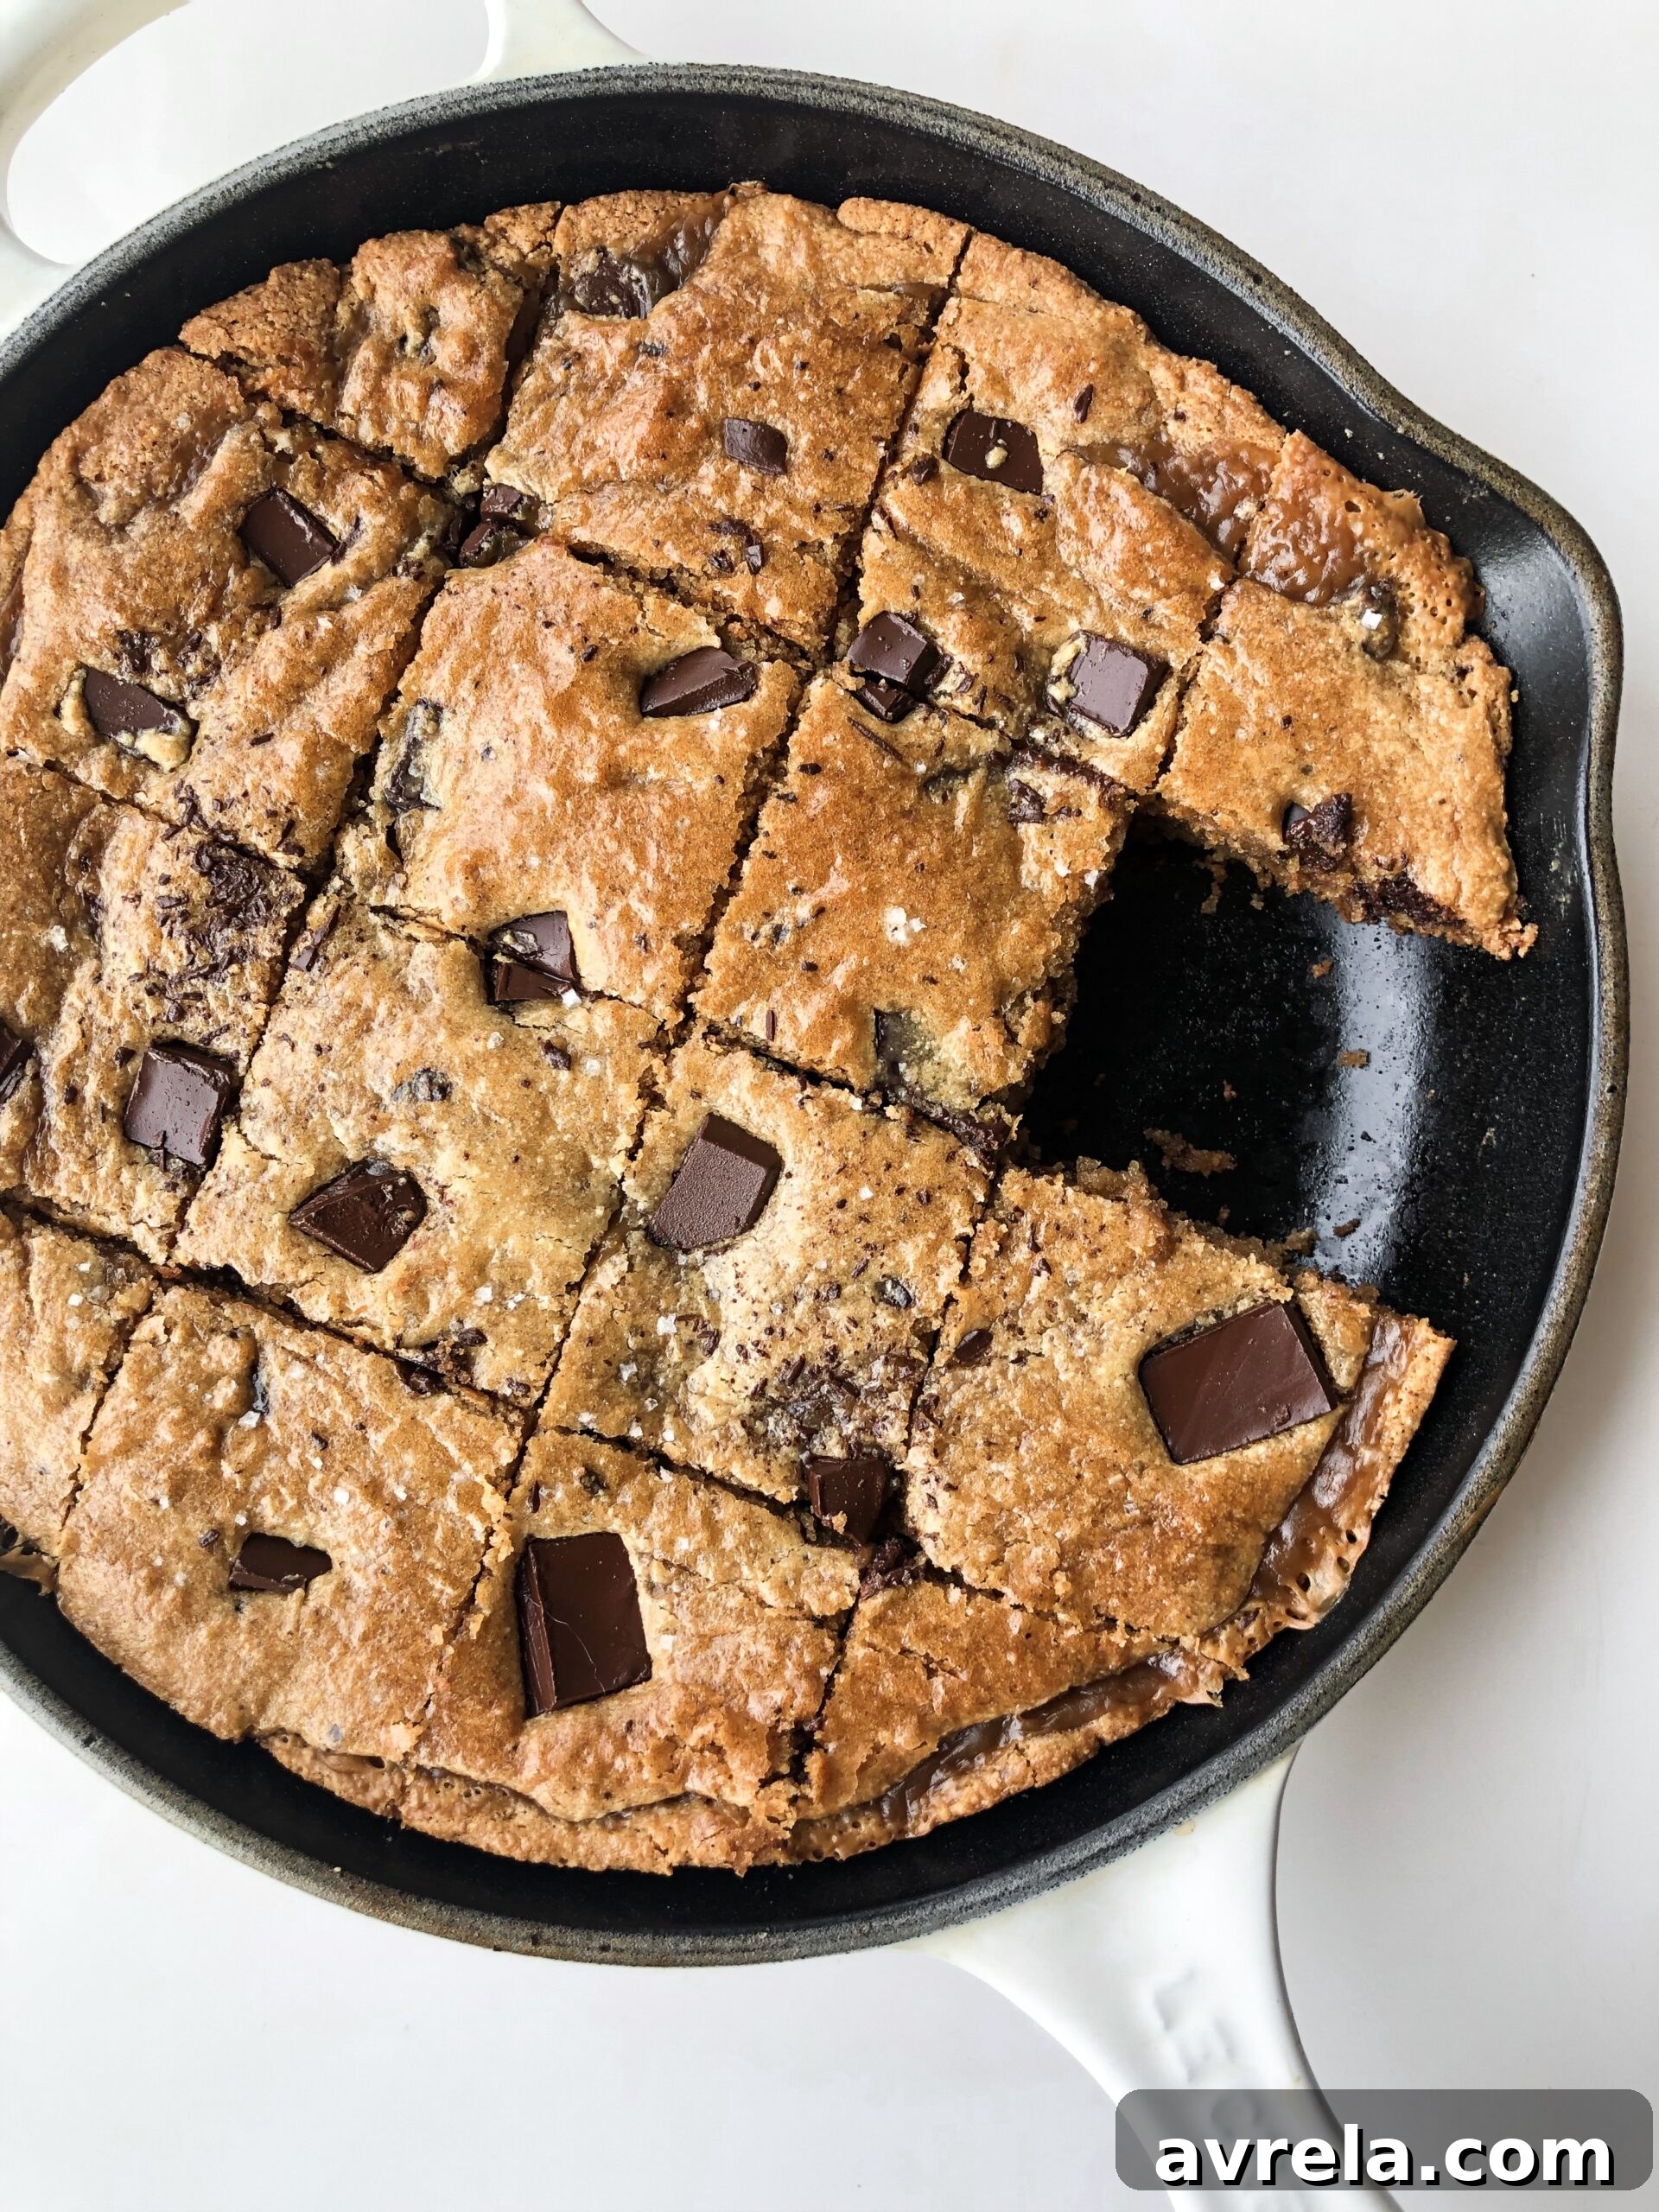
Decadent Caramel Cookie Skillet Bars: A Wholesome Indulgence
By Rachael DeVaux
Cook Time: 40 mins
Total Time: 1 hr
Servings: 8
Prepare to be amazed by these Caramel Cookie Skillet Bars, a truly exceptional dessert that seamlessly blends two of Rachael DeVaux’s most celebrated recipes: the rich Cashew Chocolate Chip Cookie Skillet and the luscious 5-Ingredient Healthy Salted Caramel Sauce. This incredible fusion results in a dessert that is not only ridiculously delicious but also thoughtfully crafted to be gluten-free, dairy-free, grain-free, and completely free of refined sugars. It’s the perfect treat for those who crave indulgence without compromise, offering a delightful experience for mindful eaters and dessert lovers alike.
Experience the Magic: The Story Behind These Caramel Cookie Skillet Bars
Imagine a warm, tender, and incredibly gooey chocolate chip cookie, baked to golden perfection in a rustic cast-iron skillet. Now, envision that same delightful cookie generously layered with a velvety, rich, and perfectly balanced homemade salted caramel sauce. This isn’t just a dream; it’s the reality of our Caramel Cookie Skillet Bars. This innovative recipe takes the comforting essence of a classic cookie skillet and elevates it with a wholesome, healthy salted caramel, transforming it into an irresistible dessert bar that’s destined to become a staple in your kitchen.
These skillet bars are more than just a sweet treat; they’re a celebration of flavor and mindful eating. Whether you’re planning a cozy night in, preparing a show-stopping dessert for guests, or simply yearning for a wholesome indulgence that aligns with your dietary preferences, these bars are an impeccable choice. The harmonious blend of textures—from the slightly crisp edges of the cookie to its soft, chewy core, complemented by the silky, sweet-and-salty caramel swirl—creates an unforgettable sensory experience. Beyond the taste, the convenience of baking in a skillet ensures minimal fuss and a beautifully rustic presentation that’s sure to impress.
Each bite offers a comforting warmth, a burst of dark chocolate, and the decadent embrace of homemade caramel, all crafted with ingredients that nourish your body. It’s a testament to the fact that healthy eating doesn’t mean sacrificing flavor or fun. Get ready to embark on a delightful baking journey that culminates in a dessert that truly has it all!
Why You’ll Fall in Love with This Recipe
These Caramel Cookie Skillet Bars are designed to be a crowd-pleaser and a personal favorite for many reasons:
- Dietary Inclusivity: Proudly gluten-free, dairy-free, grain-free, and refined sugar-free, these bars cater to a wide array of dietary needs, making them a fantastic option for almost any guest or family member.
- Unforgettable Flavor Profile: The luxurious cashew butter base, combined with chunks of rich dark chocolate and a generous swirl of homemade salted caramel, creates a symphony of flavors that is both complex and incredibly satisfying. The balance of sweet and salty is pure perfection.
- Effortless Preparation: Despite their sophisticated taste and appearance, these skillet bars are surprisingly easy to make. Our clear, step-by-step instructions ensure a smooth baking process, suitable for both novice and experienced bakers.
- Perfect for Any Occasion: Baked beautifully in a single skillet and easily portioned into bars, this dessert is ideal for sharing at potlucks, family gatherings, or simply enjoying as a comforting treat at home.
- Wholesome Ingredients: Crafted with natural sweeteners like pure maple syrup and coconut sugar, nourishing fats from melted coconut oil and creamy cashew butter, and a gluten-free base of almond flour, you can indulge with peace of mind.
- Versatile Serving: Enjoy them warm straight from the skillet with a scoop of dairy-free ice cream, or cooled and cut into bars for a portable and delightful snack.
The Essential Ingredients for Your Skillet Bars
Creating these exquisite Caramel Cookie Skillet Bars begins with a careful selection of high-quality ingredients. Each component is chosen not only for its flavor contribution but also for its role in maintaining the recipe’s wholesome and dietary-friendly profile. Pay attention to the notes for substitutions and tips to ensure the best results.
For the Cookie Skillet Batter:
- 1 large egg: This acts as a crucial binding agent, bringing all the ingredients together.
- (Optional) Flax egg substitute: For a vegan alternative, simply mix 1 tablespoon of ground flaxseeds with 3 tablespoons of water and allow it to sit for 5 minutes until it thickens. This makes an excellent plant-based binder.
- 3 tbsp maple syrup: A natural, unrefined sweetener that imparts a lovely, earthy sweetness. Honey can be used as a substitute if preferred, though maple syrup offers a unique flavor depth.
- 1/4 cup melted coconut oil: Provides essential healthy fats, contributing to the cookie’s rich flavor and perfectly chewy texture. Ensure it’s melted but not hot.
- 1/3 cup creamy cashew butter: This is the star for a luxuriously creamy and nutty base. Cashew butter is wonderfully mild, making it versatile, but any smooth nut or seed butter (like almond or sunflower seed butter) can be used as a substitute.
- 1 tsp vanilla extract: A fundamental flavor enhancer that brightens and complements all the other ingredients in the cookie.
- 1 tbsp unsweetened almond milk: Helps to achieve the ideal batter consistency. Feel free to use any unsweetened plant-based milk you have on hand.
- 1 cup almond flour: The cornerstone of our gluten-free base. For the best texture and crumb, we highly recommend using Bob’s Red Mill finely ground almond flour.
- 1/4 cup collagen peptides: This ingredient is completely optional but offers a fantastic way to boost the protein content and add nutritional benefits without altering the taste or texture of the cookie.
- 1/4 tsp baking soda: Our leavening agent, crucial for giving the cookie skillet a slight rise and tender crumb.
- 1/2 tsp cinnamon: Adds a warm, inviting spice note that beautifully complements both the chocolate and the caramel.
- 3/4 dark chocolate bar, broken into pieces: Essential for capturing that classic chocolate chip cookie essence. Using a high-quality dark chocolate bar and breaking it into irregular chunks creates delightful pockets of molten chocolate throughout the bars. We particularly love Eating Evolved Signature Dark for its rich flavor.
- 1/4 tsp flakey sea salt: A sprinkle of this on top before baking enhances all the flavors and provides a delightful salty contrast to the sweetness.
- 8-9 inch cast-iron skillet: The ideal vessel for baking, ensuring even heat distribution and contributing to a wonderfully rustic presentation. If you don’t have one, an 8×8 inch baking dish, a round cake pan, or even a loaf tin can be used (adjusting bake time as needed).
For the Healthy Salted Caramel Sauce:
This simple yet incredibly delicious salted caramel sauce is a game-changer, offering a rich, sweet, and perfectly balanced counterpoint to the cookie, all without refined sugars.
- 3 tbsp coconut sugar: A natural, unrefined sweetener that provides a deep, molasses-like flavor, closely mimicking traditional caramel sugar.
- 1 cup full-fat coconut cream, using the thickest part: This forms the creamy base of our caramel. For best results, chill a can of full-fat coconut milk overnight and scoop out only the thick, solidified cream from the top, leaving the liquid behind.
- 1 tbsp arrowroot starch: A natural thickening agent that gives the caramel sauce its luxurious, pourable consistency.
- 1 tsp vanilla extract: Deepens and enriches the caramel flavor, adding a warm, aromatic note.
- 1/2 tsp flakey sea salt: Absolutely crucial for balancing the sweetness of the caramel and creating that irresistible “salted caramel” profile.
Your Step-by-Step Guide to Perfect Caramel Cookie Skillet Bars
Follow these detailed instructions carefully to ensure your Caramel Cookie Skillet Bars turn out beautifully, every single time. Precision in baking, especially with healthy ingredient swaps, makes all the difference.
Initial Preparation:
- Preheat your oven to 325 degrees F (160 degrees C). Proper oven temperature from the start is key for even baking.
Crafting the Cookie Skillet Batter:
- In a large mixing bowl, begin by whisking the egg thoroughly. If you are using a flax egg as a substitute, first mix 1 tablespoon of ground flaxseeds with 3 tablespoons of water in a separate small bowl and let it sit for approximately 5 minutes until it forms a gel-like consistency, then add it to your large mixing bowl.
- Next, pour in the maple syrup, melted coconut oil, creamy cashew butter, vanilla extract, and unsweetened almond milk. Whisk all these wet ingredients together vigorously until the mixture is completely smooth and well combined, ensuring no lumps remain.
- Gently stir in the almond flour, baking soda, cinnamon, and a pinch of the flakey sea salt. Mix until the dry and wet ingredients are just combined; be careful not to overmix the dough, as this can lead to a tougher cookie.
- Finally, fold in the dark chocolate chunks. Remember to reserve a few pieces of chocolate to sprinkle on top of the skillet bars before baking for a picture-perfect finish.
Preparing the Healthy Salted Caramel Sauce:
This luscious caramel can be made while the cookie dough rests, or even a day or two in advance. If making ahead, simply warm it gently before use.
- Heat a medium saucepan over medium heat until it is warm to the touch.
- Add the coconut sugar to the warm saucepan, followed by the thick part of the full-fat coconut cream and the arrowroot starch. Whisk these ingredients together thoroughly until they are smooth and completely integrated, ensuring there are no starch lumps.
- Increase the heat slightly and bring the mixture to a gentle boil, stirring continuously to prevent sticking.
- Once the sauce is gently boiling, reduce the heat to low, cover the saucepan with a lid, and allow it to simmer gently for 15 minutes. This slow simmer allows the flavors to deepen and the sauce to thicken beautifully.
- Remove the saucepan from the heat. Using a silicone spatula, stir the caramel sauce, making sure to scrape any darker, caramelized bits from the bottom of the pan to integrate them into the sauce for richer flavor.
- Add the vanilla extract and the remaining 1/2 teaspoon of flakey sea salt to the sauce. Whisk vigorously for several minutes until the caramel is smooth, glossy, and perfectly creamy.
- Allow the caramel to cool completely to room temperature. Once cool, measure out and set aside 1/3 cup of this delectable sauce specifically for layering into your cookie skillet. Store any remaining caramel sauce in an airtight glass container or mason jar in the refrigerator, where it will remain fresh and delicious for up to 2 weeks.
Assembling and Baking the Caramel Cookie Skillet:
- Very lightly spray your 9-inch cast-iron skillet with coconut oil spray to prevent sticking.
- Using a silicone spatula, spread approximately three-quarters of your prepared cookie skillet batter evenly into the base of the skillet. Aim for a relatively flat and even layer.
- Next, gently and carefully spoon the reserved 1/3 cup of salted caramel sauce over the top of the cookie batter. Don’t worry if it’s not perfectly spread; a rustic, swirled look is part of its charm!
- Finally, take the remaining cookie dough and spread it in dollops over the caramel layer. This part can be a little tricky; gently spread the dollops to cover as much of the caramel as possible without entirely mixing the layers.
- Arrange the last few pieces of dark chocolate on top of the dough, then sprinkle generously with the remaining flakey sea salt for an extra touch of flavor and visual appeal.
- Bake in your preheated oven for approximately 25 minutes.
- After 25 minutes, carefully turn your oven to the broiler setting. Cook for an additional 1 to 2 minutes, watching the skillet bars *very closely*! The top will quickly achieve a beautiful golden brown color, but it can burn rapidly, so do not step away from the oven.
- Once baked to your desired golden perfection, remove the skillet from the oven and allow it to cool slightly on a wire rack before cutting into generous squares. This cooling period helps the bars set and makes them easier to cut cleanly. Enjoy the warm, gooey goodness!
Expert Tips for Crafting Flawless Caramel Cookie Skillet Bars
Achieving the perfect texture and flavor for these bars is easy with a few insider tips:
- Source High-Quality Ingredients: The taste of your final product directly reflects the quality of your ingredients. Opt for good quality almond flour (like Bob’s Red Mill finely ground) and a rich, dark chocolate bar for the best flavor and texture.
- Pre-Chill Coconut Cream: For the ultimate creamy caramel, make sure to chill a can of full-fat coconut milk in the refrigerator overnight. This allows the thick cream to separate and rise to the top, yielding a much richer sauce.
- Avoid Overmixing the Dough: When combining the dry and wet ingredients for the cookie batter, mix only until just combined. Overmixing can develop the gluten (even in almond flour, which has minimal gluten, it can affect texture), leading to a tougher, less tender cookie.
- Broiler Vigilance is Key: The broiler step is vital for that beautiful golden-brown crust but also the most critical for preventing burns. Stay right by the oven and keep a constant eye on your skillet; it can go from perfectly golden to charred in mere seconds.
- Taste and Adjust Salt Levels: If you’re a fan of a pronounced salty-sweet contrast, feel free to add a tiny bit more flakey sea salt to the top of the skillet before it goes into the oven. Customizing to your palate is encouraged!
- Patience with Cooling: While the aroma of a freshly baked skillet cookie is incredibly tempting, allowing the bars to cool for at least 15-20 minutes before cutting will help them set properly. This prevents the caramel from running excessively and ensures cleaner, more manageable squares.
Creative Variations and Customizations
One of the joys of baking is adapting recipes to suit your preferences. Here are some delightful ways to customize your Caramel Cookie Skillet Bars:
- Nut-Free Alternative: If you have nut allergies, simply swap the cashew butter for a creamy sunflower seed butter. Ensure all other ingredients (like almond milk) are also nut-free certified if severe allergies are a concern.
- Add Extra Crunch: Fold in a handful of chopped pecans, walnuts, or even toasted pumpkin seeds into the cookie batter for an added layer of texture and nutty flavor.
- Chocolate Exploration: While dark chocolate is specified, feel free to experiment with different types of chocolate. Dairy-free milk chocolate chips or even a mix of dark and white (dairy-free) chocolate chunks can offer a new twist.
- Seasonal Spices: During colder months, enhance the warmth by adding a pinch of nutmeg, cardamom, or even a dash of pumpkin pie spice to the cookie batter.
- Gourmet Toppings: Serve your warm skillet bars with a scoop of your favorite dairy-free vanilla bean ice cream, a dollop of fluffy coconut whipped cream, or an extra drizzle of the homemade salted caramel sauce for ultimate indulgence.
- Fruit Infusion: For a touch of fruitiness, consider adding a small amount of dried cranberries or chopped dates to the cookie batter.
Storage and Reheating Best Practices
To enjoy the deliciousness of your Caramel Cookie Skillet Bars for as long as possible, follow these simple storage and reheating guidelines:
- Room Temperature: The bars can be left on the kitchen counter, loosely covered with a paper towel or foil, for up to 3 days. This helps maintain their wonderfully chewy texture.
- Refrigeration: For extended freshness, transfer the cooled bars to an airtight container and refrigerate for up to a week. Be aware that the caramel may firm up slightly when cold.
- Freezing for Later: For long-term storage, cut the bars into individual squares. Place them in an airtight freezer-safe container or bag, separating layers with parchment paper to prevent sticking. They will keep well in the freezer for up to 2-3 months.
- Reheating Instructions:
- Microwave: For a quick warm-up, heat individual bars in the microwave for 10-20 seconds until gooey and warm.
- Oven: To reheat several bars or a larger portion, place them on a baking sheet and warm in a preheated oven at 300°F (150°C) for 5-10 minutes, until the cookie is soft and the caramel is melted and bubbly again.
Frequently Asked Questions About Caramel Cookie Skillet Bars
- Can I use a different pan if I don’t have a cast-iron skillet?
- Yes, absolutely! While a cast-iron skillet provides excellent heat retention and a charming rustic aesthetic, you can certainly use an 8×8 inch square baking dish, a round cake pan of similar size, or even a loaf tin. Just keep in mind that baking times may vary slightly, so keep a close eye on your dessert for doneness.
- Is this recipe genuinely healthy, considering it’s a dessert?
- When we describe this recipe as “healthy,” it’s in the context of being a much more wholesome alternative to traditional desserts. It utilizes nutrient-dense ingredients like almond flour, healthy fats from coconut oil and cashew butter, and natural sweeteners like maple syrup and coconut sugar, entirely avoiding refined sugars, dairy, and gluten. This makes it a mindful indulgence that supports a clean eating lifestyle.
- Can I prepare the salted caramel sauce in advance?
- Definitely! The homemade salted caramel sauce is excellent for meal prepping. You can make it up to 2 weeks ahead of time and store it in an airtight container in your refrigerator. When you’re ready to use it, gently warm it slightly (either on the stovetop or in the microwave) to make it easier to spread over the cookie batter.
- How do I know when the cookie skillet is perfectly baked?
- The edges of the cookie skillet should appear set and lightly golden brown. The center will still be soft and delightfully gooey, which is exactly what you want for a skillet cookie. The final broiler step is crucial for achieving that beautiful, slightly browned top. To double-check, a toothpick inserted into the cookie (avoiding any direct chocolate chunks or caramel) should come out with moist crumbs, not wet batter.
- What if my caramel sauce is too thin or too thick?
- If your caramel sauce seems too thin after cooling, you can gently reheat it and simmer for a few more minutes to reduce it further. If it’s too thick, you can whisk in a tiny amount (1/2 to 1 teaspoon) of warm almond milk or coconut cream until it reaches your desired consistency.
Indulge Smartly with These Irresistible Skillet Bars
These Caramel Cookie Skillet Bars are far more than just a dessert; they represent a delightful fusion of indulgence and mindful eating. They stand as a testament to the fact that truly satisfying and decadent treats can absolutely align with a healthy lifestyle. By masterfully combining the comforting warmth of a classic chocolate chip cookie with the luxurious, sweet-and-salty embrace of homemade caramel, all while meticulously omitting common allergens like gluten and dairy, and refined sugars, this recipe establishes itself as a true culinary gem.
Whether you’re baking a special treat for yourself to enjoy after a long day or planning to share a wholesome delight with cherished friends and family, prepare to be utterly amazed by the profound depth of flavor and the incredibly satisfying texture these bars offer. They are designed to impress, to comfort, and to satisfy even the most discerning sweet tooth without any lingering guilt.
So, don’t hesitate. Gather your wholesome ingredients, grab your trusty skillet, and embark on the joyous journey of baking a dessert that not only tastes utterly sinful but is secretly crafted with goodness. Get ready to savor every single glorious, caramel-infused bite, and make these Caramel Cookie Skillet Bars a cherished addition to your recipe collection. Enjoy the wholesome indulgence!
Loved This Recipe? Share Your Experience Below!
Your feedback is invaluable and genuinely brightens our day! If you’ve had the pleasure of trying these incredibly delicious Caramel Cookie Skillet Bars, we would absolutely love to hear about your baking adventure and what you thought. Please take a moment to leave a comment below and share your personal tips, any creative variations you tried, or simply what you loved most about this recipe. Your insights help our community grow and inspire other bakers!
Leave a comment