
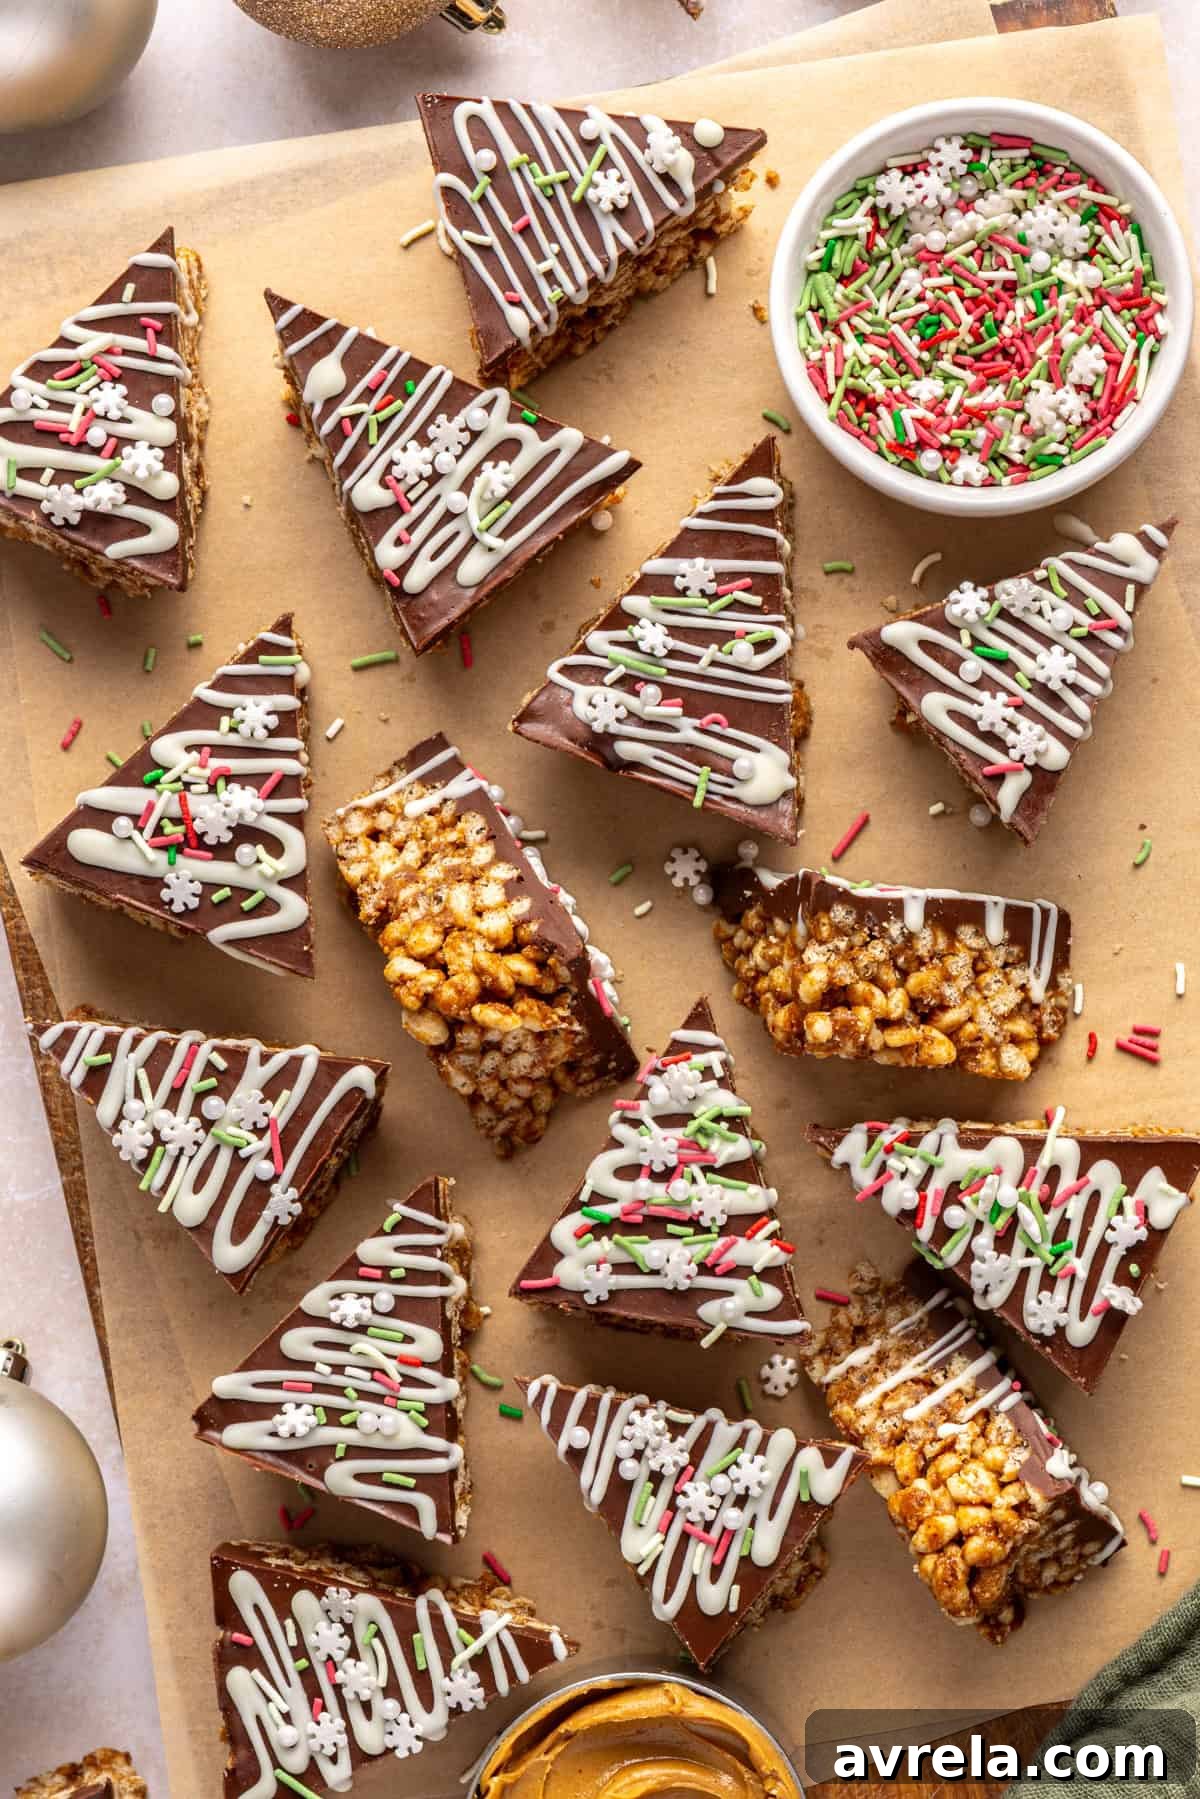
Indulge Guilt-Free: The Ultimate No-Bake Salted Peanut Butter Bars (Gluten-Free & Dairy-Free)
Prepare for a delightful journey back to childhood, but with a sophisticated twist. These salted peanut butter bars redefine the no-bake dessert experience, offering a harmonious blend of rich, creamy peanut butter, decadent chocolate, and just the right kiss of sea salt. Crafted from simple, wholesome pantry staples such as natural peanut butter, brown rice cereal crisps, pure maple syrup, and coconut oil, they are incredibly easy to assemble and store beautifully in your fridge or freezer, making them the ultimate convenient indulgence.
Whether you opt for the classic, satisfying bar shape or decide to transform them into charming Christmas trees for a festive touch, this recipe is guaranteed to be a hit. It’s a universally loved, crowd-pleasing treat perfect for the holiday season, special gatherings, or simply whenever that irresistible craving for a chocolate peanut butter dessert strikes. Trust us, these are set to become a treasured tradition!
Why These Salted Peanut Butter Bars Will Become Your New Obsession
These no-bake peanut butter bars aren’t just delicious; they’re also thoughtfully crafted to be naturally gluten-free and dairy-free. This makes them an exceptional choice for sharing with friends and family who have various dietary preferences or restrictions, ensuring everyone can enjoy a slice of this delightful treat. Who can resist the appeal of a dessert that comes together without ever needing to turn on the oven?
Beyond their convenience and inclusivity, these bars pack a nutritional punch. The star ingredient, natural peanut butter, delivers a generous dose of healthy fats and plant-based protein, contributing to a satisfying and energy-boosting snack. To further enhance their nutritional profile, we’ve incorporated ground flaxseed, an excellent source of dietary fiber and beneficial omega-3 fatty acids, helping to make these dessert bars a more balanced and wholesome option.
Sweetened with the natural goodness of maple syrup and coconut sugar, you get that wonderfully indulgent dessert flavor without the reliance on refined sugars. This approach allows the rich, nutty, and chocolatey notes to shine through beautifully. Plus, their impressive freezer-friendly nature makes them the ultimate make-ahead holiday dessert bars. Imagine having a gourmet-quality treat ready to go, simplifying your holiday preparations while still offering something truly special and homemade. Seriously, they’re so incredibly good, it almost feels unreal!
Unleash Your Creativity: Customizing Your No-Bake Peanut Butter Bars for Any Occasion
One of the most appealing aspects of this remarkable no-bake dessert recipe is its incredible versatility. While delicious as simple squares or rectangular bars, don’t hesitate to embrace the festive spirit by cutting them into adorable Christmas tree shapes. Imagine a plate filled with these charming peanut butter Christmas trees, each one a miniature masterpiece ready to delight your guests.
The rich chocolate peanut butter topping, often enhanced with an elegant white chocolate drizzle, elevates these bars from a simple treat to something truly special. For an extra touch of holiday cheer, consider adding a sprinkle of colorful Christmas sprinkles – they instantly add a playful pop of color and texture. Despite their sophisticated appearance, the preparation remains wonderfully straightforward. There’s no need for an oven, just a quick melting process on the stovetop for both the peanut butter base and the luscious chocolate layers, making this recipe approachable for even novice bakers.
Whether you’re arranging them on an elaborate holiday cookie tray, assembling a gift box for loved ones, or simply keeping a secret stash in your freezer for those moments when a quick, satisfying dessert is calling your name, these salted chocolate peanut butter bars are an undeniable winner. Their ease of preparation combined with their irresistible flavor guarantees they’ll be a recipe you turn to time and time again. We sincerely hope you adore them; happy holidays and happy baking!
Gathering Your Wholesome Ingredients: What You’ll Need
Creating these irresistible no-bake chocolate peanut butter bars starts with selecting high-quality, natural ingredients. Our choices focus on wholesome components that deliver incredible flavor and texture, while also offering some nutritional benefits. Here’s a detailed look at what you’ll need:
For the Irresistible Base:
- Brown rice cereal crisps: These provide the perfect crunch and structure. I highly recommend One Degree Organic for their excellent quality and simple ingredients.
- Ground flaxseed meal: A fantastic addition for fiber and omega-3s, helping to bind the base and add a subtle nutty flavor. Spectrum Essentials Organic Ground Flaxseed is my preferred brand.
- Natural, creamy, unsalted, unsweetened peanut butter: The backbone of these bars! Opt for a brand with only peanuts (and maybe salt) as ingredients for the best texture and flavor.
- Maple syrup: Our primary natural sweetener, providing a lovely depth of flavor.
- Coconut sugar: Another unrefined sweetener that contributes to the rich caramel notes.
- Coconut oil: Helps everything bind together and creates that luscious, smooth consistency.
- Kosher salt: The essential ingredient that truly makes these “salted” peanut butter bars, balancing the sweetness and enhancing all flavors.
- Pure vanilla extract: A touch of vanilla elevates the overall aroma and taste profile.
For the Decadent Chocolate Peanut Butter Topping:
- Semi-sweet or dark chocolate chips: Choose your favorite! For dairy-free options, Enjoy Life or Lily’s are excellent choices.
- Natural, creamy, unsalted, unsweetened peanut butter: Again, using the natural kind ensures the best melt and texture for the topping.
- Coconut oil: This helps create a smooth, glossy chocolate coating that sets beautifully.
For the Festive Finish (Decoration):
- White chocolate chips: For an optional elegant drizzle.
- Coconut oil: To thin the white chocolate for easy drizzling.
- Holiday sprinkles: Add a fun, festive pop of color!
Crafting Perfection: Step-by-Step Guide to Making Salted Peanut Butter Bars
Let’s dive into the simple process of creating these exquisite no-bake bars. The key to success lies in careful mixing and sufficient chilling time. Begin by lining an 8×8 square baking pan with a parchment paper sling, ensuring the paper hangs over the edges to make removal easy later. This prepares your canvas for the delicious layers to come.
Preparing the Luscious Base:
1. In a spacious mixing bowl, combine the brown rice crisp cereal and ground flaxseed meal. Give them a quick toss to ensure they are evenly distributed.
2. In a medium-sized pot, combine the natural peanut butter, maple syrup, coconut sugar, coconut oil, and kosher salt. Place the pot over medium heat. Whisk the mixture gently, stirring occasionally, until it reaches a gentle simmer. You’ll notice the ingredients beginning to meld into a uniform, fragrant blend.
3. Once the mixture is bubbling gently, continue to whisk constantly for precisely 1 minute. This crucial step helps the mixture thicken slightly and ensures the coconut sugar completely dissolves, preventing a grainy texture. Remove from heat, then stir in the pure vanilla extract until fully combined. Without delay, pour this warm, aromatic peanut butter mixture directly over the brown rice cereal and flaxseed in your large bowl.
4. Mix thoroughly and vigorously until every single crisp and flaxseed particle is coated with the rich peanut butter blend. This requires a good amount of stirring to ensure an even consistency. Transfer this base mixture into your prepared 8×8 baking pan and spread it out into a uniform layer. For a firm, sturdy base, use the bottom of a measuring cup or a flat spatula to press the mixture down firmly and evenly into the pan, compacting it well.
5. Place the pan into the freezer for at least 30 minutes, or until the base is completely firm and set. This chilling time is essential for the bars to hold their shape.
Creating the Silky Smooth Topping:
1. Once your peanut butter base has firmly set in the freezer, it’s time to prepare the delectable chocolate topping. In a small pot, combine the semi-sweet or dark chocolate chips, natural peanut butter, and coconut oil. Place the pot over medium-low heat.
2. As the chocolate chips begin to soften and melt, start stirring slowly but continuously. Reduce the heat to low to prevent scorching. Gentle, consistent stirring is key here to achieve a smooth, lump-free consistency.
3. As soon as almost all the chocolate chips have melted and the mixture is nearly smooth, remove the pot from the heat. Continue to stir, allowing the residual heat from the pot and the melted chocolate to fully dissolve any remaining chips. This technique ensures a perfectly smooth and glossy topping without overheating the chocolate.
4. Carefully pour the warm, silky chocolate mixture evenly over the chilled peanut butter base. Use an offset spatula or the back of a spoon to spread it into a smooth, even layer across the entire surface. Return the pan to the freezer for another 30 minutes, or until the chocolate topping is completely set and firm to the touch.
The Art of Decorating:
Once your bars are fully set, it’s time to transform them! Carefully remove the entire slab from the pan using the parchment paper sling. Place it on a cutting board.
If making squares and triangles: Using a sharp knife, first cut the large slab into 3 equal rectangles. Then, cut each rectangle into 3 squares. Finally, cut each square diagonally to yield two triangles, giving you a total of 18 triangles. Arrange these individual pieces on a baking sheet lined with parchment paper.
Alternatively, for classic bars, simply slice each of the initial 3 rectangles into ~1-inch-thick bars. You can adjust the thickness to your personal preference for smaller or larger portions.
If making festive Christmas trees: Carefully remove the set bars from the pan. Using a sharp knife, divide the slab into 3 equal rectangles. For each rectangle, you will cut 7 triangles. Start at the right corner and make a diagonal cut towards the left. Remove this edge piece (it’s a delicious cook’s treat!). Then, proceed to make another triangle, and repeat this pattern until you have 7 uniformly sized triangles from that rectangle. Repeat this process with the remaining 2 rectangles, aiming for a total of 21 charming “trees.” Place all the tree shapes onto a baking sheet lined with parchment.
To decorate: In a small microwave-safe bowl, combine the white chocolate chips and coconut oil. Microwave in 30-second intervals, stirring well after each, until the mixture is completely smooth and fluid. Be careful not to overheat it.
With a fork, rapidly drizzle the melted white chocolate over your chosen shapes (squares or trees) from about a foot above. For the Christmas trees, aim for an irregular, festive pattern that resembles strings of twinkling lights. Work quickly! Immediately scatter your holiday sprinkles over the drizzled chocolate, as the cold temperature of the bars will cause the chocolate to harden very rapidly.
Storage Secrets for Lasting Freshness:
Once decorated and fully set, store your delicious salted peanut butter bars in an airtight container. They will keep beautifully in the refrigerator for up to a week, or you can extend their life by storing them in the freezer for up to 1 month. When freezing, layer them with parchment paper to prevent sticking. For optimal enjoyment, allow frozen bars to sit at room temperature for a few minutes before serving to soften slightly.
Your Questions Answered: FAQs & Ingredient Swaps for Perfect Peanut Butter Bars
We believe that cooking should be a joy, and that means making recipes adaptable to your pantry and dietary needs. Here are some easy substitutions and helpful tips to customize these no-bake salted peanut butter bars, ensuring they turn out perfectly every time:
Smart Substitutions for Every Pantry:
- Brown rice cereal crisps: While One Degree Organic is recommended for its consistent crispness, any similar gluten-free crisp cereal or puffed rice cereal will work. The key is to choose a cereal with a light, airy texture that holds its shape well when mixed. Avoid flake cereals, as they tend to become soggy and won’t provide the desired structural integrity.
- Ground flaxseed meal: If you don’t have flaxseed on hand, chia seed meal makes an excellent substitute, offering a similar fiber boost and binding properties. If neither is available, you can omit it entirely; the bars will still set, though they might be slightly softer in texture.
- Natural peanut butter: Feel free to experiment with other natural nut butters! Almond butter or cashew butter are fantastic alternatives, lending their own unique flavor profiles. Just ensure you use a natural, creamy variety without added sugars or hydrogenated oils to maintain the desired consistency and clean taste.
- Maple syrup: Honey can be used as a direct 1:1 substitute for maple syrup. Keep in mind that honey typically offers a slightly stronger sweetness and distinct floral notes, which will subtly alter the flavor profile of the bars.
- Coconut sugar: If coconut sugar isn’t in your pantry, light or dark brown sugar can be used in equal amounts. Brown sugar will provide a similar moisture and caramel-like flavor, ensuring your bars remain deliciously sweet.
- Coconut oil: For a different fat option, you can replace coconut oil with an equal amount of vegan butter or unsalted dairy butter. This swap will work seamlessly and maintain the necessary fat content for proper setting.
- Semi-sweet or dark chocolate chips: The beauty of this recipe is its flexibility! Any dairy-free or conventional chocolate chips can be used. For a more artisanal touch, you can also chop up a good quality dark chocolate bar.
- White chocolate chips (for decorating): This is an optional but highly recommended decorative element. If you prefer to skip it, the bars will still be incredibly delicious. For dietary needs, dairy-free white chocolate chips are readily available. Alternatively, a simple drizzle of extra dark chocolate can create an elegant contrast.
- Holiday sprinkles: Sprinkles are purely for fun and visual appeal! If you’d like an alternative topping, consider crushed candy canes for a minty crunch, finely chopped nuts for added texture, or a sprinkle of flaky sea salt for an extra gourmet finish.
For a comprehensive list of my go-to kitchen, cooking, and baking essentials (and much more!), please feel free to shop my Amazon Storefront.
Troubleshooting: Why Didn’t My Salted Peanut Butter Bars Set Properly?
If you find your bars are softer than desired or not holding their shape, there are a couple of common culprits. The most frequent reason is that the peanut butter mixture for the base didn’t simmer long enough on the stovetop. It’s crucial for the mixture to gently bubble for a full minute to allow it to thicken properly before you pour it over the cereal. This brief simmering helps the sugars dissolve and the mixture to achieve the right consistency for setting. Additionally, ensure you’ve allowed adequate freezer time for both the base and the chocolate topping to fully firm up. Patience during the chilling phases is key to perfectly set, sliceable bars.
Planning Ahead: Can I Make Salted Peanut Butter Bars in Advance?
Absolutely! These no-bake salted peanut butter bars are an ideal make-ahead dessert, perfect for busy holiday seasons or when you just want to have a sweet treat readily available. You can prepare them up to a week in advance and store them in an airtight container in the refrigerator. For even longer storage, they freeze exceptionally well for up to a month. If serving from the freezer, simply let them sit at room temperature for a few minutes before indulging to achieve the best, slightly softened texture.
Beyond Bars: Creative Shapes & Serving Ideas
Yes, certainly! Once the entire pan of bars is fully set and firm, your creativity can truly shine. While squares, rectangles, and Christmas trees are popular options, you can absolutely cut them into any festive shapes you desire using cookie cutters. Just remember to use a very sharp knife for clean, precise cuts, and always work with the bars while they are still cold directly from the freezer or fridge. This prevents smudging and ensures crisp edges, making your delightful creations look as professional as they taste.
Explore More Delicious & Easy No-Bake Desserts You’ll Love:
- Peppermint Patties
- Gingerbread Protein Balls
- Peanut Butter Balls (Healthy!)
- Salted Maple Protein Cookie Bars
- Protein Brownie Bites (Easy No-Bake)
- No-Bake Cinnamon Cereal Bars (Gluten-Free, Dairy-Free)
Salted Peanut Butter Bars
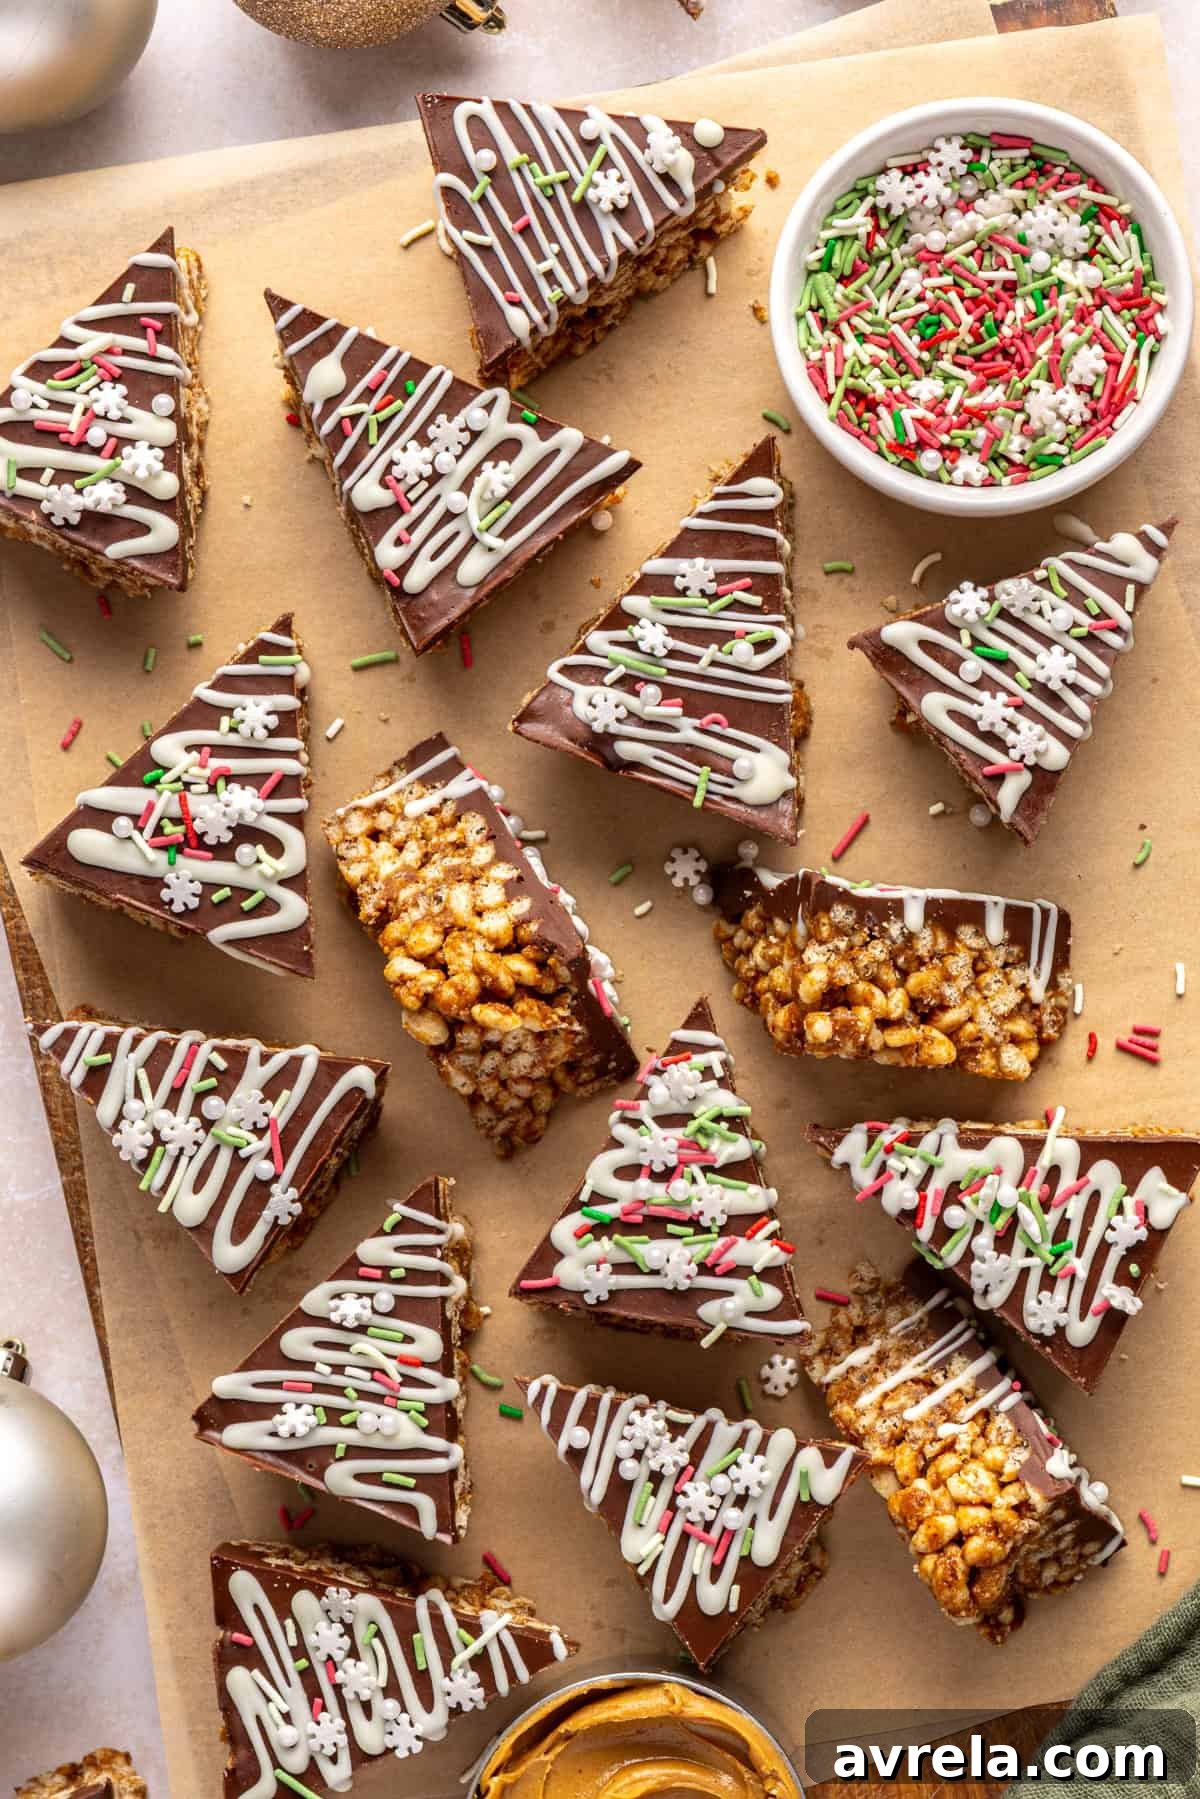
Quick, no-bake salted peanut butter bars made with chocolate, peanut butter, and a hint of salt. Perfect for festive holidays or anytime you need a simple treat.
Ingredients
For the Base:
- 4 cups brown rice cereal crisps, (I use One Degree Organic)
- 3 tablespoons ground flaxseed meal, (I like Spectrum Essentials Organic Ground Flaxseed)
- ¾ cup natural, creamy, unsalted, unsweetened peanut butter
- ⅓ cup maple syrup
- ¼ cup coconut sugar
- 2 tablespoons coconut oil
- ½ teaspoon kosher salt
- 1 teaspoon pure vanilla extract
For the Topping:
- 1 cup semi-sweet or dark chocolate chips, (I like Enjoy Life or Lily’s)
- ¼ cup natural, creamy, unsalted, unsweetened peanut butter
- 1 tablespoon coconut oil
For Decorating:
- ⅓ cup white chocolate chips
- 1 teaspoon coconut oil
- ¼ cup holiday sprinkles
Instructions
-
Line an 8×8 square baking pan with a parchment paper sling. Set aside.
For the Base:
-
In a large bowl, add the brown rice crisp cereal and flaxseed meal. Toss to combine.
-
In a medium pot, add the peanut butter, maple syrup, coconut sugar, coconut oil, and salt. Turn the heat to medium. Whisk, stirring occasionally until the mixture comes to a gentle simmer.
-
Once bubbling, whisk constantly for 1 minute, until the mixture thickens slightly and the flecks of coconut sugar dissolve. Add the vanilla and whisk to combine. Immediately pour the mixture over the brown rice cereal.
-
Mix very well to combine. Transfer the base to the prepared baking pan and spread in an even layer. Using the bottom of a measuring cup, press the mixture into the pan, packing down.
-
Transfer to the freezer for at least 30 minutes or until it is completely set.
For the Topping:
-
Once the bars have set, start on the topping. In a small pot, add the chocolate chips, peanut butter, and coconut oil. Heat over medium-low.
-
Once the chocolate begins to melt, stir slowly but constantly, reducing the heat to low.
-
Once almost all of the chocolate chips have melted, remove from the heat. Stir until the residual heat has melted the remaining chips.
-
Pour the mixture over the bars, spreading into a smooth and even layer. Transfer back to the freezer for 30 minutes.
For Decorating:
-
If making squares: Carefully remove the bars from the pan. Using a sharp knife, cut into 3 rectangles. Cut each rectangle into 3 squares. Cut each square on the diagonal to get 18 triangles. Place the trees on a baking sheet lined with parchment.
Alternatively, for smaller bars instead of triangles, slice each rectangle into ~1-inch-thick bars. You can make them thicker or thinner based on your preference.
-
If making Christmas trees: Carefully remove the bars from the pan. Using a sharp knife, cut into 3 rectangles. With each rectangle, cut 7 triangles, starting on the right corner and cutting at a diagonal towards the left. Remove the edge piece and save for snacking! Then make a triangle, and repeat until you get 7 equal-sized triangles. Repeat with the remaining 2 rectangles, until you get 21 “trees.” Place the trees on a baking sheet lined with parchment.
-
In a small microwave-safe bowl, add the white chocolate and coconut oil. Microwave in 30-second increments until smooth.
-
Using a fork, drizzle the white chocolate rapidly over the squares or trees, about a foot above them. For the trees, you’re trying to resemble strings of lights. Immediately add the sprinkles (since the bars are cold the chocolate will harden quickly).
To Store:
-
Store in an airtight container in the fridge for up to a week or in the freezer for up to 1 month.