
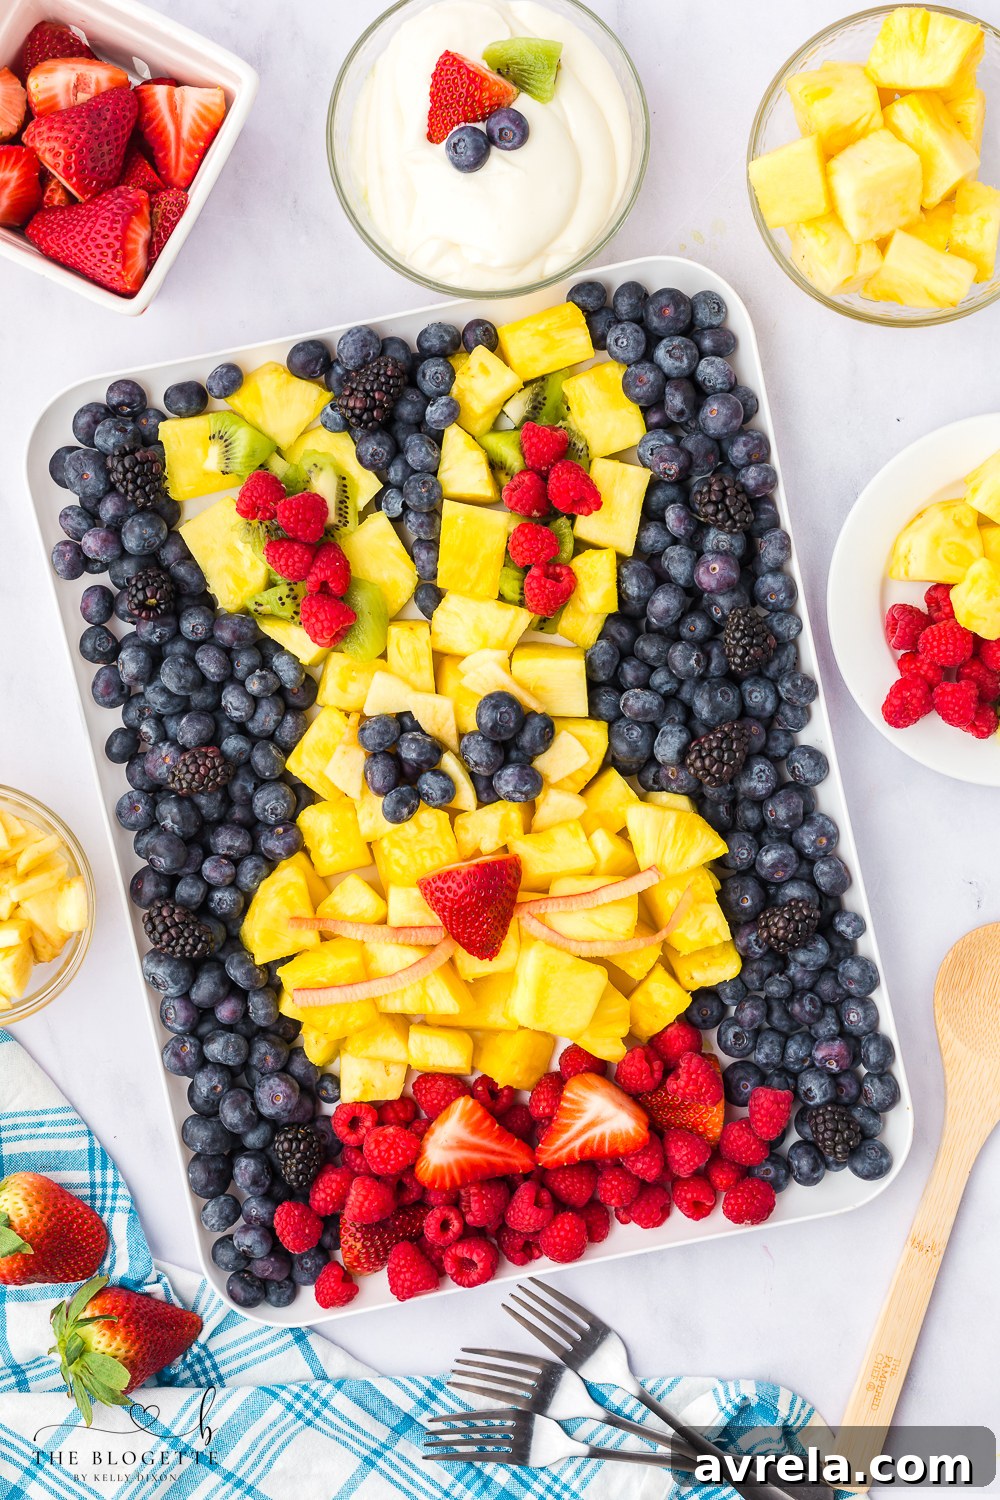
An Easter Fruit Platter is not just a dish; it’s a vibrant celebration of spring, health, and festive cheer. This delightful Easter fruit tray, artfully arranged to resemble an adorable bunny, offers a refreshing and visually captivating addition to your holiday spread. Bursting with the natural sweetness and brilliant colors of seasonal fruits like juicy berries, tangy kiwi, and tropical pineapple, it’s a healthy alternative that appeals to both adults and children alike.
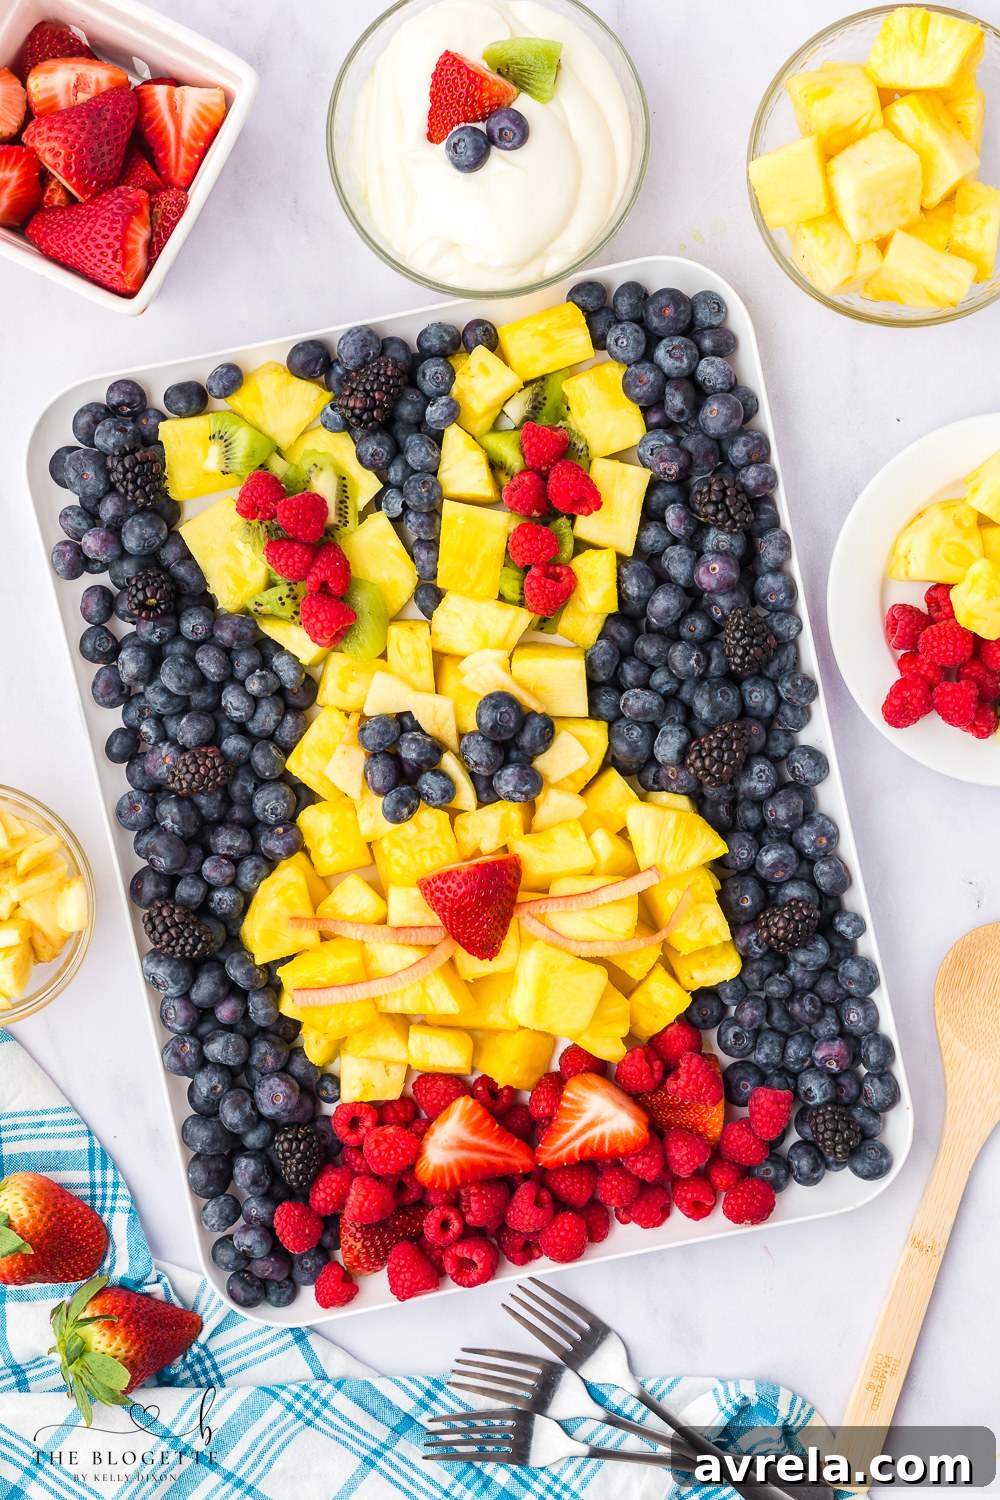
The Ultimate Easter Bunny Fruit Platter
Transform your Easter brunch or dinner table into a whimsical wonderland with this irresistible Easter bunny fruit tray. It’s incredibly fun and easy to assemble, making it a fantastic activity for the whole family, especially little helpers. What makes this platter truly exceptional is its pairing with a smooth, creamy, and wonderfully sweet homemade cheese fruit dip. This dip perfectly complements every fruit on the tray, elevating a simple fruit arrangement into an unforgettable holiday treat. Prepare to impress your guests with this eye-catching, healthy, and utterly delicious centerpiece!
Why This Bunny Fruit Platter is Perfect for Easter
There are countless reasons to adore this Easter Fruit Platter. Beyond its undeniable charm, it’s a beacon of fresh flavors and healthy choices amidst the usual rich holiday fare. It’s naturally gluten-free and can easily be made dairy-free by opting for a suitable dip alternative, catering to various dietary needs. The vibrant array of colors contributes significantly to your festive decor, reflecting the joyous essence of spring and renewal. Moreover, assembling the bunny shape is a delightful and engaging activity for children, encouraging them to interact with healthy foods in a fun way. It’s a guilt-free dessert, a refreshing appetizer, or a light snack that leaves everyone feeling satisfied and energized.
Essential Ingredients for Your Bunny Fruit Platter
- Pineapple: Cubed pineapple forms the core of the bunny’s face. For variety or if pineapple isn’t available, consider using slices of banana or apple for the main face structure. Bananas provide a softer texture, while apples offer a crisp crunch. Ensure any sliced apples are tossed in lemon juice to prevent browning.
- Blueberries: These tiny powerhouses are perfect for creating the bunny’s eyes and outlining sections. Their deep blue color provides a striking contrast. You can use solely blueberries or a blend of mixed berries for a more varied look.
- Strawberries: Sliced or halved, strawberries add a beautiful pop of red and sweetness. They’re ideal for the bunny’s nose and can also be used to fill in larger areas. If strawberries are out of season or you prefer other options, extra raspberries or red grapes make excellent substitutes.
- Blackberries: With their rich, dark hue, blackberries contribute depth and another layer of flavor. Don’t hesitate to get creative with other dark fruits you might have, such as dark cherries (pitted) or concord grapes.
- Raspberries: Delicate and brightly colored, raspberries are fantastic for filling in the inner ears of the bunny. They add a soft, textural element. Pink dragonfruit, cut into small pieces, could also offer a unique and exotic alternative.
- Kiwi: Sliced kiwi provides a vibrant green, perfect for outlining details or adding a touch of tropical flair. Green grapes, halved, are an excellent and readily available substitute if kiwi isn’t on hand.
- Apple: Apples are versatile for whiskers and detailing. Any type works well – crisp Red Delicious adds a sweet note, while Granny Smith offers a tart contrast. Remember to have lemon juice ready to prevent them from browning.
- Lemon Juice: A crucial ingredient for keeping those apple slices and any other prone-to-browning fruits looking fresh and appealing throughout your event.
Ingredients for the Creamy Fruit Dip
This simple yet sensational fruit dip requires only three ingredients to achieve its smooth, sweet, and irresistible texture:
- Cream Cheese: Softened cream cheese forms the luscious base of the dip, providing its signature creaminess and a slight tang. For a richer flavor, mascarpone cheese can be used as an alternative.
- Marshmallow Fluff: This is the secret to the dip’s airy texture and delightful sweetness. It blends effortlessly with the cream cheese, making the dip light and fluffy.
- Almond Extract: Just a touch of almond extract elevates the flavor profile, adding a warm, nutty aroma that pairs beautifully with the fresh fruit. If you prefer, vanilla extract can be substituted for a classic sweet flavor.
Step-by-Step Instructions for Assembling Your Easter Bunny Fruit Platter
Creating this adorable bunny fruit platter is a straightforward process, but it benefits from a thoughtful arrangement. Here’s how to bring your edible bunny to life:
Recipe Tips for Success
Feel free to personalize your bunny platter with other fruits your family enjoys. Consider adding pear slices, cantaloupe, honeydew melon, watermelon, or orange slices for a diverse fruit salad experience. For an extra touch of color and nutrients, you could even incorporate some thinly sliced carrots or bell peppers if your kids enjoy them with a dip.
Should I use fresh, canned, or frozen fruit?
For the best presentation and texture, fresh fruit is highly recommended for this recipe. If you opt to use canned or frozen fruit, ensure it is completely thawed and thoroughly drained. Pat the fruit dry with paper towels to remove any excess liquid, which will help prevent your platter from becoming watery and keep the arrangement looking neat.
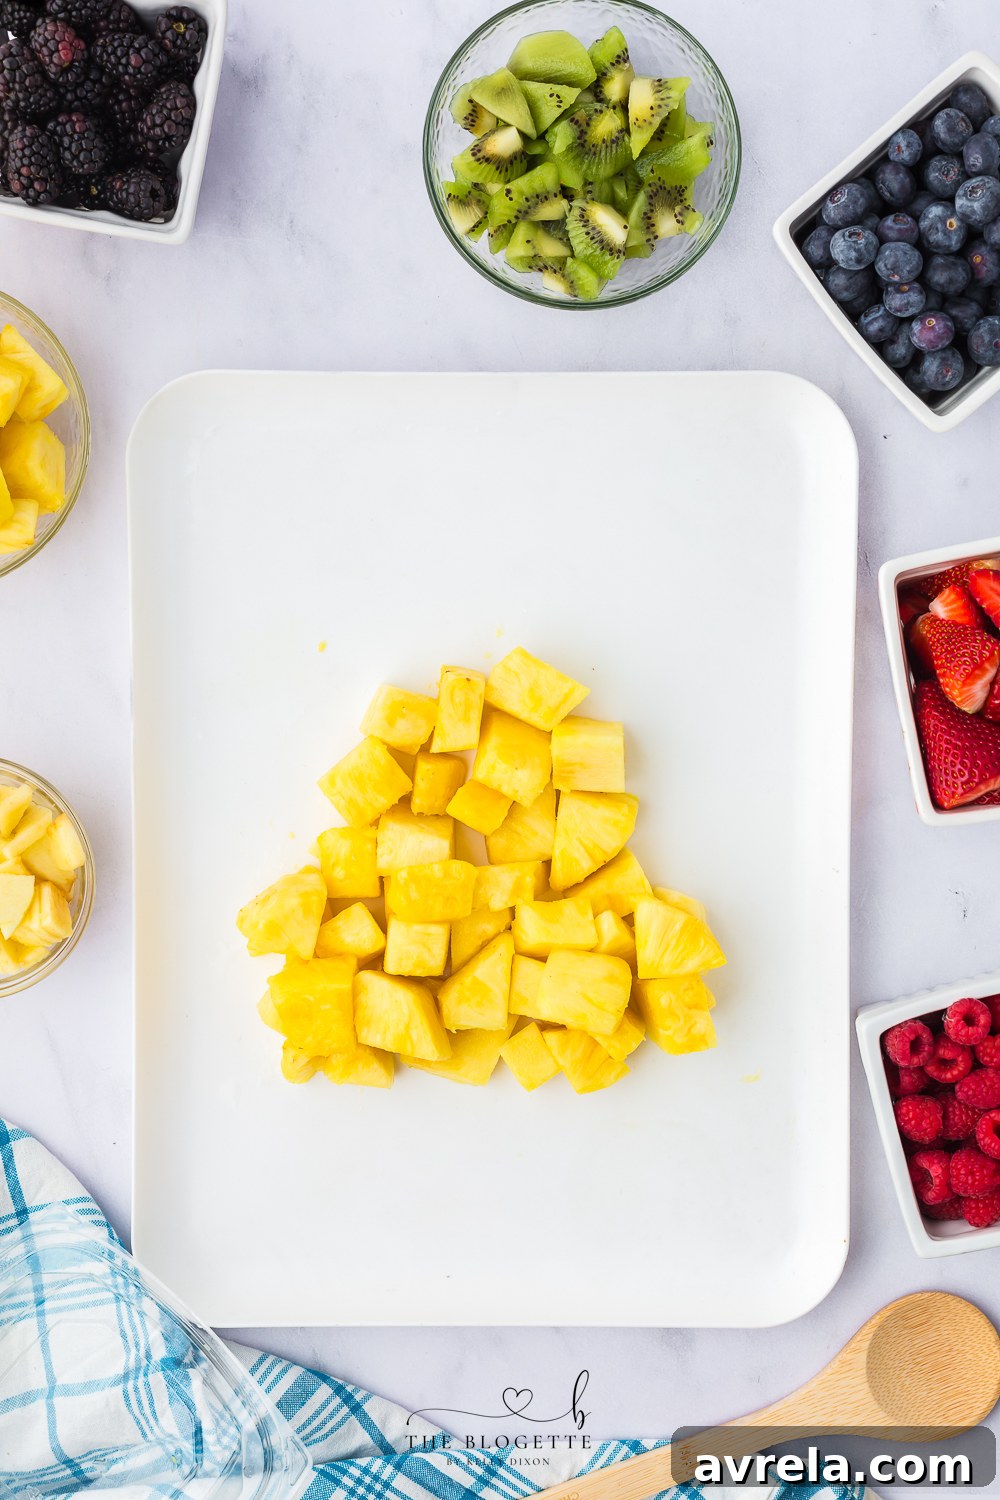
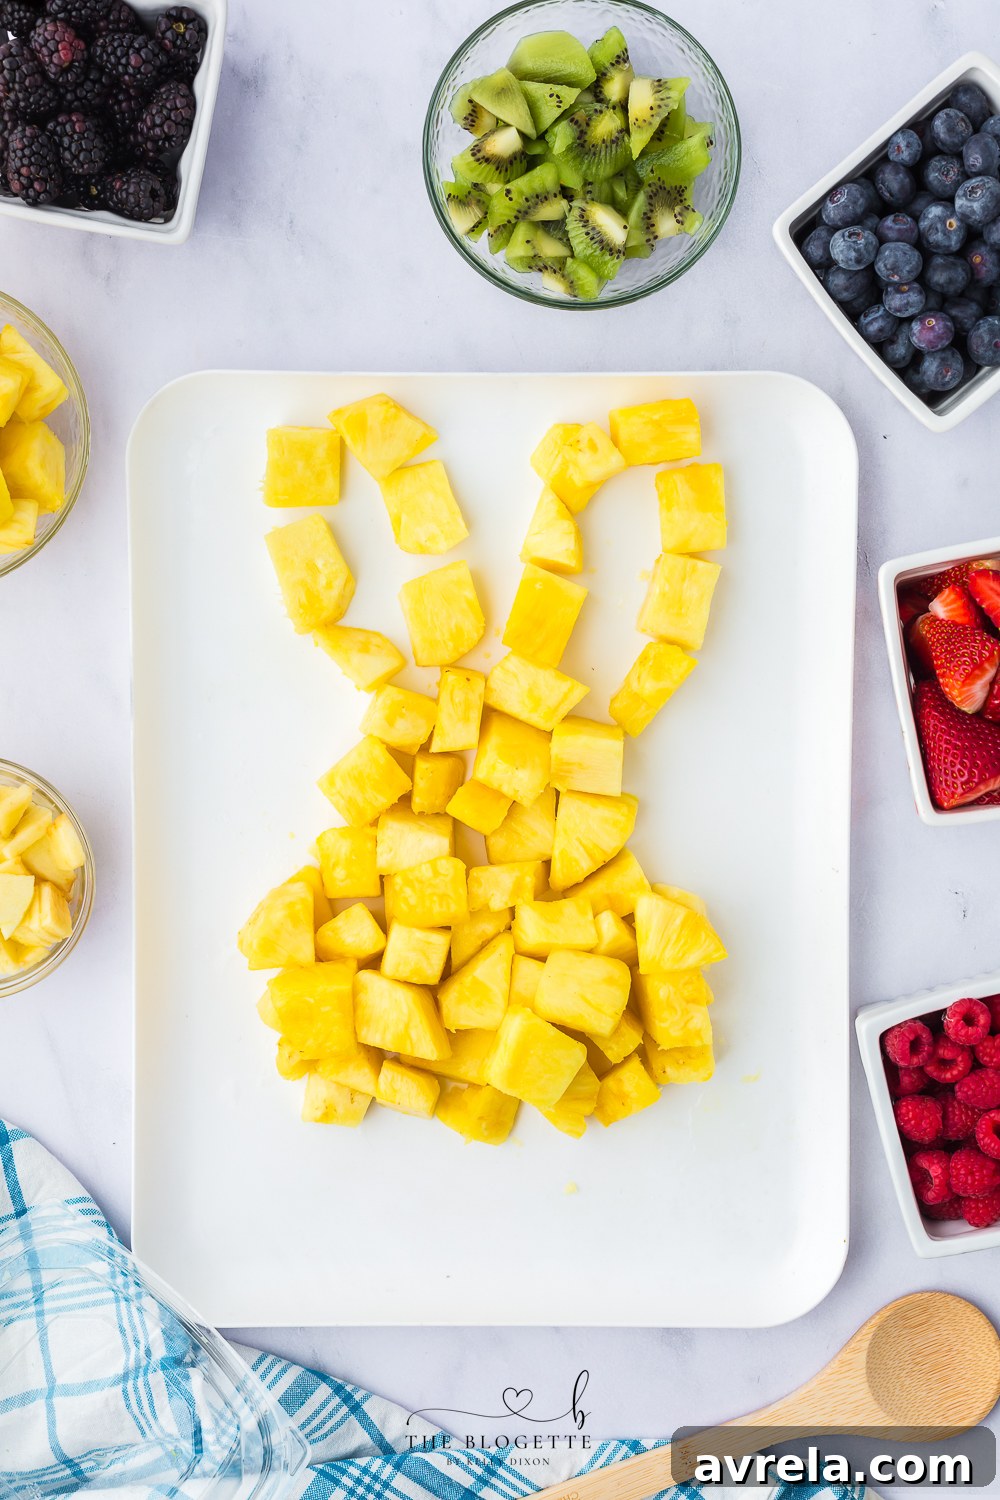
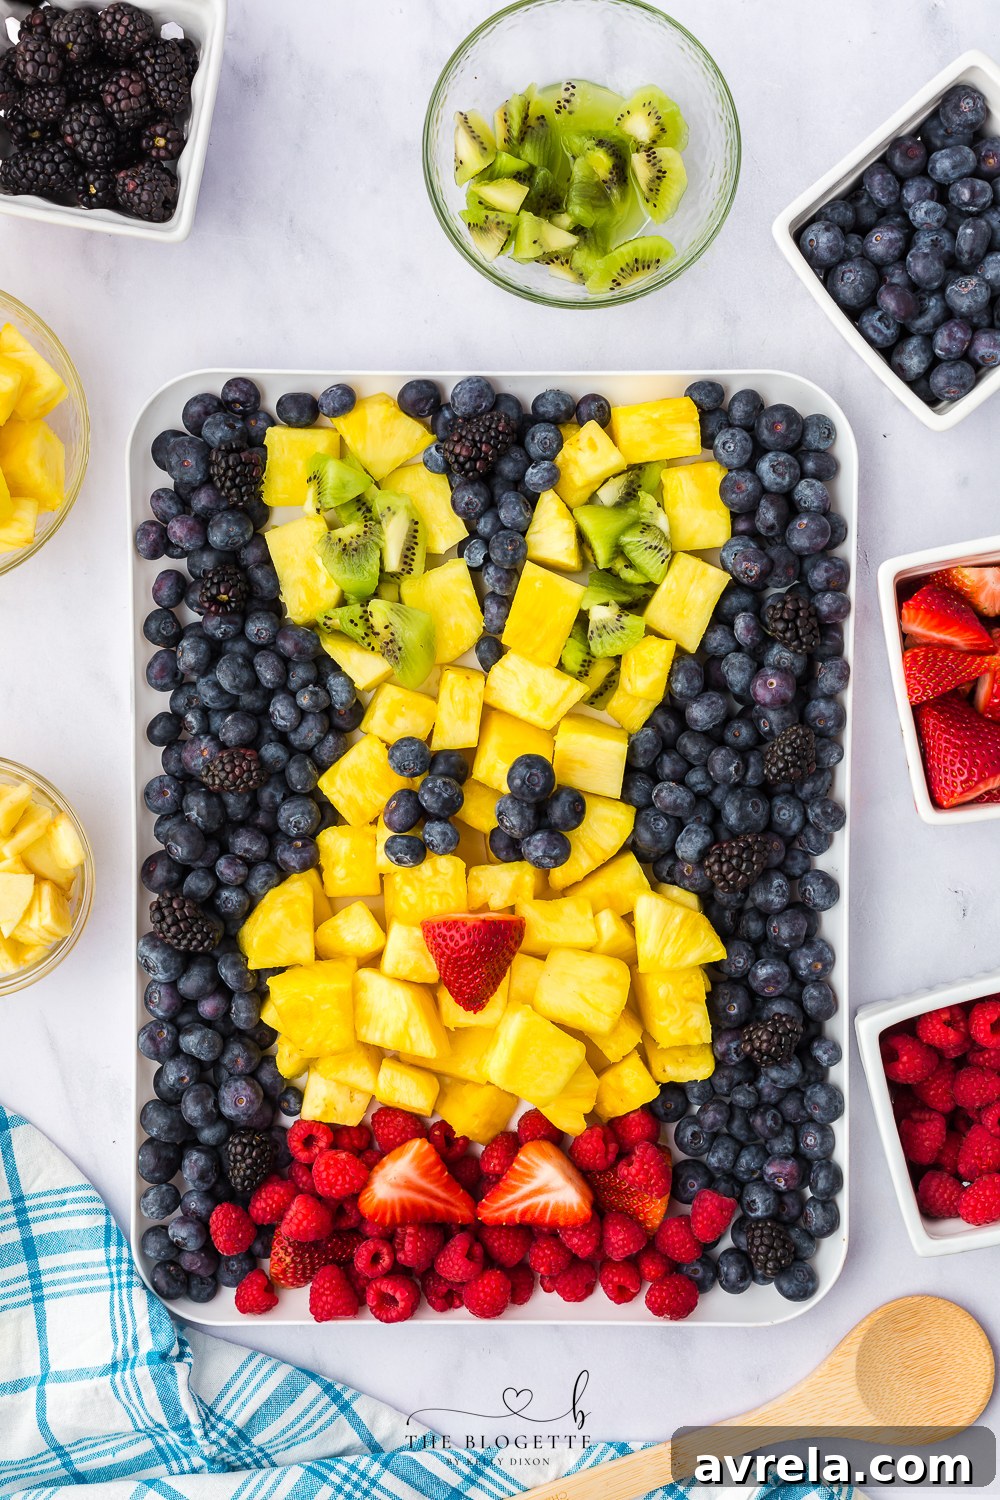
1. Begin the Bunny Face: On a large, clean serving platter, start by arranging the cubed pineapple. Form one large round pile for the bunny’s head, and then place two smaller round piles directly below it to create the bunny’s cheeks or snout area. This establishes the basic structure of your bunny’s face.
2. Outline the Ears: Above the large round pile that forms the main head, gently outline two large, elongated shapes for the bunny’s ears. You can use pineapple chunks or a combination of pineapple and another complementary fruit like apple slices for this initial outline, ensuring they are distinctly shaped.
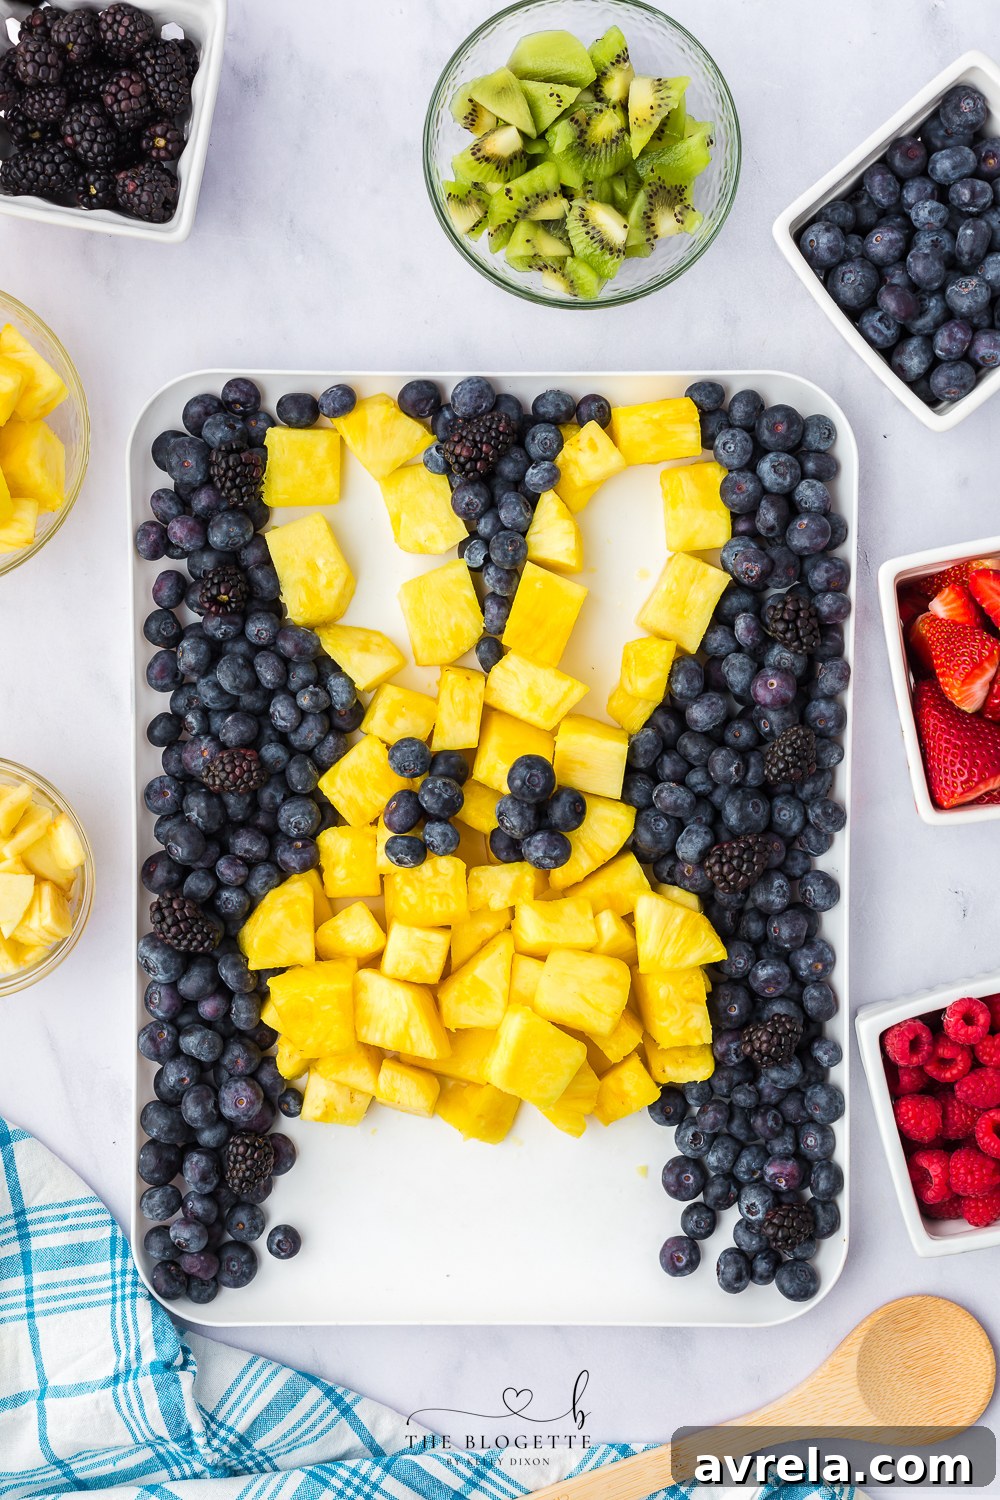
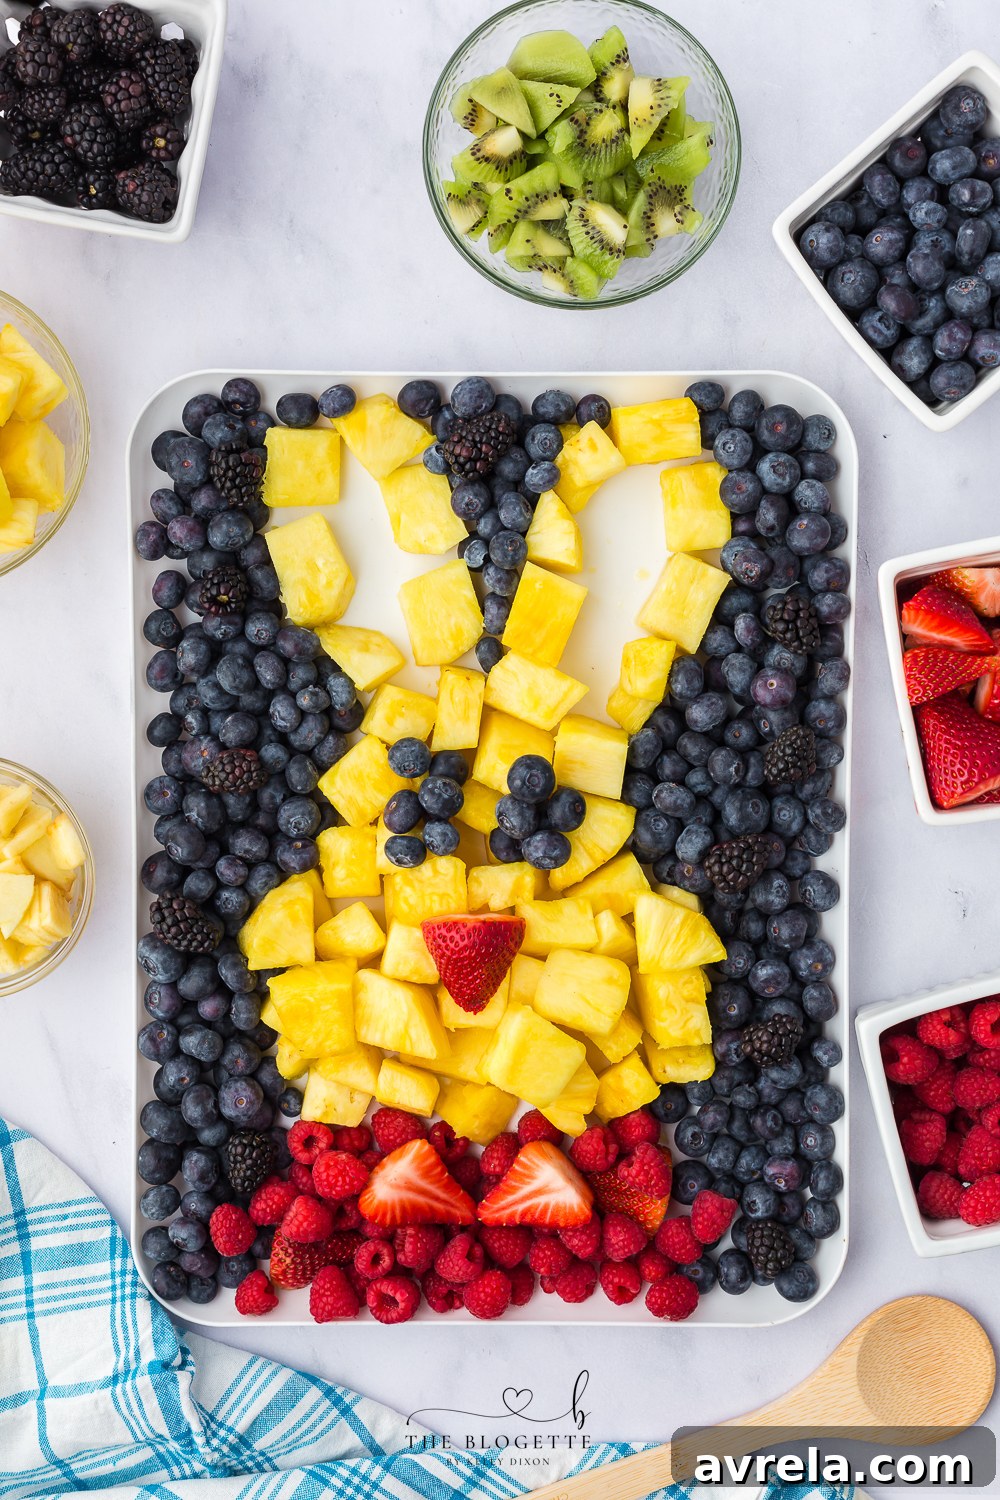
3. Create a Colorful Background and Eyes: Use blueberries to form two distinct eyes on the bunny’s main head pile. Then, fill in the areas around the top of the face and between the ears with a generous mix of blueberries and blackberries. This creates a rich, dark background that helps other features stand out and adds visual depth to your bunny.
Completing Your Easter Fruit Tray’s Design
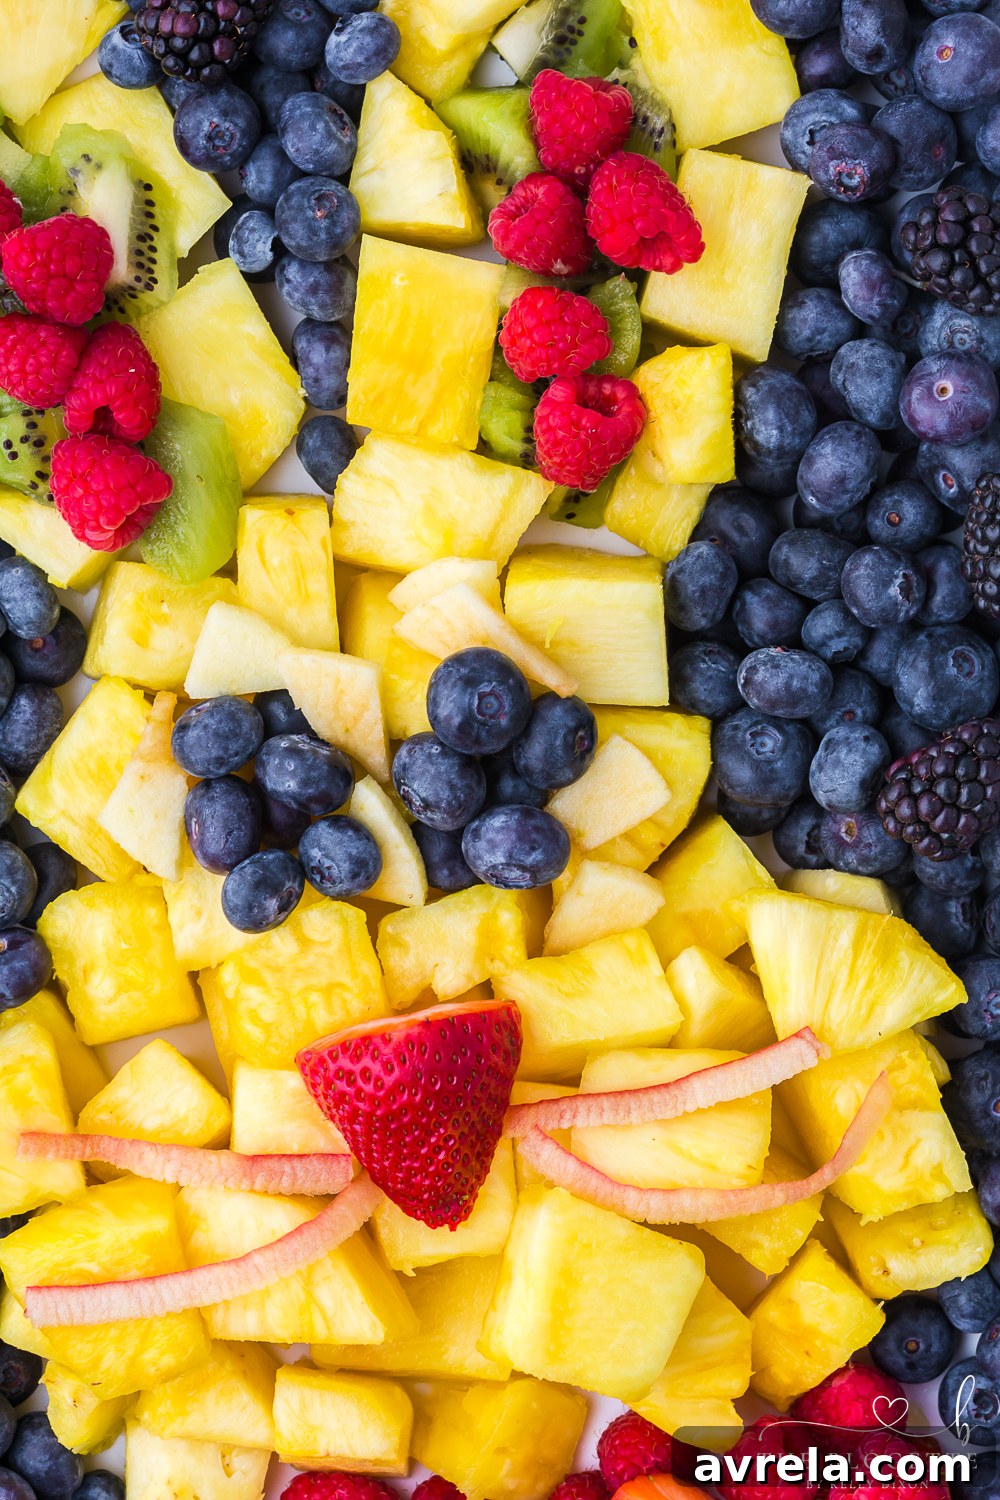
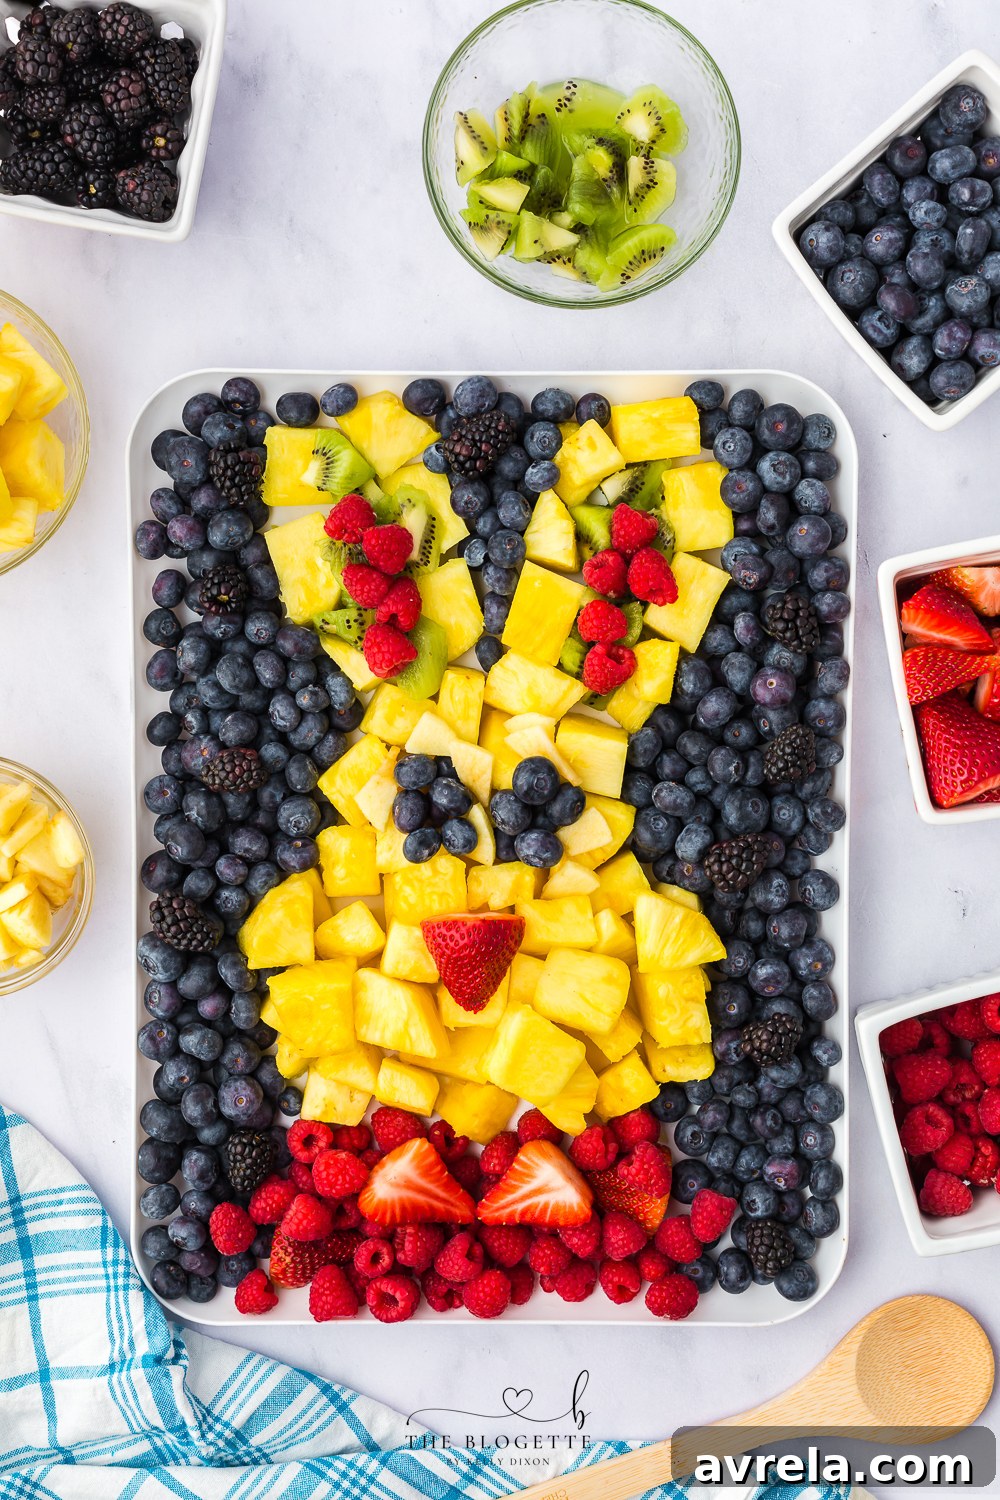
4. Finish the Ears and Add a Nose: Carefully fill in the middle sections of the bunny’s ears with vibrant raspberries. Use any remaining raspberries to create a complementary background area under the bunny’s face. For the bunny’s nose, place a single strawberry chunk or a halved strawberry directly in the center of the face, just below the blueberry eyes.
5. Detail the Ears with Kiwi: To add definition and another layer of color, use thinly sliced kiwi to outline the center part of the ears. Position the kiwi slices precisely between the raspberries and the pineapple outline, creating a clean, green border.
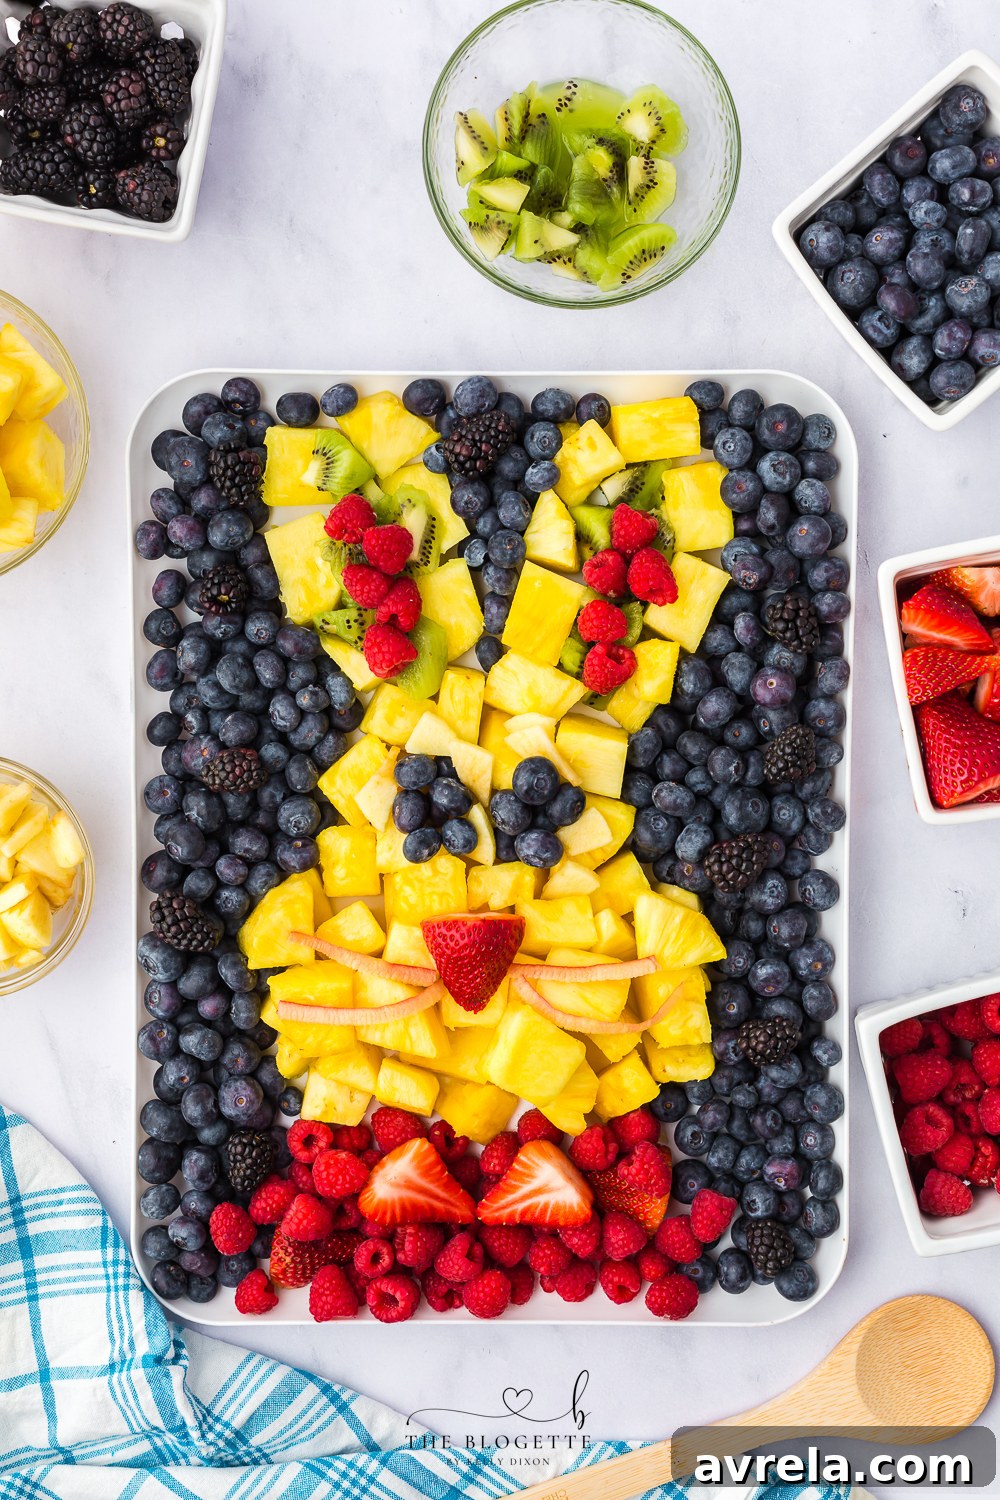
6. Whiskers, Teeth, and Eye Accents: This step adds the charming final touches. First, peel and slice half of your chosen apple into thin, elongated strips. Dice the remaining half of the apple into small cubes. Toss both the apple slices and diced pieces in a bowl with lemon juice to prevent any browning, ensuring they remain bright and appetizing. Use the apple slices to cut out long, delicate whiskers for your bunny face, arranging them gracefully around the nose. Finally, use the diced apple pieces to outline or highlight the blueberry eyes, giving them a bright, expressive quality.
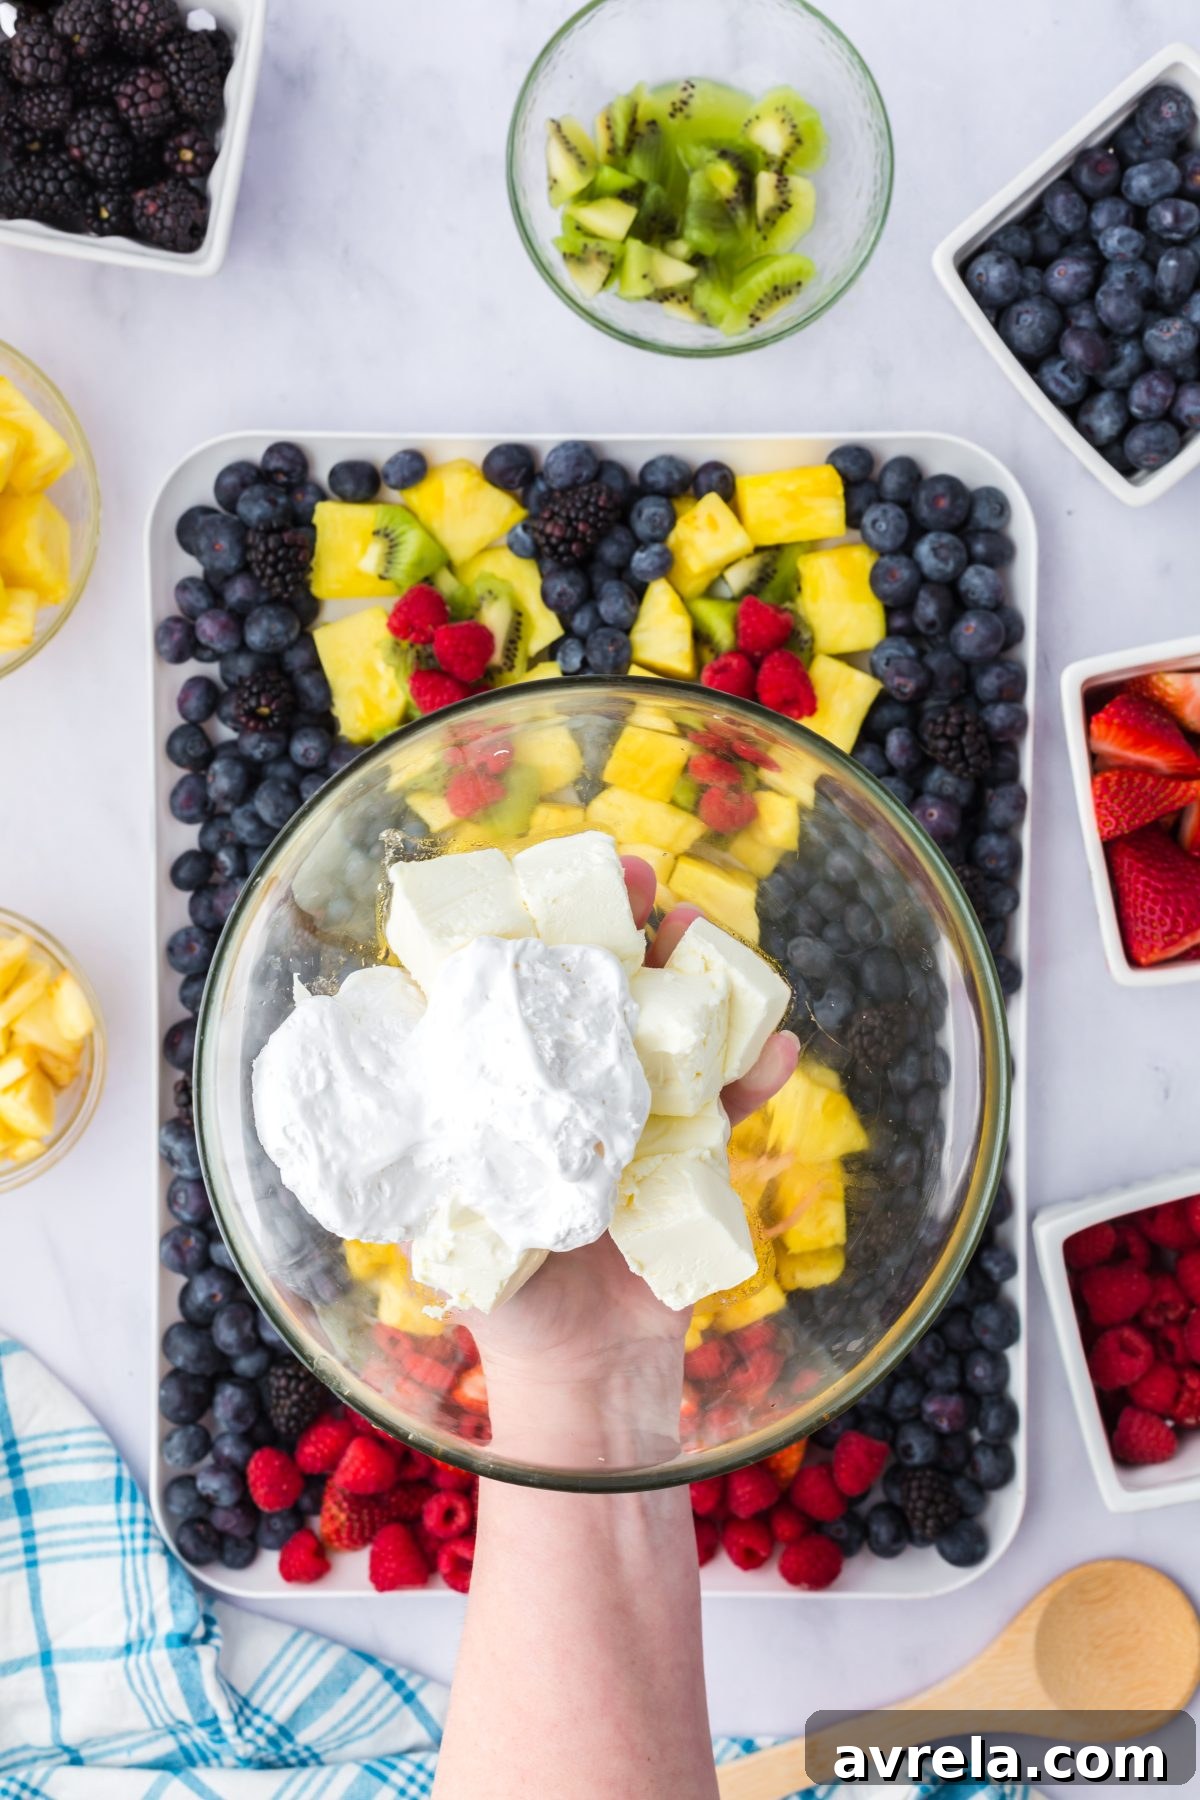
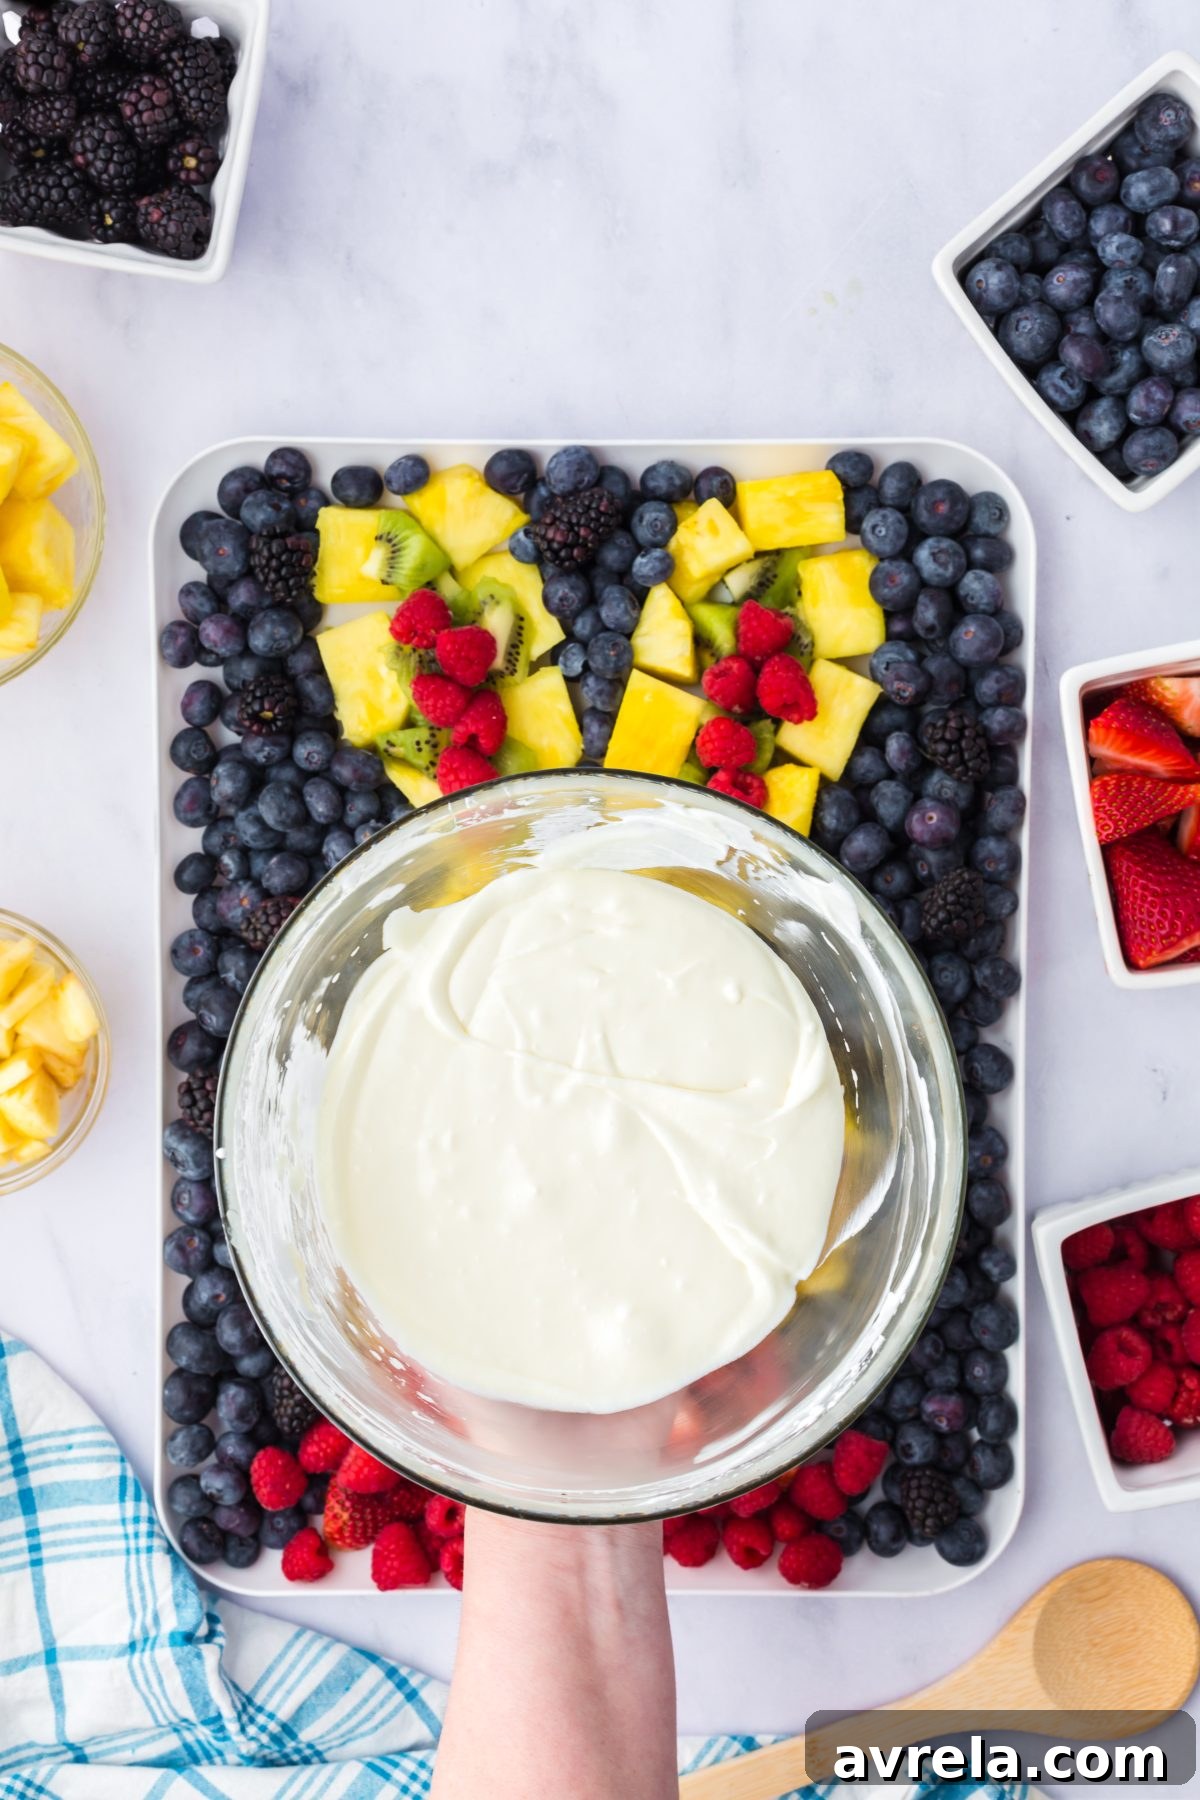
7. Prepare the Creamy Fruit Dip: This three-ingredient wonder is effortlessly prepared. In a medium mixing bowl, combine the softened cream cheese, marshmallow fluff, and almond extract. Using a hand electric mixer or a stand mixer, beat the ingredients together on medium speed until the mixture is completely smooth, airy, and soft. The dip should be free of lumps and have a spreadable consistency.
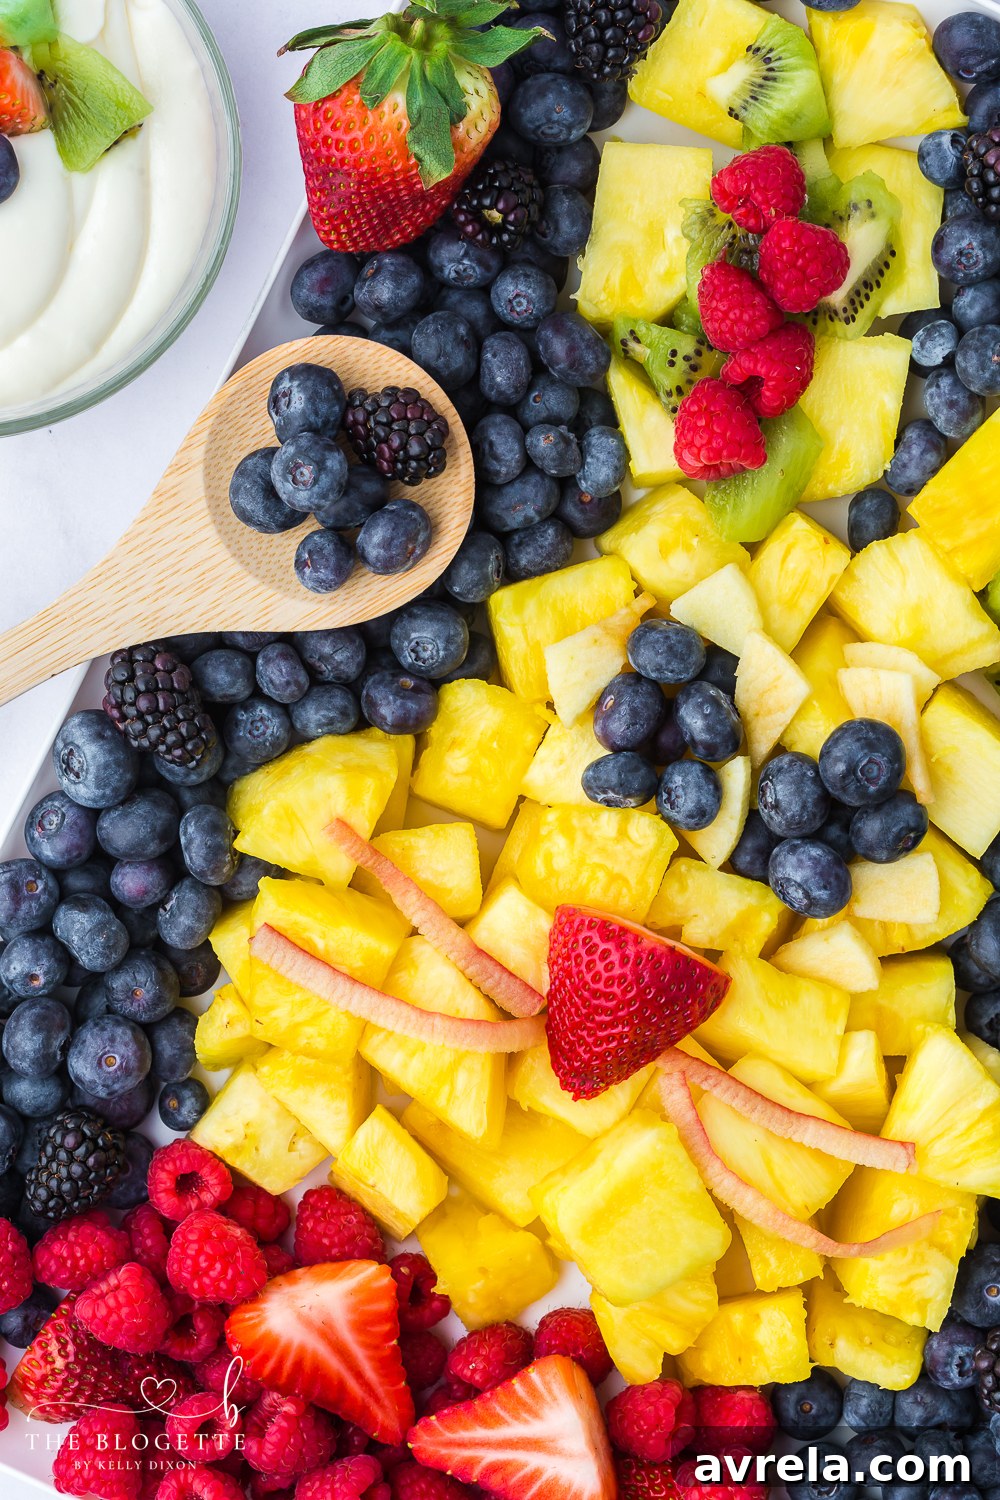
This creamy fruit dip is incredibly versatile, pairing beautifully not only with fresh fruit but also with cookies, vanilla wafers, graham crackers, and other delightful snacks. For a detailed guide on making the perfect dip, including additional flavor variations, you can find the full recipe here.
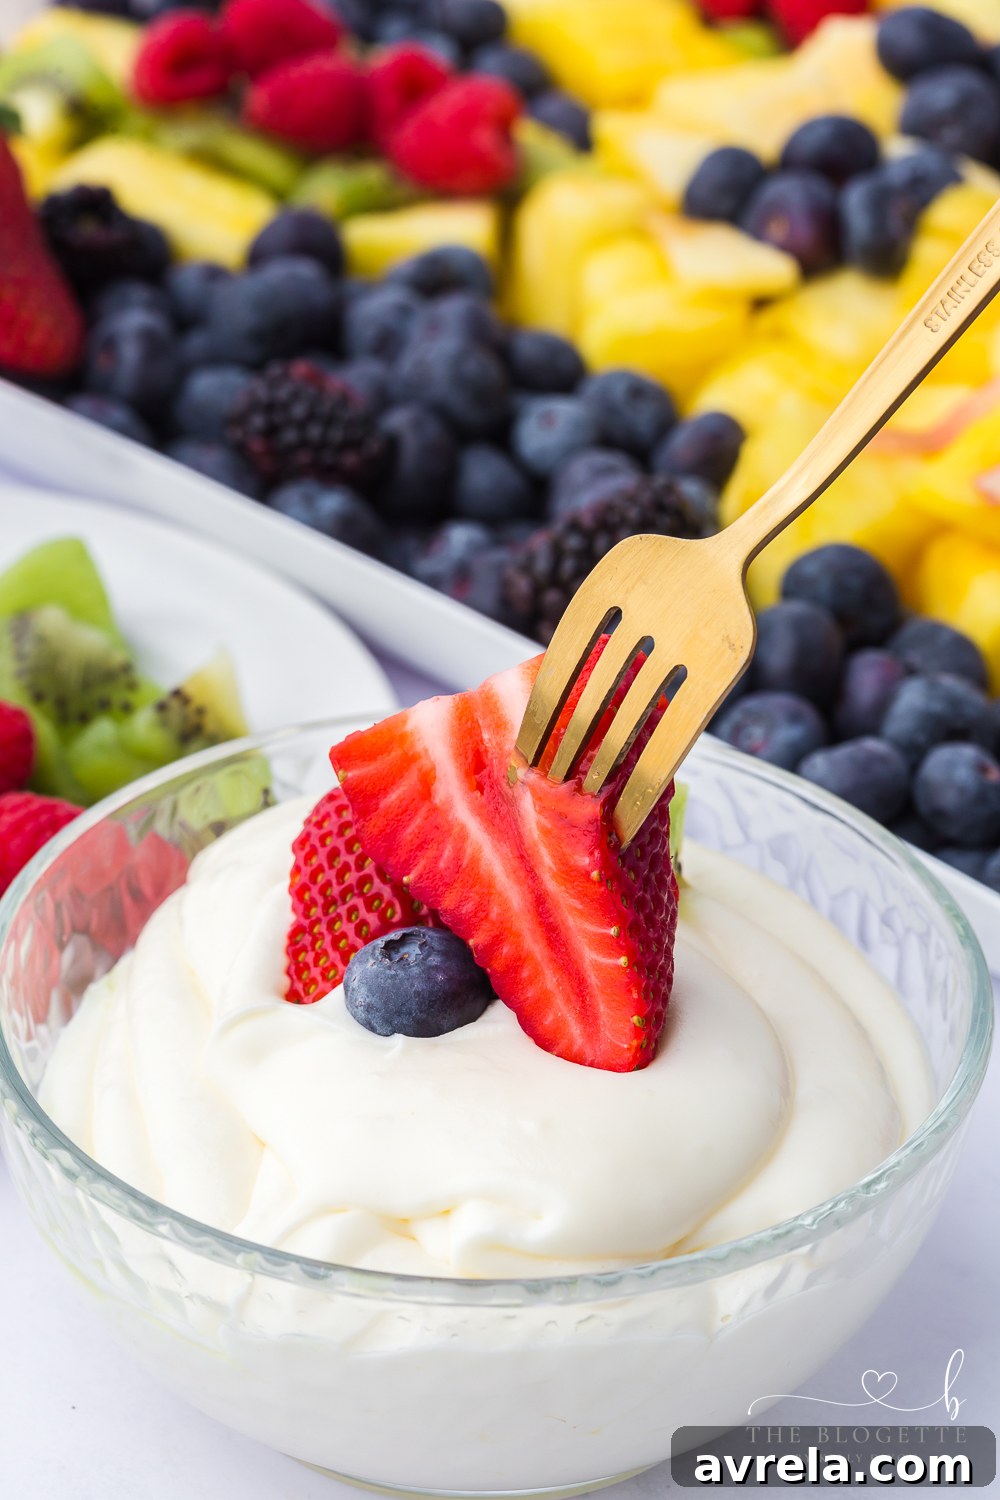
Once your bunny fruit platter is fully assembled and your dip is prepared, arrange the dip in a small bowl placed alongside or within the fruit arrangement. Serve chilled and watch as your guests delight in this adorable and delicious Easter masterpiece!
Tips for a Picture-Perfect Easter Fruit Platter
- Choose Fresh, Ripe Fruit: The success of your platter hinges on the quality of your ingredients. Select fruits that are firm, vibrant in color, and free of blemishes.
- Wash and Dry Thoroughly: Always wash all fruits well before slicing. Ensure they are completely dry to prevent a watery platter and to keep them looking fresh longer.
- Slicing Uniformity: While the bunny shape is organic, trying to keep slices somewhat uniform in thickness will make arrangement easier and the overall look tidier.
- Prevent Browning: Have lemon juice ready for apples and bananas. A quick toss will maintain their appealing color for hours.
- Layering for Dimension: Don’t just lay fruits flat. A slight overlap or piling can add appealing dimension and texture to your bunny.
- Chill Before Serving: Both the fruit platter and the dip benefit from being chilled for at least 30 minutes before serving. This enhances the refreshing taste.
- Creative Garnishes: For an extra festive touch, you could add a small mint sprig for a “tail” or use small edible flowers around the base of the platter.
More Festive Easter Recipes
Creamy Fruit Dip
Fluffy Bunny Buns
Carrot Rice Krispie Treats
Sweet Chocolate Egg Nests
Frequently Asked Questions About Easter Fruit Platters
Can I make the bunny fruit platter ahead of time?
While fresh fruit is always best, you can prepare some elements in advance. Wash and slice all your fruits a day before and store them in airtight containers in the refrigerator. Toss apples or bananas with lemon juice just before assembling. The fruit dip can be made up to 2-3 days in advance and stored in the fridge; give it a quick whisk before serving if it has thickened.
What kind of platter is best for this design?
A large, flat platter is ideal for creating the bunny shape. My platter is approximately 13×16 inches, but any large serving tray, a spacious cutting board, or even a baking sheet with a slight lip would work well. Adjust the quantity of fruit based on your platter size – you might need more for a larger surface or less for a smaller one. If you don’t have one large platter, consider making two smaller bunnies on dinner plates!
How can I keep the fruit fresh for longer on the platter?
The key is to use fresh, thoroughly dried fruit. Once assembled, cover the platter loosely with plastic wrap and refrigerate until serving. For extra protection against browning, you can lightly spritz certain fruits (like apples and bananas, if used) with a diluted lemon juice solution or a fruit preservative spray immediately after cutting. Keep the platter chilled as much as possible, especially if serving outdoors.
Can I adapt this for other holidays or themes?
Absolutely! The concept of a themed fruit platter is wonderfully versatile. For Valentine’s Day, you could arrange fruits into a heart shape. For Christmas, a festive tree or wreath. The principles of using colorful, fresh fruits and a delicious dip remain the same, allowing you to get creative for any occasion!
Easter Fruit Platter Recipe
Print Recipe
Easter Fruit Platter
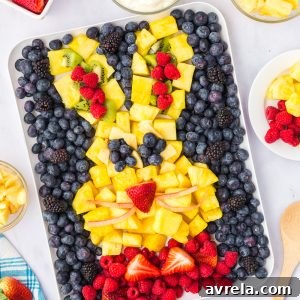
Shaped like a bunny, this Easter fruit tray has an assortment of colorful fruits like berries, kiwi, and pineapple.
20 minutes
20 minutes
6 servings
Equipment
- Large flat platter
- Mixing bowl
- Electric mixer
Ingredients
For the Fruit Tray
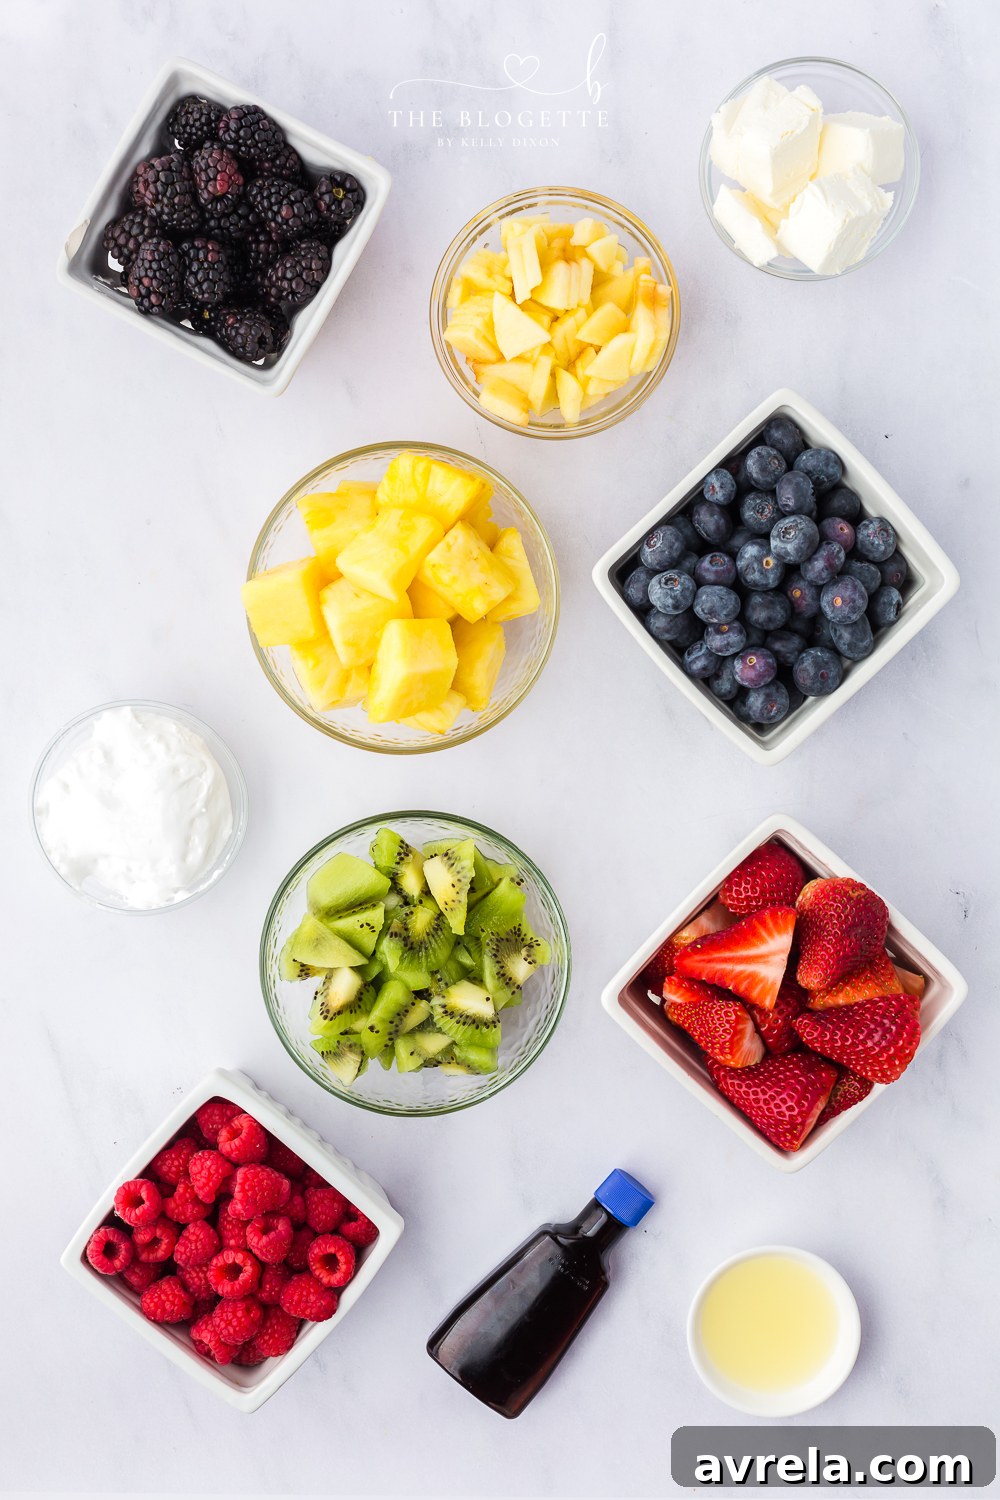
- 3 cups pineapple, cubed
- 4 cups blueberries, washed
- 1 cup strawberries, washed and sliced
- 1 cup blackberries, washed
- 2 cups raspberries, washed
- 1/2 cup kiwi, peeled and sliced
- 1 apple, any type
- 1/2 Tablespoon lemon juice
For the Fruit Dip
- 1 (8 ounce) block cream cheese, softened
- 1 (7 ounce) jar marshmallow fluff
- 1 teaspoon almond extract
- For full fruit dip directions, tap here
Instructions
- Make the bunny face. On a large platter, use the pineapple chunks to make the face of the bunny by forming 2 small round piles south of 1 large round pile.
- Outline the ears. Outline the large bunny ears north of the large round pile.
- Create a background. Using the blueberries, form the eyes. Use blueberries and blackberries to fill in around the top of the face and between the ears to create a dark background.
- Fill in the ears and add nose. Using the raspberries, fill in the inner part of the ears. Use the rest under the face of the bunny for a background effect. Place one halved strawberry in the center of the face under the eyes as the bunny’s nose.
- Detail the ears. Using the kiwi, outline the center of the ears between the raspberries and the pineapple sections.
- Make whiskers and eye accents. Lastly, peel and slice half of your apple and dice the other half. Toss all of the apple pieces in a bowl with lemon juice to prevent browning. Use slices of apple to cut long whiskers for the bunny face. Use diced apples to outline the bunny eyes for a highlight.
- Make the Dip. In a medium bowl, using a hand electric mixer or stand mixer, blend the cream cheese, marshmallow fluff, and almond extract at medium speed until smooth and soft.
- Serve chilled with the fruit dip.
Notes
Storage Instructions:
If you have leftover fruit and dip from your Easter bunny fruit platter, spoon the fruit and dip into separate airtight containers and refrigerate. They will both stay fresh for about 3-4 days. If you wish to keep the dip longer, it can be frozen for up to 3 months.
What size platter did you use?
You can use any large platter available. My platter is 13×16 inches, but a larger or smaller one will work (adjusting fruit quantities accordingly). If a large platter isn’t available, you could make two smaller bunnies using dinner plates or even a large cutting board. A lipped baking tray can also serve as a functional base.
This Easter Fruit Platter is more than just a recipe; it’s an opportunity to create beautiful memories with your family while enjoying a refreshing and healthy treat. Its festive appearance and delightful flavors are sure to make it a standout on your holiday table. Happy Easter and happy plating!