
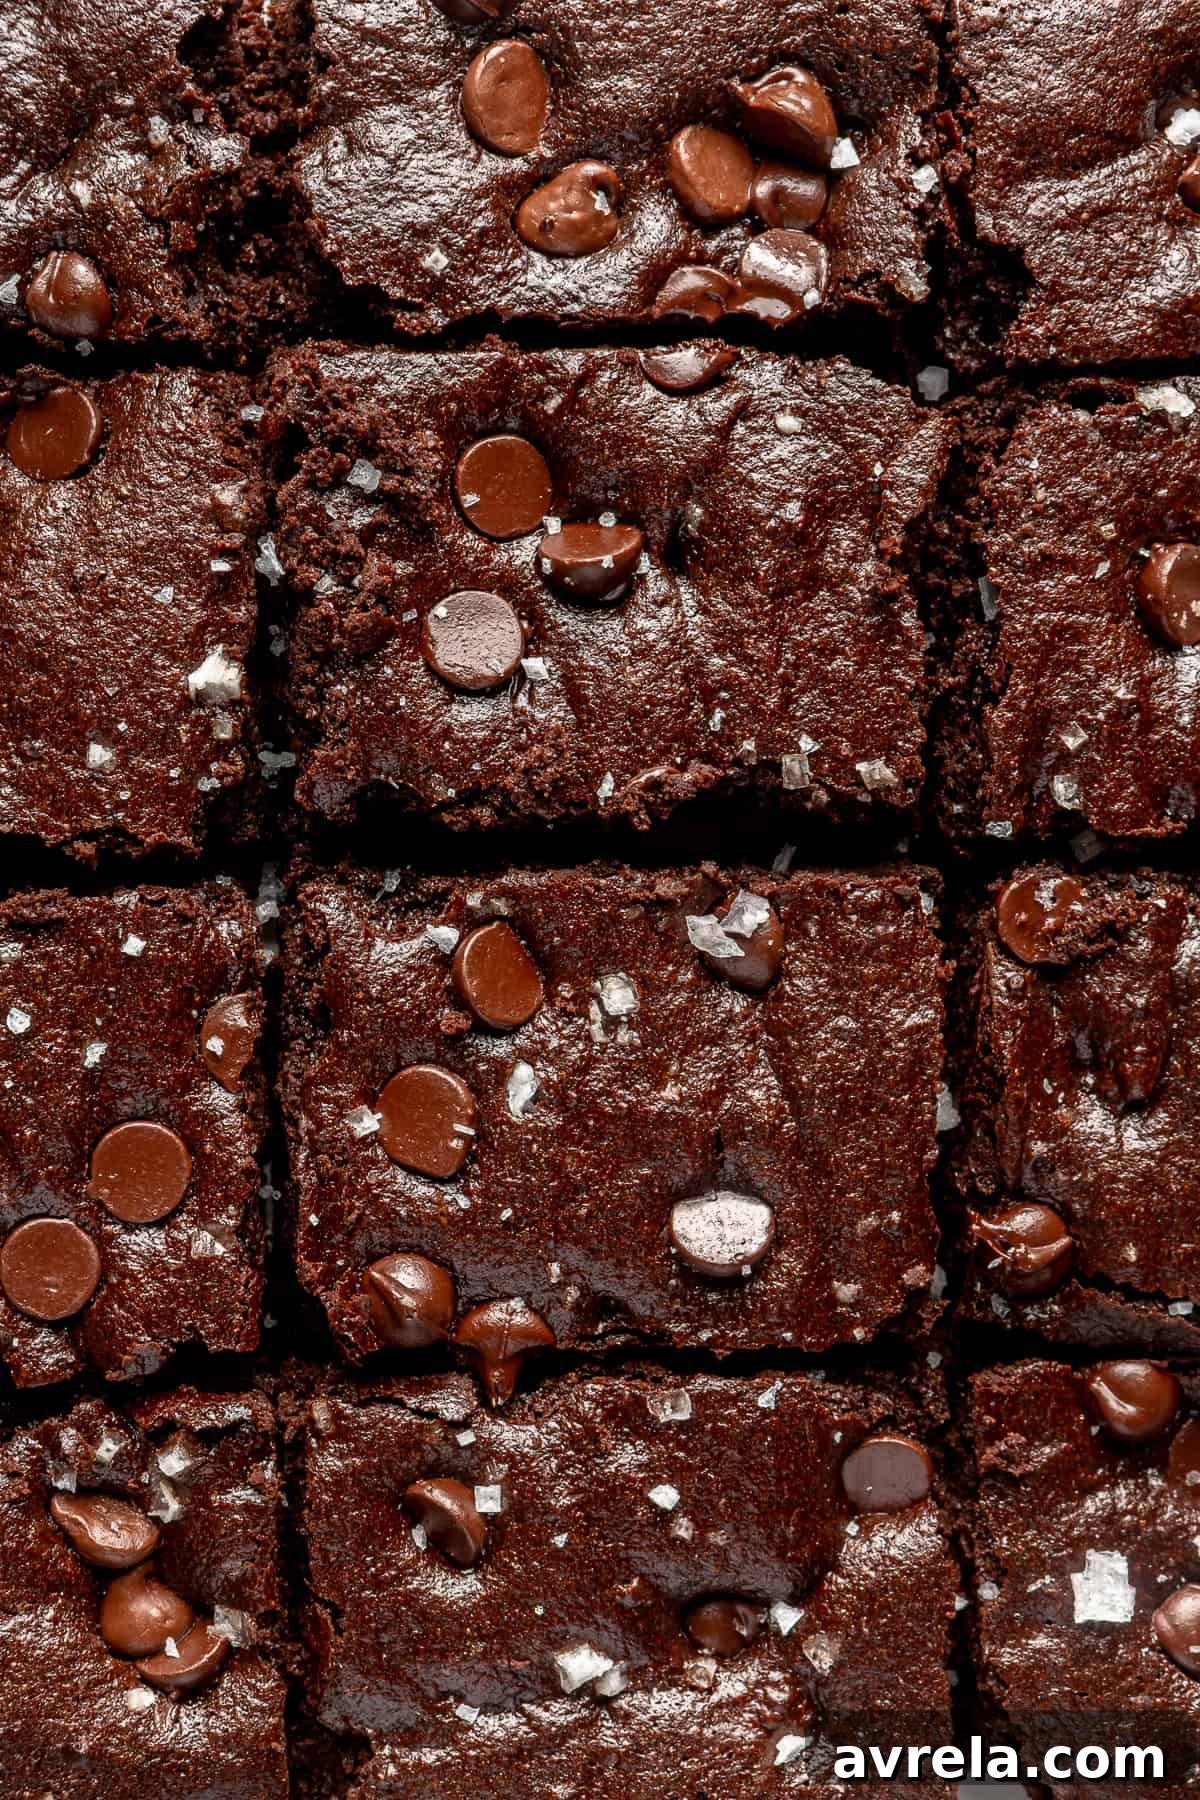
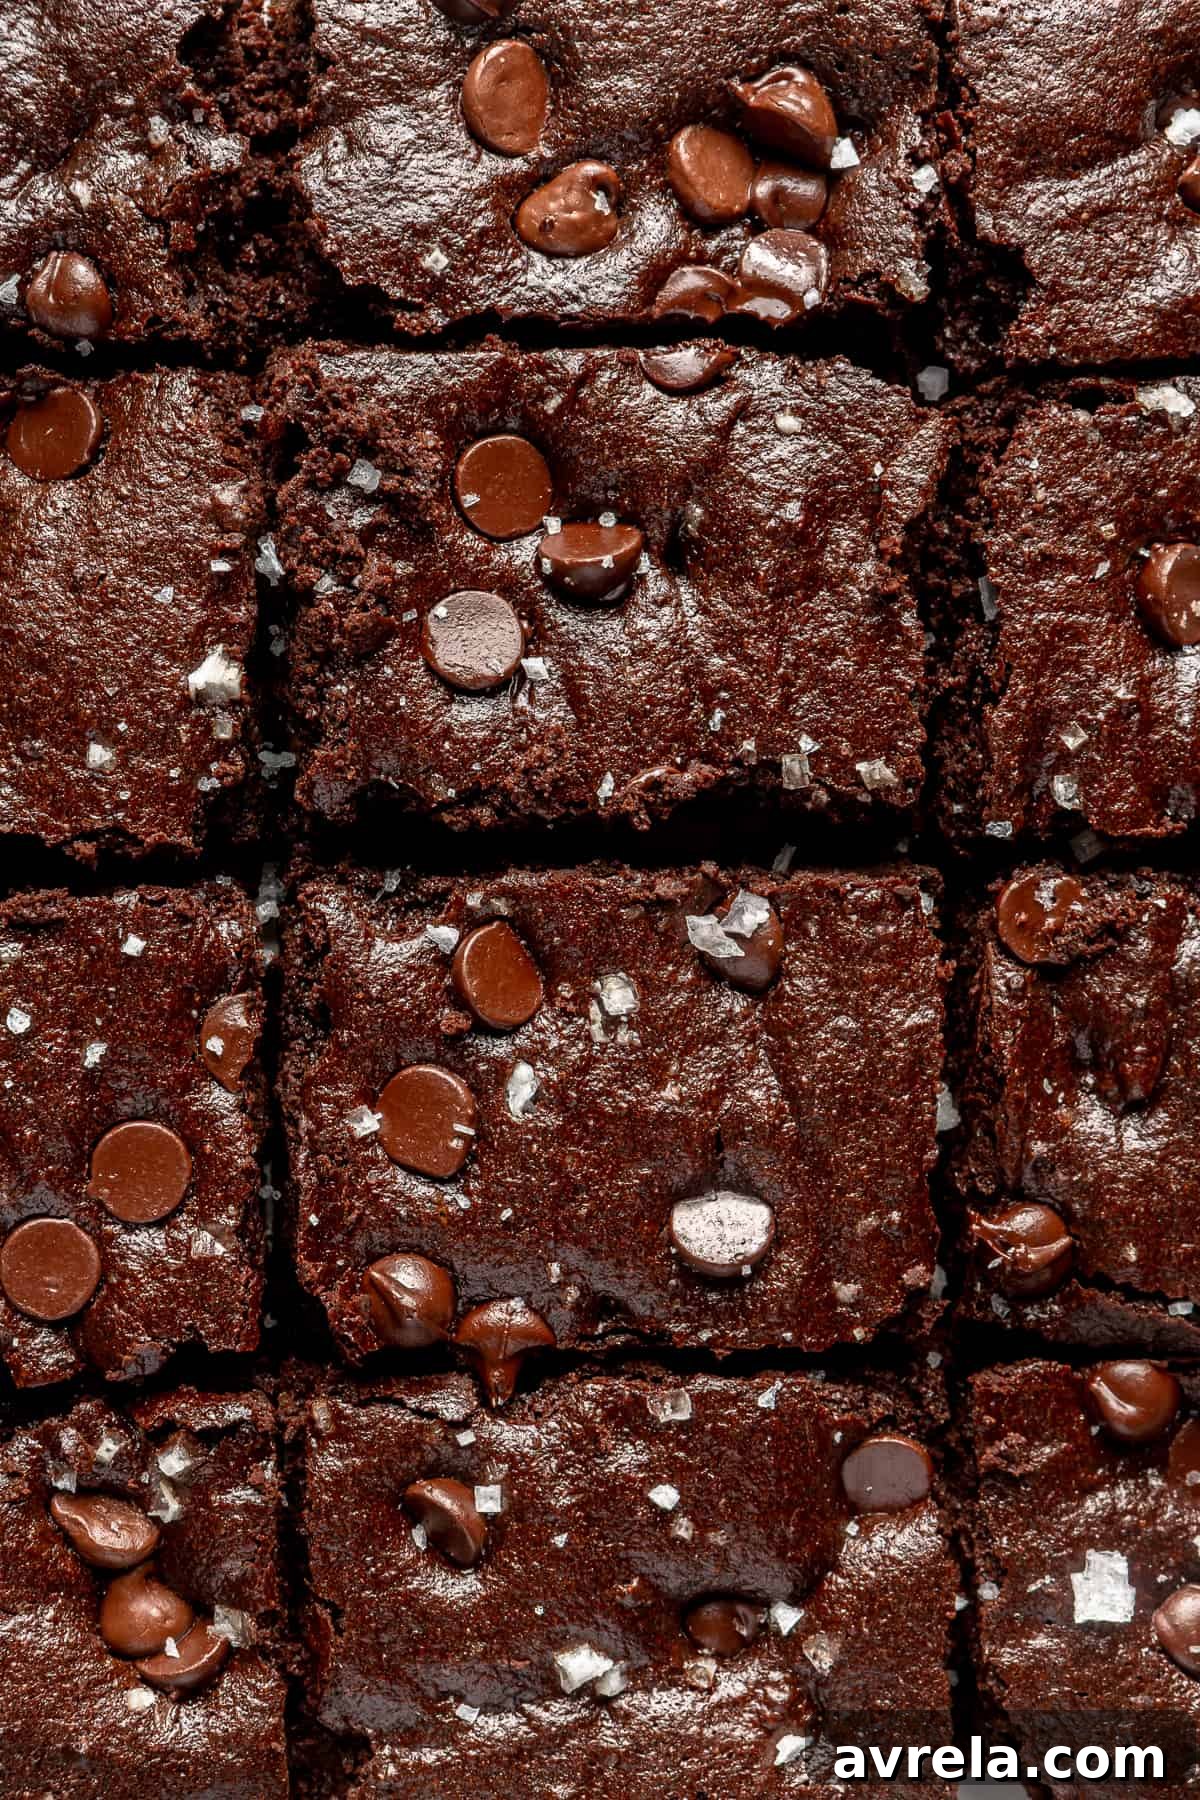
Welcome to the ultimate guide for creating unbelievably rich, chocolatey, and ultra-fudgy brownies that also happen to be gluten-free, dairy-free, and refined sugar-free. If you’ve been searching for that perfect brownie recipe that consistently delivers a gorgeous shiny top, a dense, moist center, and delightfully chewy edges, your quest ends here. This isn’t just another brownie recipe; it’s a culinary revelation that combines simple, wholesome pantry ingredients to produce a treat far superior to any boxed mix. Ready in under 30 minutes, these homemade fudgy brownies are perfect for an easy weeknight indulgence, a reliable crowd-pleaser for parties, or a freezer-friendly dessert. Prepare to be amazed by their intense chocolate flavor and remarkably easy preparation. You’ll truly wonder how something this decadent can also be mindful of your dietary needs!
Mastering the Art of the BEST Gluten-Free Fudge Brownies
Baking can sometimes feel like a delicate balancing act, but when you hit that sweet spot of perfect consistency and flavor, it’s an undeniable triumph. These fudgy gluten-free brownies are precisely that kind of win. Each bite is a symphony of textures and tastes: incredibly moist, intensely chocolatey, and with just the right amount of chewiness on the edges. The aroma alone is enough to get you drooling! What’s even better? They require only 25 minutes in the oven, making them a remarkably quick and satisfying dessert. The fudgy, almost molten interior is truly a dream, proving that you don’t have to compromise on decadence when choosing a healthier option. These brownies look as good as they taste, making them an ideal treat for any occasion, from casual gatherings to special celebrations like Valentine’s or Galentine’s Day. They are sure to become a beloved staple in your baking repertoire.
A Wholesome Twist: Healthier Fudge Brownies for Everyone
While we all adore a classic fudgy brownie, what truly sets this recipe apart is its commitment to using better-for-you ingredients without sacrificing flavor or texture. My journey with a gluten and lactose intolerance has led me to discover incredible healthy swaps that transform traditional treats into guilt-free pleasures. This recipe is a prime example of how you can enjoy a sweet indulgence while focusing on wholesome eating. Let’s delve into the thoughtful ingredient choices that make these brownies stand out:
- Natural Sweeteners: Maple Syrup & Coconut Sugar: Instead of refined white sugar, we opt for maple syrup and coconut sugar. Maple syrup isn’t just a delightful sweetener; it’s packed with antioxidants and boasts a lower score on the glycemic index compared to regular sugar. This means fewer drastic blood sugar spikes after enjoying your treat. Coconut sugar, while still a sugar, contains a small amount of inulin, a prebiotic fiber that supports gut health. These natural alternatives provide a rich sweetness with added nutritional benefits.
- Almond Flour for a Gluten-Free Base: My go-to flour alternative is almond flour. Made from finely ground blanched almonds, it offers all the nutritional advantages of the nut itself, including a wealth of vitamin E, magnesium, and dietary fiber. It’s naturally gluten-free and also has a lower glycemic index, contributing to a more balanced energy release.
- Antioxidant-Rich Cacao Powder: We pair this superfood-like almond flour with antioxidant-rich cacao powder. Cacao is raw, unprocessed cocoa, meaning it retains more of its powerful nutrients and intense chocolate flavor. Combined with natural sweeteners and dairy-free dark chocolate, this creates a truly heavenly experience.
The result is a brownie that tastes incredibly indulgent but nourishes your body from the inside out. It’s proof that healthy eating doesn’t mean depriving yourself of the joy of dessert.
Indulge Guilt-Free: More Than Just a Healthy Gluten-Free Treat
These fudgy gluten-free brownies are more than just a sweet treat; they’re an obsession waiting to happen. Imagine biting into a square, where every mouthful is graced with generous chunks of melted dairy-free chocolate chips and a delicate sprinkle of flaky sea salt on top, creating a perfect balance of sweet and savory. While they are absolutely divine on their own, the possibilities for indulgence are endless. For an extra layer of decadence, pair them with a scoop of your favorite dairy-free ice cream, or drizzle warm peanut butter or almond butter over them for a nutty twist.
For those truly looking to elevate their brownie experience, consider swirling in the luscious caramel from my renowned Twix Bars (an original recipe that is also gluten-free, dairy-free, and refined sugar-free) – a suggestion that blew my mind and is an absolute must-try! The versatility of these brownies makes them a fantastic addition to any menu. Bring a batch to your next gathering, and watch the expressions of pure shock and delight on everyone’s faces when they discover these incredible brownies are not only delicious but also gluten-free, dairy-free, and refined sugar-free. For more crowd-pleasing, easy, and healthy dessert ideas, explore my cookbook, Rachael’s Good Eats, or check out the extensive Sweets and Baked Goods sections on my website.
Essential Ingredients for Your Fudgy Brownies:
Crafting these delectable gluten-free brownies requires a handful of simple, wholesome ingredients. Each component plays a crucial role in achieving the perfect fudgy texture and rich chocolate flavor. Here’s what you’ll need to gather:
- Eggs, room temp: Crucial for binding and achieving that signature chewy texture. Room temperature eggs emulsify better with other ingredients, leading to a smoother batter and a more consistent bake.
- Dairy-free dark chocolate chips: The star of the show! High-quality dairy-free chocolate chips melt beautifully, providing intense chocolate flavor and pockets of gooey deliciousness.
- Coconut oil: A fantastic dairy-free fat that contributes to the brownies’ fudginess and helps create that desirable shiny top.
- Cacao powder: Unprocessed cocoa powder, offering a deeper, more robust chocolate flavor and a boost of antioxidants.
- Maple syrup: A natural liquid sweetener that adds moisture and a subtle caramel note, while contributing to a healthier sugar profile.
- Coconut sugar: Another natural granulated sweetener, similar in taste to brown sugar but with a lower glycemic index and a touch of fiber.
- Almond flour: Our gluten-free base, providing structure, a delicate nutty flavor, and beneficial nutrients.
- Flaky sea salt: A pinch enhances the chocolate flavor and provides a delightful contrast to the sweetness. Don’t skip this!
- Baking soda: A leavening agent that gives the brownies a slight lift, preventing them from being too dense.
Your Guide to Perfection: How to Make Fudgy Gluten-Free Brownies (Step-by-Step)
Creating these incredible brownies is surprisingly straightforward. Follow these simple steps for a truly rewarding baking experience:
- Prepare Your Oven: Begin by preheating your oven to 350 degrees F (175 degrees C). This ensures the oven is at the optimal temperature for even baking.
- Melt Chocolate & Oil: In a small saucepan, gently melt the coconut oil and 2/3 cup of your dairy-free chocolate chips over low heat. Stir continuously until the mixture is smooth and fully liquid. Immediately remove from heat to prevent burning and let it cool for about 15 minutes. This cooling step is crucial to avoid cooking the eggs later.
- Whisk Wet Ingredients: In a medium-sized mixing bowl, quickly whisk together the room temperature eggs and coconut sugar for about 30 seconds until light and slightly frothy. Then, whisk in the maple syrup until well combined. Finally, pour the cooled coconut oil and chocolate mixture into the bowl and whisk again until everything is smoothly incorporated.
- Combine Dry Ingredients: Gently fold in the cacao powder with a spatula, stirring until just combined. Next, sift in the almond flour along with the baking soda. Sifting prevents lumps and ensures an even distribution. Carefully stir until the flour is just incorporated, being careful not to over-mix, which can lead to tough brownies. Stir in the majority of the remaining chocolate chips at this stage, reserving some for topping.
- Prepare for Baking: Line a 6×6 or 8×8 inch baking dish with parchment paper, leaving an overhang on the sides to easily lift the brownies out later. Pour the brownie mixture evenly into the prepared dish. Sprinkle the remaining chocolate chips over the top of the batter, along with a final pinch of flaky sea salt for that perfect sweet-and-salty crunch.
- Bake and Cool: Bake for 22-25 minutes. Keep an eye on them; you want the edges to be set and a toothpick inserted into the center to come out with moist crumbs, not wet batter. Avoid overbaking if you desire that ultimate fudgy texture. Once baked, remove the dish from the oven and, here’s a critical step for fudginess, let them cool completely in the pan for at least 30 minutes before slicing and serving. This allows them to set properly.
Enjoy your homemade, wholesome fudgy brownies! Store any leftovers in an airtight container in the refrigerator for 1-2 days to maintain their freshness and fudgy texture.
Customizing Your Brownies: Gluten-Free Variations, Add-Ins, and Ingredient Swaps
While this recipe is perfected for a gluten-free, dairy-free, and refined sugar-free experience, there are many ways to adapt it to your preferences or dietary needs. Baking is all about experimentation and making a recipe your own!
Ingredient Swaps:
- Dairy & Flour Alternatives: If you don’t require dairy-free, you can easily swap the coconut oil for regular butter (grass-fed for added benefits, or ghee for a rich flavor). For those not avoiding gluten, all-purpose flour can be used instead of almond flour. Remember that traditional flours absorb liquids differently; you will only need about half the amount of all-purpose flour compared to almond flour. Always look up reliable conversions when switching flours to ensure the correct consistency.
- Nut-Free Options: For a nut-free alternative, cassava flour is an excellent choice. Typically, it can be used in a 1:1 ratio, but it can be a bit more finicky in baking. While I haven’t personally tested it in this specific recipe, be prepared to make minor adjustments to the liquid content if needed. Tapioca flour is another potential substitute to research.
- Sweetener Swaps: Unsweetened cocoa powder can work as a substitute for cacao powder, though the flavor profile might be slightly less intense. If coconut sugar isn’t available or preferred, brown sugar makes a fine alternative, offering a similar molasses-like depth.
- Egg Replacements: For those following a vegan diet or avoiding eggs, flax eggs (1 tbsp ground flaxseed + 3 tbsp water per egg, let sit for 5 minutes) are often a successful substitute in brownie recipes. If you try this, I’d love to hear about your results!
Creative Add-Ins:
Elevate your brownies with these delicious additions:
- Nuts: Fold in chopped walnuts, pecans, or almonds for added crunch and flavor.
- Dried Fruit: Dried cherries, cranberries, or chopped apricots can add a tangy counterpoint to the rich chocolate.
- Extracts: A teaspoon of peppermint extract for mint chocolate brownies, or a touch of orange extract for a citrusy twist.
- Candy: For a less healthy but fun indulgence, consider folding in crushed gluten-free candies or mini marshmallows.
- Swirls: As mentioned, a swirl of homemade caramel, peanut butter, or even a raspberry jam before baking can create stunning visual appeal and flavor variations.
Always remember that ingredient swaps can alter the final texture and taste, so don’t be afraid to experiment to find your perfect brownie!
Common Questions & Tips for Perfect Brownies
What if I Forgot to Have My Eggs at Room Temp?
Forgot to pull your eggs out ahead of time? No worries, I’ve got a clever trick to get them to room temperature quickly. Fill a small bowl (large enough to comfortably fit your eggs) with warm to very warm tap water. Ensure the water isn’t too hot, as you don’t want to prematurely cook the eggs. Gently place the eggs (still in their shells) into the bowl and let them sit for about 5 minutes. They’ll be perfectly tempered and ready to use!
Are Gluten-Free Fudge Brownies Healthier Than Regular Brownies?
When you’re aiming for a healthier lifestyle, gluten-free brownies, especially ones made with natural sweeteners and alternative flours like almond flour, are generally a more conscious choice. As I mentioned earlier, ingredients like almond flour are often higher in essential nutrients and fiber and typically have a lower glycemic index compared to traditional white flour. Opting for gluten-free brownies isn’t just about accommodating dietary restrictions; it’s a step towards prioritizing overall health and wellness. It allows for balance, meaning you can still enjoy delicious sweets without completely eliminating them from your diet. Being mindful of what you put into your body, even when it comes to desserts, is always a positive step!
What Makes Brownies Fudgy vs Cakey?
The texture of a brownie, whether it’s gluten-free, dairy-free, or conventional, largely depends on the ratio of fat to flour in the recipe. If your goal is to bake a gloriously fudgy brownie, you’ll want a recipe that calls for a higher proportion of fat (like butter, oil, or even milk) relative to the flour. More fat contributes to a denser, more moist, and intensely rich result. Conversely, for a lighter, more cake-like brownie, recipes typically feature a higher flour-to-fat ratio, often with added leavening agents, resulting in a fluffier crumb.
Can I Double the Recipe?
Yes, absolutely! This recipe can be easily doubled. If you’re doubling, I recommend using a larger baking dish, such as a 9×13 inch pan. Keep in mind that the baking time might need to be adjusted slightly, usually by an additional 5-10 minutes. Always test for doneness with a toothpick.
How Should I Store Leftover Brownies?
To keep these fudgy brownies at their best, store them in an airtight container at room temperature for up to 3 days, or in the refrigerator for up to a week. For longer storage, you can individually wrap cooled brownies in plastic wrap, then place them in an airtight freezer-safe bag or container and freeze for up to 2-3 months. Thaw at room temperature or warm gently in the microwave for a fresh-from-the-oven feel.
Holiday & Seasonal Variations
Make these brownies extra special for any holiday! For a festive touch this Valentine’s Day, I made a double batch and adorned them with cheerful pink heart sprinkles and decadent white chocolate chips. You can watch the full process on my Reel HERE for inspiration! Feel free to customize with sprinkles, candies, or toppings that match any season or celebration.
Shop My Favorite Baking Essentials
More Wholesome Baked Goods and Sweet Treats You’ll Love:
If you enjoyed these gluten-free fudge brownies, you’re in for a treat! Explore more delicious and wholesome recipes that are perfect for any craving:
- Peanut Butter Blossoms
- Tahini Chocolate Chunk Cookies
- 20-Minute Paleo Pear Crisps
- The Best Gluten-Free Zucchini Bread
- Peanut Butter Swirl Fudge Brownies
- Cashew Chocolate Chip Cookie Skillet
Click here to watch the reel I made of this recipe!
Fudge Brownies (Gluten-Free & Dairy-Free)
Equipment
-
Sieve or fine-mesh strainer
-
Mixing bowls
-
Baking dish 6×6 or 8×8
Ingredients
- 2 eggs, room temp
- 1 cup dairy-free dark chocolate chips, leave 1/3 cup aside
- 1/3 cup coconut oil
- 1/3 cup cacao powder
- 1/4 cup maple syrup
- 1/4 cup coconut sugar
- 1/3 cup almond flour
- 1/2 tsp flakey sea salt
- 1/4 tsp baking soda
Instructions
-
Preheat oven to 350 degrees F.
-
In a small saucepan over the stove on low heat, melt the coconut oil and 2/3 cup chocolate chips. Once liquid, remove immediately, then let cool for 15 minutes.
-
In a medium bowl, quickly whisk together the room temp eggs and coconut sugar for 30 seconds. Then whisk in the maple syrup, then pour in the cooled coconut oil / chocolate mixture, and whisk again.
-
Fold in the cacao powder and gently stir until just well combined. Sift in the almond flour, then making sure not to over-mix, stir together along with the baking soda, and majority of the remaining chocolate chips.
-
Add parchment paper to a 6×6 or 8×8 baking dish, then pour the mixture over the top, topping with final chocolate chips and a pinch of sea salt.
-
Bake for 22-25 minutes, then remove and let cool for 30 minutes before serving. Store any leftovers in the refrigerator, in an airtight container, for 1-2 days.