
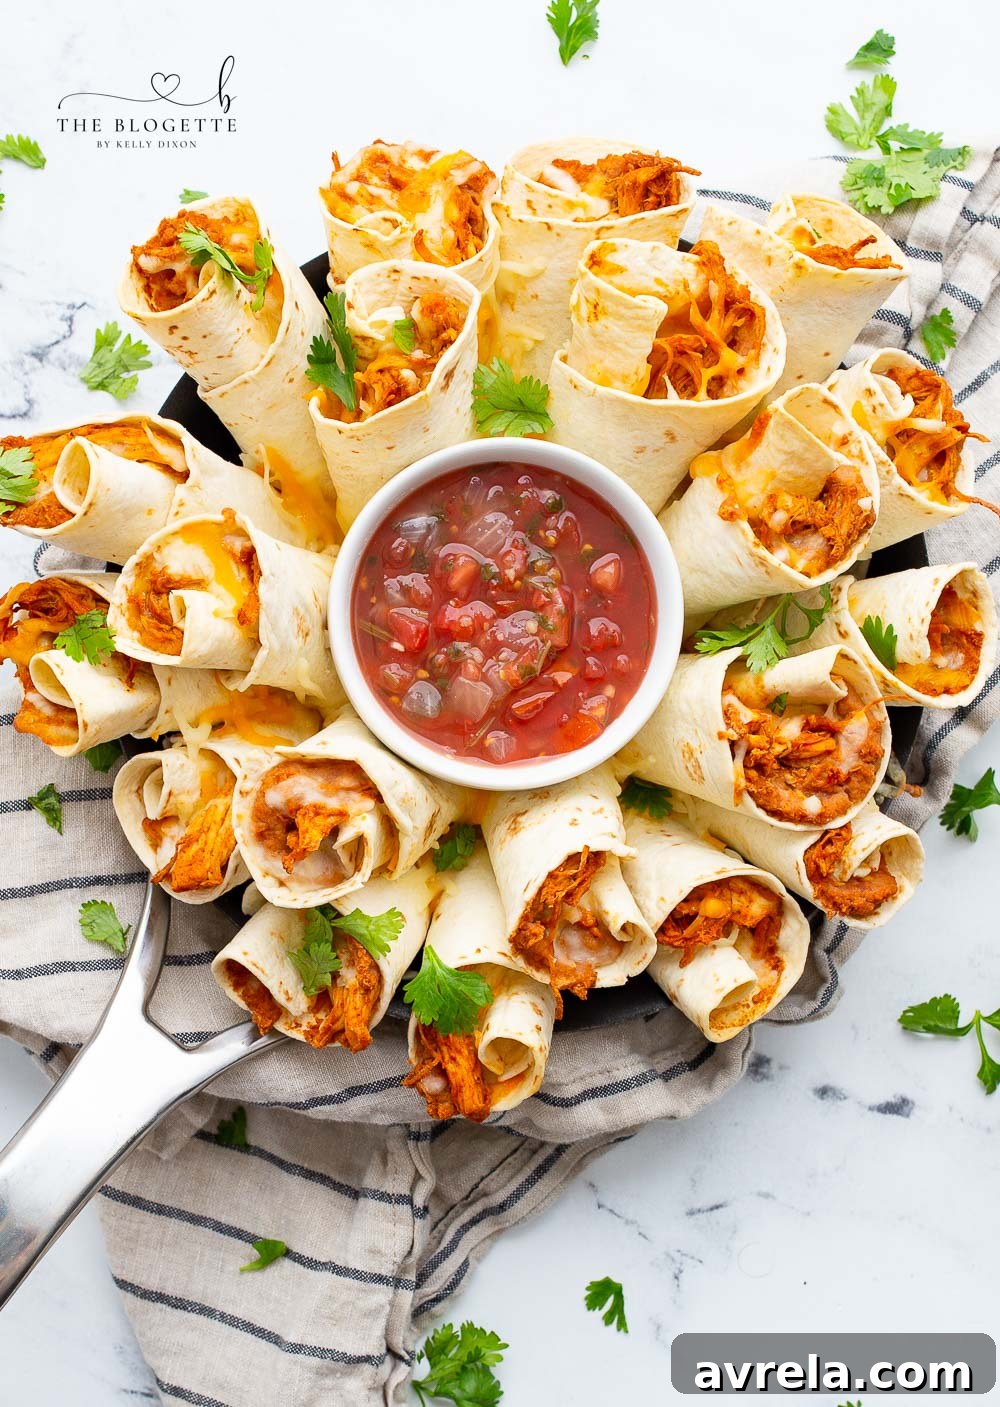
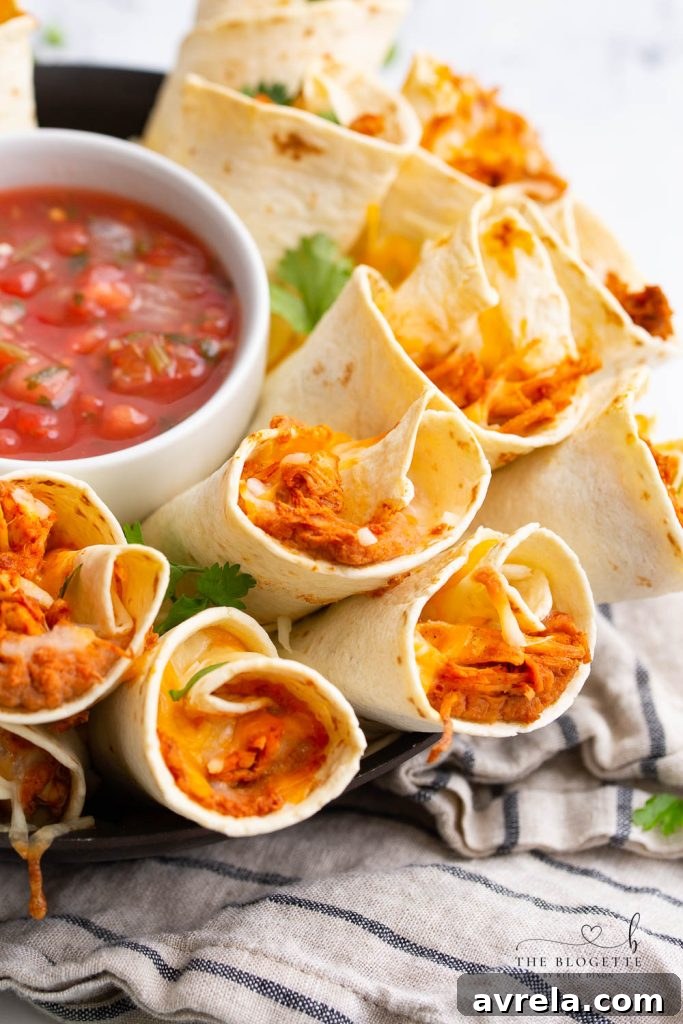
Discover the ultimate crowd-pleaser for any gathering: the **Blooming Burrito Ring**! This delightful appetizer or fun family meal transforms comforting cheesy chicken and bean burritos into a visually stunning, easy-to-share dish. Baked to golden perfection, these mini burritos are arranged in a beautiful ring around a tempting bowl of dip, making it an irresistible centerpiece. Whether you’re hosting a party, celebrating Taco Tuesday, or simply looking for a creative and hearty meal, this blooming burrito ring promises to be a hit with everyone. Its unique presentation and familiar flavors make it a standout recipe that’s as enjoyable to look at as it is to eat.
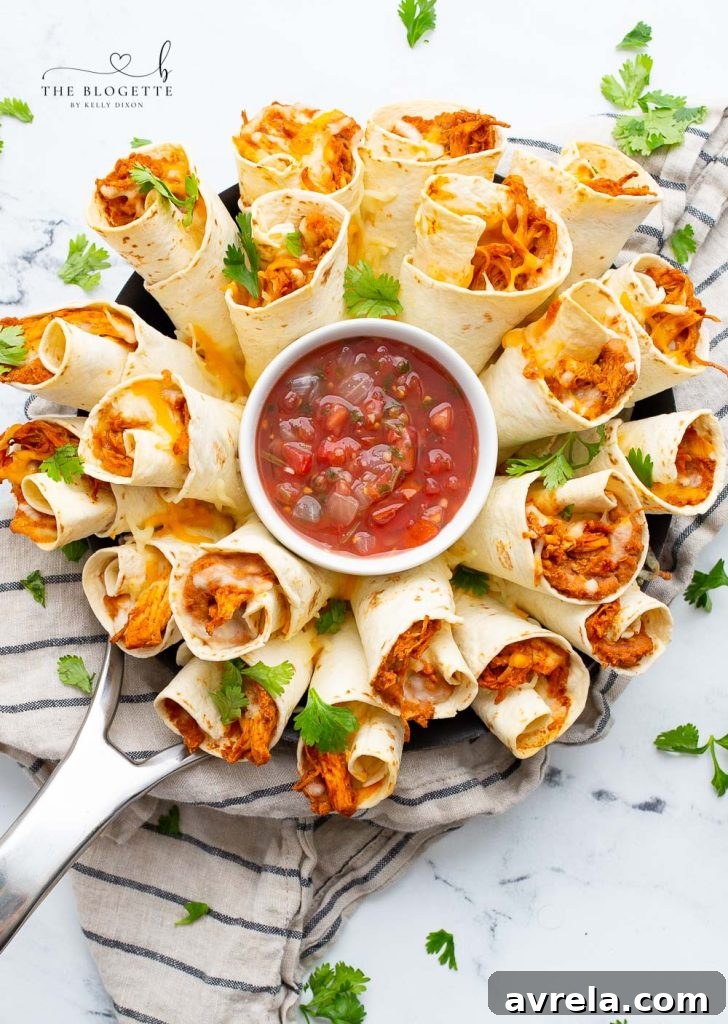
The Ultimate Blooming Burrito Ring Recipe
Imagine crispy flour tortillas, generously packed with savory refried beans, perfectly seasoned shredded chicken, and a melty blend of Mexican cheeses. These flavor-filled delights are then carefully rolled into individual cones, nestled together in a circular pattern, and baked until they achieve a gorgeous golden hue with bubbling, gooey cheese. Served hot and fresh, this blooming burrito ring is not just a dish; it’s an experience. It’s impossible not to love this fun, interactive recipe that offers both comfort and excitement in every bite. It’s perfect for dipping, sharing, and creating memorable moments around the table.
Why You’ll Adore This Blooming Burrito Ring
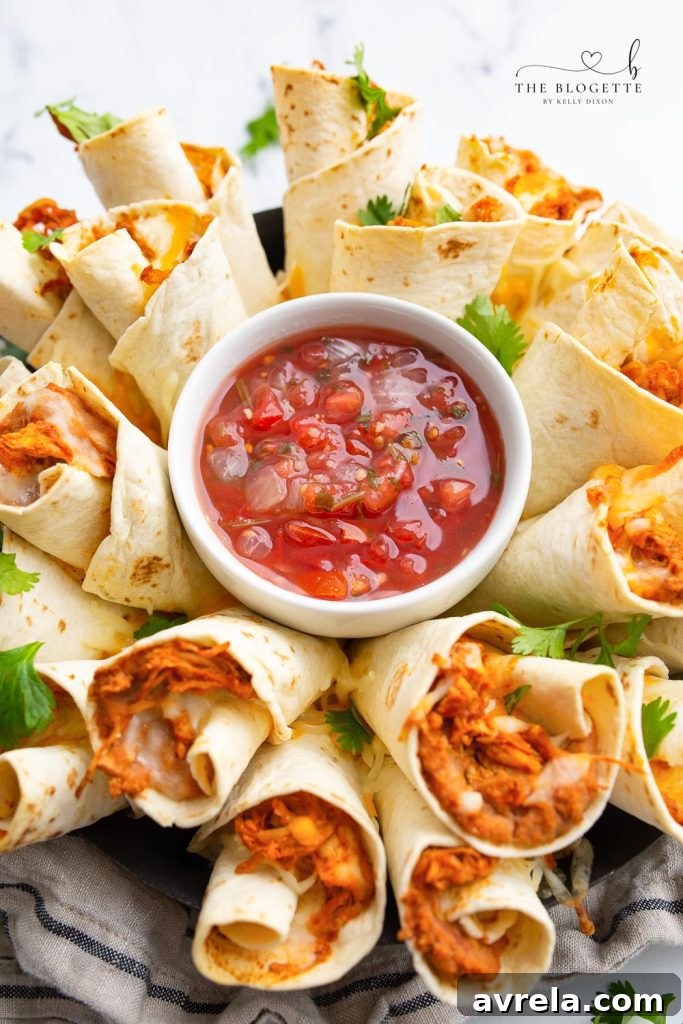
The Blooming Burrito Ring isn’t just another recipe; it’s a culinary triumph that ticks all the boxes for a perfect meal or appetizer. First and foremost, its presentation is a showstopper. The “blooming” effect, with burritos fanned out around a central dip, is incredibly appealing and makes it an instant conversation starter at any gathering. Forget boring platters – this dish brings a touch of elegance and whimsy to your table.
Beyond its looks, the flavor profile is undeniably delicious. Each mini burrito is a symphony of textures and tastes: the soft yet slightly crisp tortilla, the creamy refried beans, the tender, spiced chicken, and the abundant melted cheese. It’s comfort food with a Mexican twist, designed to satisfy even the most discerning palates. The individual portions make it incredibly easy to serve and enjoy, eliminating the need for plates and cutlery in a casual setting – simply grab and dip!
Furthermore, this recipe offers incredible versatility. While it shines as a party appetizer, it’s substantial enough to serve as a main course for a family dinner. It’s also highly customizable, allowing you to tailor the fillings to your family’s preferences or dietary needs. It’s a fantastic way to utilize leftover shredded chicken or transform a simple meal into something extraordinary. This blooming burrito ring is proof that delicious, impressive food doesn’t have to be complicated, making it a valuable addition to your recipe repertoire.
Key Ingredients for Crafting Your Burrito Blossom
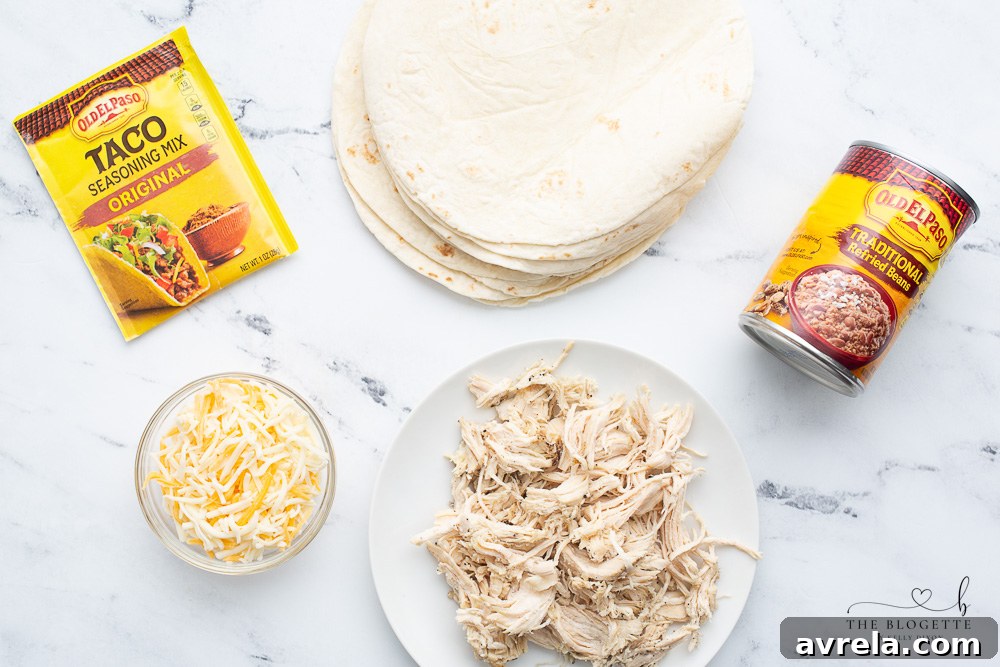
The magic of the Blooming Burrito Ring begins with a selection of simple yet flavorful ingredients. Choosing quality components ensures a delicious outcome every time. Here’s a closer look at what you’ll need and some valuable substitution tips:
- **Taco Size Flour Tortillas:** These are crucial for the “mini” burrito cones. Their smaller size makes them ideal for rolling into tight, manageable portions that form the beautiful blooming shape. Ensure they are fresh and pliable to prevent tearing during rolling.
- **Shredded Chicken:** A fantastic protein base! You can use pre-cooked rotisserie chicken for a quick shortcut, boil and shred chicken breasts, or even prepare it in an Instant Pot or slow cooker. If you don’t have chicken, ground beef, ground turkey, or even seasoned shredded pork can make excellent alternatives.
- **Taco Seasoning:** This is your flavor powerhouse. A good quality taco seasoning mix will infuse your chicken with authentic Tex-Mex flavor. Feel free to adjust the amount to your taste or use homemade seasoning for a custom blend.
- **Water:** Used to help the taco seasoning adhere to the chicken and create a juicy, flavorful mixture.
- **Refried Beans:** They provide a creamy, savory layer that adds body and classic Mexican flavor to the burritos. You can use canned refried beans for convenience, or try making your own from scratch for an even fresher taste. Warming them slightly beforehand makes them easier to spread.
- **Mexican Shredded Cheese:** A blend of Monterey Jack, Cheddar, and other Mexican cheeses provides the perfect melt and flavor. Shredded cheddar cheese is a readily available and delicious substitute. For a spicier kick, consider using Pepper Jack cheese. The more cheese, the gooier and more delightful the outcome!
Essential Equipment for a Smooth Preparation
Having the right tools on hand will make the preparation of your Blooming Burrito Ring a breeze. Here’s what you’ll need:
- **Small Pot:** Ideal for warming your refried beans until they are smooth and easy to spread, and for combining your shredded chicken with taco seasoning and water.
- **Baking Sheet, Pie Plate, or Oven-Safe Skillet:** The main vessel for assembling and baking your burrito ring. A round dish is preferred for the classic “blooming” shape. Choose one that comfortably fits all your rolled burritos.
- **Knife:** For cutting your tortillas in half and any other ingredient prep.
- **Cutting Board:** A stable surface for all your chopping and cutting needs.
- **Non-stick Spray or Parchment Paper:** Essential for preventing the burritos from sticking to the baking dish and ensuring easy cleanup.
- **Measuring Spoons and Cups:** For accurate measurement of ingredients, ensuring consistent flavor and texture.
- **Small Bowl for Dip or Salsa:** This bowl is placed in the center of your baking dish during assembly to act as a guide for the circular arrangement of the burritos. After baking, it’s replaced with your actual dipping sauce.
Step-by-Step Instructions: Crafting Your Burrito Blossom
Follow these detailed steps to create a show-stopping Blooming Burrito Ring that will impress everyone:
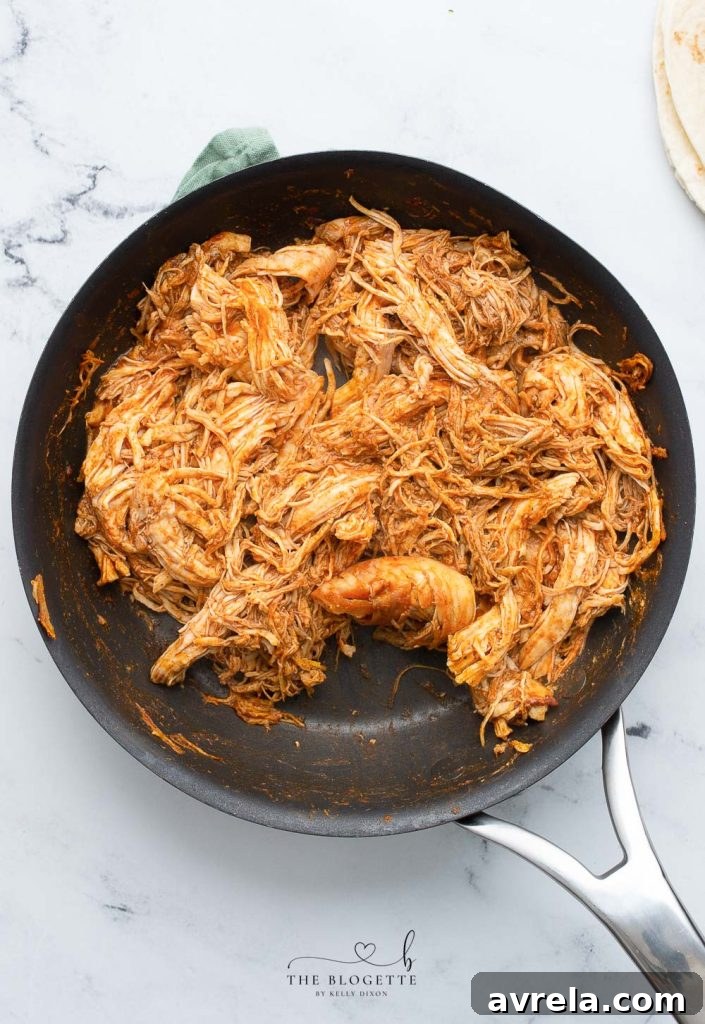
- **Preheat Oven and Prepare Chicken:** Begin by preheating your oven to 350°F (175°C). While the oven heats, prepare your shredded chicken. If starting with raw chicken, cook it thoroughly and shred. Then, combine the shredded chicken with one packet of taco seasoning and ½ cup of water in a small pot. Heat over medium heat, stirring occasionally, until the chicken is warmed through and thoroughly coated in the flavorful seasoning.
- **Warm the Refried Beans:** In a separate small pot or microwave-safe bowl, gently warm the can of refried beans. Stir until they are smooth and easy to spread. This step ensures an even distribution of beans in each burrito.
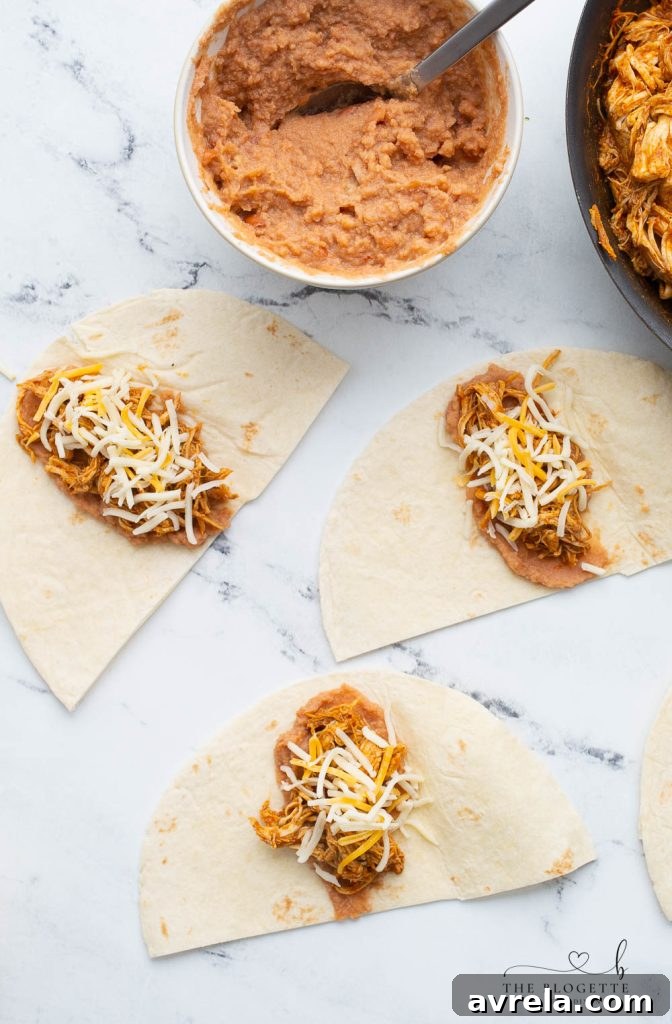
- **Prepare Tortillas:** Lay your taco-sized flour tortillas flat on a clean cutting board. Using a sharp knife, carefully cut each tortilla in half, creating two semi-circle shapes from each whole tortilla.
- **Fill Each Tortilla Half:** Take one tortilla half. Spoon approximately one tablespoon of warm refried beans onto the wider, straight edge of the tortilla. Follow this with about one tablespoon of the seasoned shredded chicken mixture and a generous pinch of shredded Mexican blend cheese. Be mindful not to overfill, as this can make rolling difficult.
- **Roll into Cone Shapes:** Starting from the straight, filled edge, tightly roll the tortilla half into a cone shape. Ensure the filling is securely tucked inside and the cone holds its form. The tighter the roll, the better the burritos will hold together during baking.
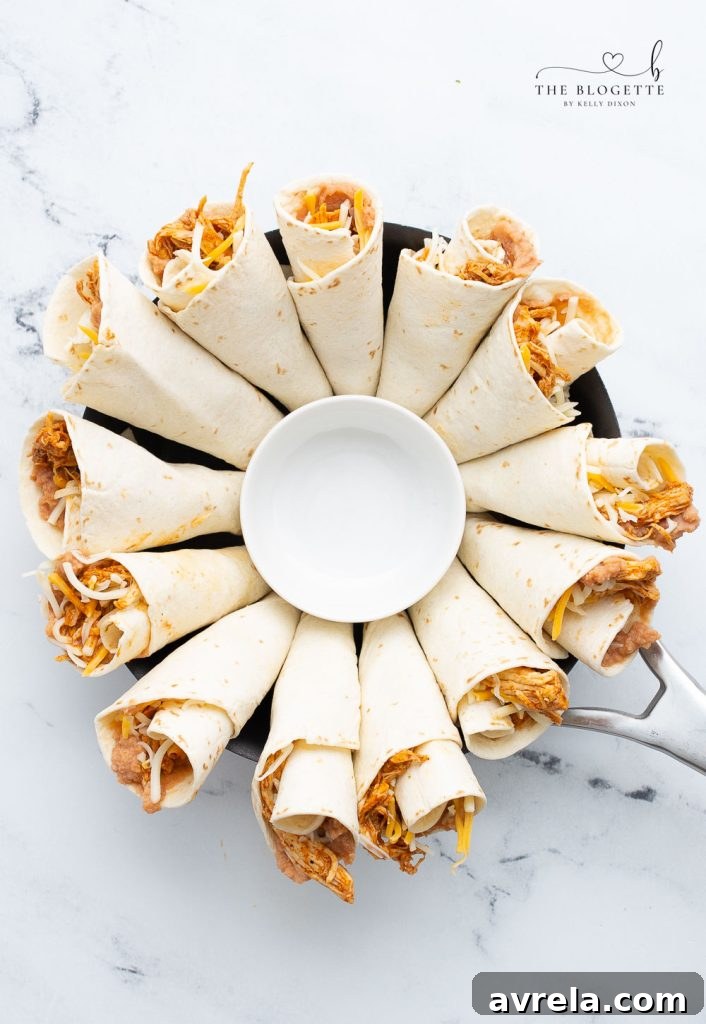
- **Prepare Your Baking Dish:** Lightly grease your chosen pie dish, oven-safe skillet, or baking sheet with non-stick spray or line it with parchment paper. Place a small, oven-safe bowl (like a ramekin) in the very center of the dish. This bowl will serve as a guide for arranging your burritos in a perfect circle and will later be replaced by your dipping sauce.
- **Arrange the First Layer:** Begin arranging the rolled tortilla cones around the central guide bowl. Place them with the wider, open end facing inwards towards the bowl and the pointed end facing outwards. Make sure they are snugly placed next to each other to create a tight, continuous circle.
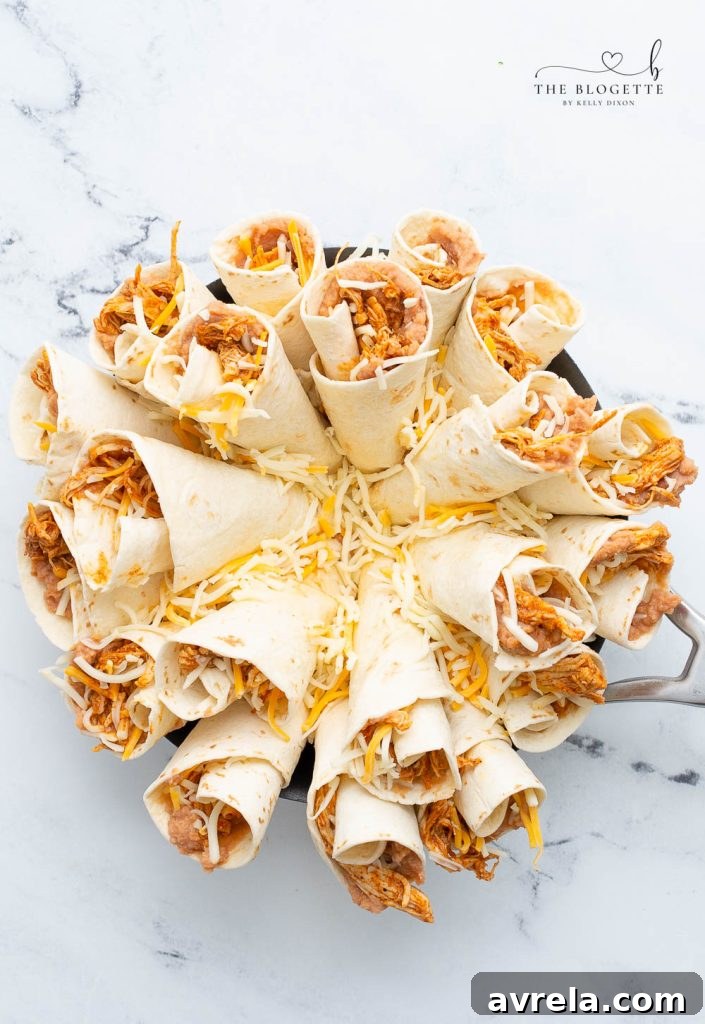
- **First Cheese Sprinkle:** Once the first ring of burritos is complete, generously sprinkle about half of the shredded cheese over the base of these rolls. Let some cheese fall into the crevices between the burritos; this will create that wonderfully ooey-gooey melted cheese effect.
- **Create the Second Layer (Optional, for a Fuller Bloom):** For a more substantial and visually impressive “bloom,” you can add a second layer of burrito cones. Place these additional rolls on top of the first ring, filling in any gaps and building upwards. This technique creates a richer, more abundant presentation.
- **Final Cheese Sprinkle:** Sprinkle the remaining shredded cheese over the second layer of burritos (or the entire first layer if you opted for a single layer). Don’t be shy – the more cheese, the better!
- **Bake to Golden Perfection:** Carefully remove the small guide bowl from the center of the ring. Place the baking dish into the preheated oven. Bake for 20-25 minutes, or until the cheese is bubbling, completely melted, and golden brown, and the edges of the tortilla cones are lightly crispy.
- **Serve with Your Favorite Dip:** Once baked, remove the blooming burrito ring from the oven. Let it cool for a few minutes before placing a serving bowl filled with your favorite salsa, guacamole, or other dipping sauce back into the center. Serve immediately and enjoy the delightful flavors and fun presentation!
- **Don’t Overfill:** While tempting to load up on fillings, overfilling your tortilla halves can make them difficult to roll and prone to bursting during baking. A tablespoon of each filling is usually sufficient.
- **Roll Tightly:** A firm roll ensures the burritos maintain their cone shape and keeps the fillings secure. Practice makes perfect!
- **Snug Arrangement:** When arranging the cones, make sure they are placed snugly against each other. This helps them support one another and maintain the circular shape as they bake.
- **Golden Brown Edges:** Keep an eye on the oven. You want the edges of the tortillas to be nicely golden and slightly crispy, not burnt. If your oven has hot spots, you might need to rotate the dish halfway through baking.
- **The More Cheese, The Merrier:** Don’t skimp on the cheese! It not only adds incredible flavor and meltiness but also acts as a “glue” to help hold the structure together.
- **Warm Fillings:** Warming the refried beans and chicken mixture before assembly helps reduce baking time and ensures all ingredients are heated evenly.
- **Ground Beef:** Substitute shredded chicken with seasoned ground beef for a classic beef burrito flavor. Cook and season ground beef with taco seasoning before mixing.
- **Pork Carnitas:** For a richer, more succulent option, use slow-cooked pork carnitas.
- **Vegetarian Options:** Make it meatless by filling the tortillas with black beans, corn, roasted sweet potatoes, or sautéed bell peppers and onions.
- Experiment with different cheese blends. Monterey Jack for extra meltiness, Colby Jack for mild flavor, or a touch of Cotija for a salty, crumbly element.
- Add a layer of spicy cheese like Pepper Jack for a bit of heat.
- Mix in finely diced jalapeños or green chiles to the chicken mixture for an extra kick.
- Add a spoonful of cooked rice or corn to the filling for added texture and heartiness.
- A dash of smoked paprika or cumin in your chicken seasoning can deepen the flavor.
- **Pico de Gallo:** A vibrant mix of diced tomatoes, onions, cilantro, and jalapeños for ultimate freshness.
- **Fresh or Pickled Jalapeños:** For those who love an extra layer of heat.
- **Diced Red Onion or Yellow Onion:** Adds a sharp, pungent bite.
- **Fresh Cilantro:** Chopped cilantro sprigs provide a refreshing, herbaceous finish.
- **Avocado Slices or Guacamole:** Creamy avocado adds richness and healthy fats.
- **Squeeze of Lime Juice:** Brightens all the flavors.
- **Crumbled Cotija Cheese:** A salty, Mexican cheese that adds a sophisticated touch.
- **Classic Salsa:** From mild tomato-based salsa to fiery habanero varieties.
- **Creamy Guacamole:** Homemade or store-bought, it’s always a crowd-pleaser.
- **Zesty Taco Sauce:** A tangy and slightly spicy sauce that complements the fillings beautifully.
- **Cooling Sour Cream or Greek Yogurt:** Offers a refreshing contrast to the rich flavors.
- **Smoky Creamy Chipotle Sauce:** Adds a lovely smoky heat and creamy texture.
- **Warm Queso Dip:** For the ultimate cheesy indulgence, serve a bowl of warm, gooey queso.
- **Ranch Dressing:** A surprising but popular choice for some!
- **Make-Ahead:** You can assemble the entire burrito ring up to one day in advance. Prepare the fillings, roll the tortillas, arrange them in the baking dish, and cover tightly with plastic wrap. Store in the refrigerator. When ready to bake, remove from the fridge 30 minutes prior to baking to allow it to come closer to room temperature, then bake as directed (you might need an extra 5-10 minutes of baking time).
- **Storage:** Leftovers can be stored in an airtight container in the refrigerator for up to 3-4 days. While the tortillas may lose some of their crispness, the flavors will still be delicious.
- **Reheating:** Reheat individual portions in a microwave for 1-2 minutes, or for best results, warm them in a toaster oven or conventional oven at 300°F (150°C) for about 10-15 minutes until heated through and slightly crispy again.
- Can I make this Blooming Burrito Ring vegetarian?
- Absolutely! Simply replace the shredded chicken with seasoned black beans, a mixture of sautéed vegetables (like bell peppers, onions, and corn), or even a plant-based ground meat alternative. Ensure your refried beans are vegetarian as well (many brands are cooked with lard).
- How do I prevent the tortillas from getting soggy?
- To minimize sogginess, ensure your fillings aren’t overly wet. If your chicken mixture is very saucy, drain any excess liquid. Baking at a good temperature for long enough will also help to crisp up the tortillas. Avoid covering the dish while baking, as this can trap steam.
- Can I freeze the Blooming Burrito Ring?
- While you can freeze individual cooked burritos, freezing the entire assembled ring is not recommended as the tortillas may become mushy upon thawing and reheating. It’s best enjoyed fresh or from refrigeration within a few days.
- What size tortillas work best?
- Soft taco-sized flour tortillas (typically 6-7 inches in diameter) are ideal for creating the mini cones that fit perfectly in the “blooming” arrangement. Larger tortillas would result in bigger, harder-to-manage portions.
- Small pot
- Baking sheet, pie plate, or oven-safe skillet (round preferred)
- Knife
- Cutting board
- Non-stick spray or parchment paper
- Measuring spoons and cups
- Small oven-safe bowl for the center guide
- 10 Soft Taco Size Flour Tortillas
- 4-5 cups Shredded Chicken (cooked)
- 1 packet (approx. 1 oz) Taco Seasoning
- ½ cup Water
- 15 ounce can of Refried Beans
- 1 cup Mexican Shredded Cheese (or shredded cheddar cheese), plus more for topping
- Preheat oven to 350°F (175°C).
- Prepare shredded chicken by mixing it with the taco seasoning and ½ cup of water in a small pot. Heat over medium heat until warmed through and flavorful.
- Warm the refried beans in a separate small pot or microwave until smooth and spreadable.
- Cut each flour tortilla in half, creating semi-circles.
- Take one tortilla half and spoon about one tablespoon of warm refried beans onto the wider edge, followed by one tablespoon of seasoned chicken mixture and a generous pinch of shredded cheese.
- Roll the tortilla half tightly into a cone shape, ensuring the filling is securely tucked inside.
- Lightly grease a pie dish or oven-safe skillet with non-stick spray or line with parchment paper. Place a small oven-safe bowl in the center of the dish as a guide.
- Arrange the rolled tortilla cones around the central bowl, with the wider, open end facing inwards and the pointed end facing outwards. Place them snugly together to form a complete circle.
- Generously sprinkle half of the remaining shredded cheese over the base of the rolls.
- For a fuller “bloom,” create a second layer by placing additional burrito cones on top of the first ring, filling in any gaps.
- Sprinkle the remaining shredded cheese over the second layer.
- Carefully remove the small guide bowl from the center of the ring.
- Bake for 20-25 minutes, or until the cheese is bubbling and golden, and the tortilla edges are lightly crispy and browned.
- Once baked, let it cool for a few minutes. Place a serving bowl filled with your favorite salsa or dipping sauce back into the center of the ring.
- Serve immediately and enjoy!
Tips for the Perfect Blooming Burrito Ring
Achieving a picture-perfect and delicious blooming burrito ring is easy with a few insider tips:
Customization and Delicious Variations
One of the best aspects of the Blooming Burrito Ring is its adaptability. Feel free to get creative and tailor it to your taste or what you have on hand:
Protein Power-Ups:
Cheese Combinations:
Flavor Boosters:
Garnishes and Topping Options: Elevate Your Dish
While delicious on its own, a generous array of fresh garnishes and toppings can take your Blooming Burrito Ring to the next level, adding fresh flavors and contrasting textures:
Must-Have Dipping Sauces
No blooming burrito ring is complete without an array of delicious dipping sauces. Offer several options to cater to different tastes:
Make-Ahead and Storage Tips
Planning ahead can make entertaining a breeze. Here’s how to manage your blooming burrito ring:
Frequently Asked Questions (FAQs)
More Delicious Appetizer Recipes to Try
Cheddar Quick Bread
Chicken Enchilada Soup
Meatloaf Muffins
Whipped Lemonade
Blooming Burrito Ring Recipe Card
A Blooming Burrito Ring is the perfect appetizer for any occasion! A round display of chicken and bean burritos served with a bowl of dip.
Prep Time: 15 minutes
Cook Time: 20-25 minutes
Total Time: 35-40 minutes
Yields: 20 servings (approx. 10 tortillas, cut in half)
Equipment
Ingredients
Instructions
Conclusion
The Blooming Burrito Ring is more than just a meal; it’s a delightful centerpiece that brings joy and flavor to any table. Its beautiful presentation, combined with the comforting taste of cheesy chicken and bean burritos, makes it an unforgettable dish. Whether you’re a seasoned chef or a kitchen novice, this recipe is straightforward to follow and incredibly rewarding. So go ahead, gather your ingredients, and prepare to impress your family and friends with this fantastic blooming creation. It’s guaranteed to become a new favorite for all your future gatherings and weeknight dinners!