
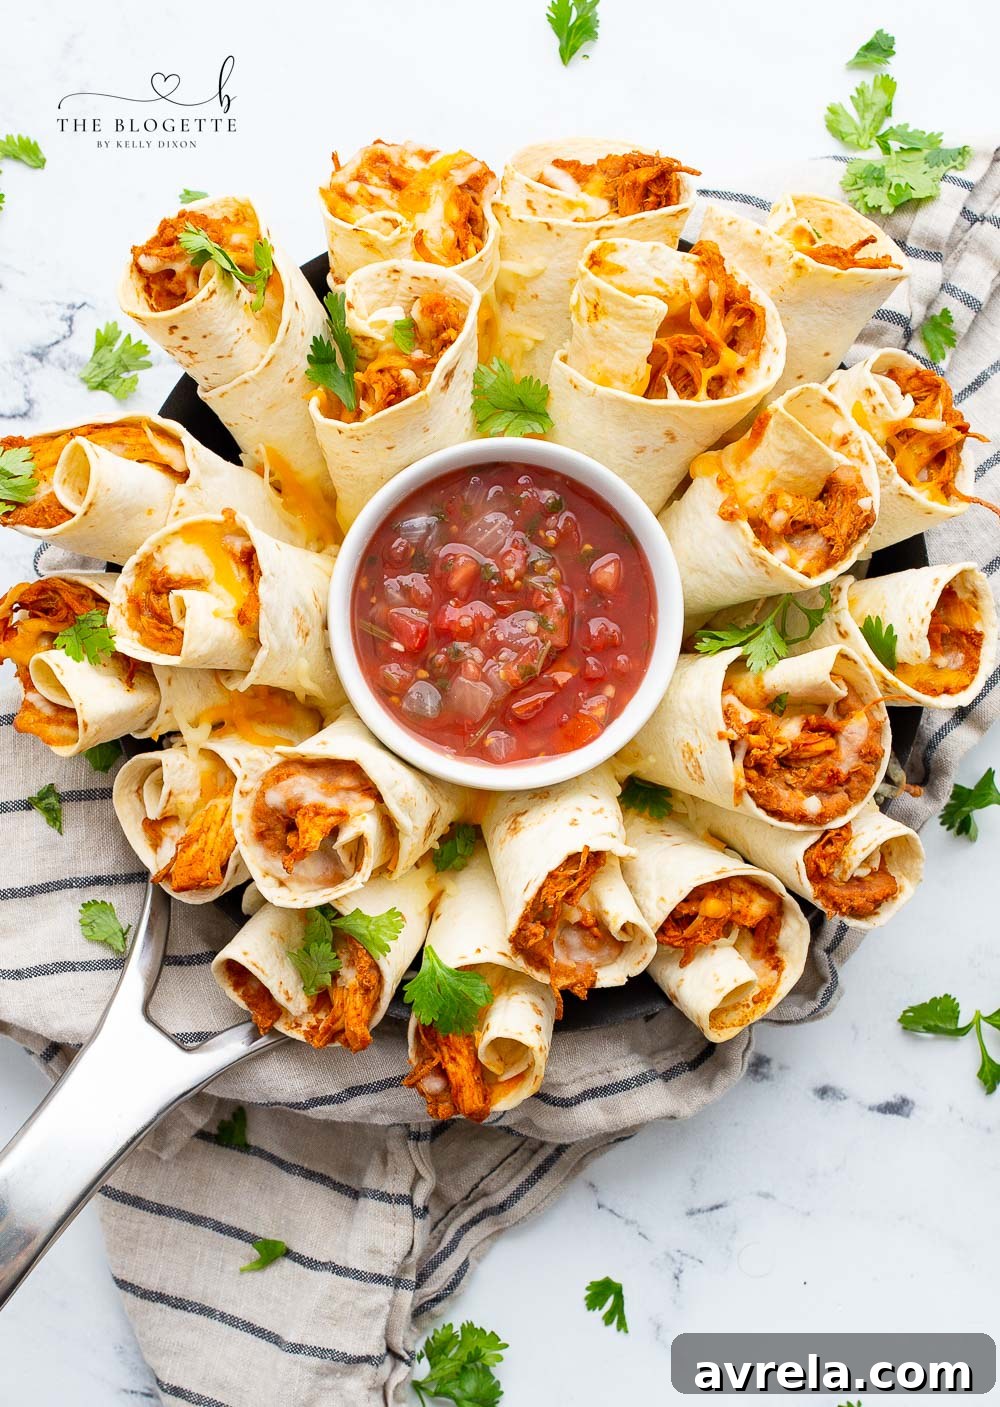
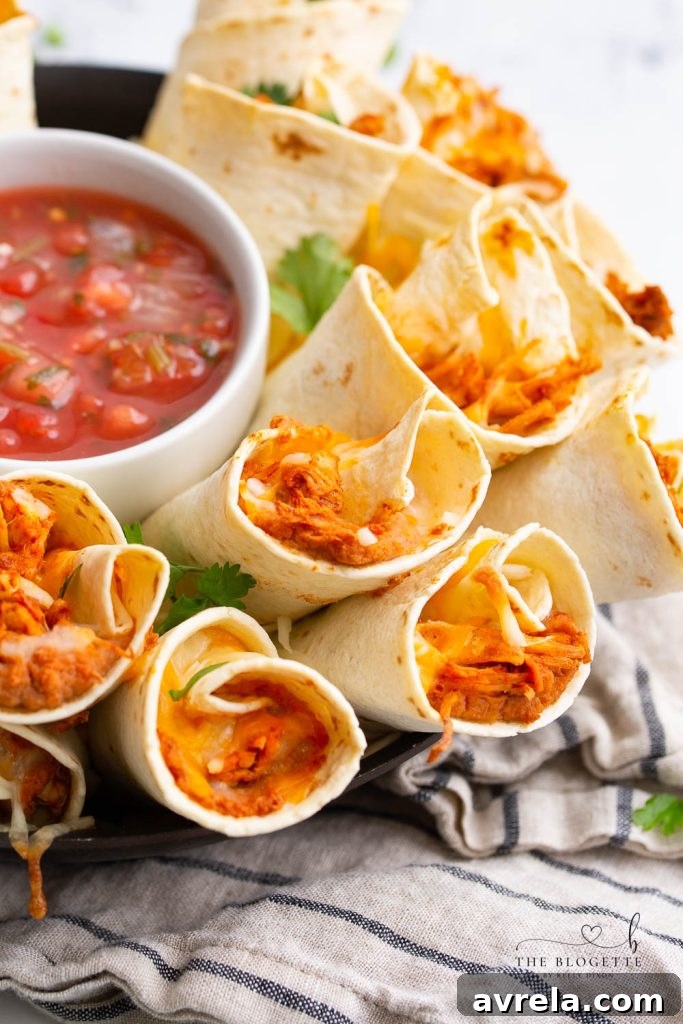
A Blooming Burrito Ring is a great appetizer for any occasion! Everyone loves this blooming ring display of the comforting cheesy chicken and bean burritos baked in the oven and served around a bowl of yummy dip. Not only is it a perfect party appetizer, but it’s also a fun and filling meal for a family. Great for Taco Tuesday, too!
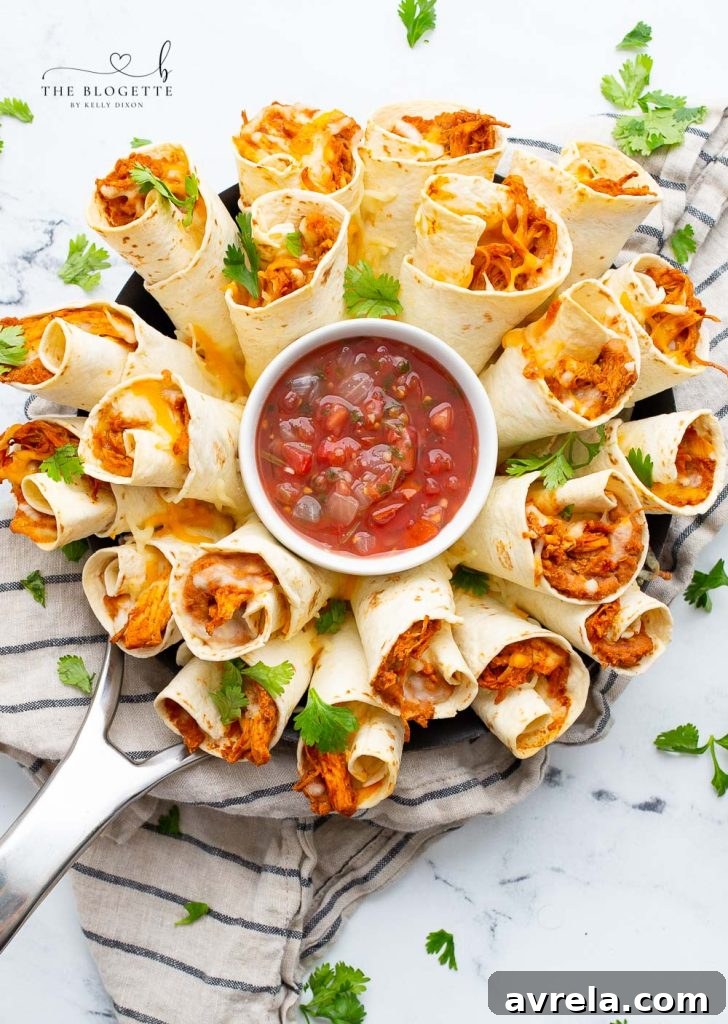
Blooming Burrito Ring: The Ultimate Appetizer & Family Meal
Welcome to the world of delicious, shareable, and utterly irresistible party food! The Blooming Burrito Ring is an innovative and delightful dish that brings together the comforting flavors of your favorite burritos in a stunning, pull-apart presentation. Imagine a vibrant centerpiece of warm, cheesy chicken and bean burritos, each rolled into a perfect cone, baked golden-brown, and encircling a savory dip. This isn’t just an appetizer; it’s an experience designed to gather friends and family, making every bite a celebration.
Whether you’re hosting a game day party, a casual get-together, or simply looking for a fun and interactive weeknight dinner, this Blooming Burrito Ring delivers on all fronts. It’s incredibly versatile, easy to customize, and guaranteed to be a hit. Say goodbye to boring finger foods and hello to a culinary masterpiece that’s as fun to eat as it is to make. It even makes Taco Tuesday extra special!
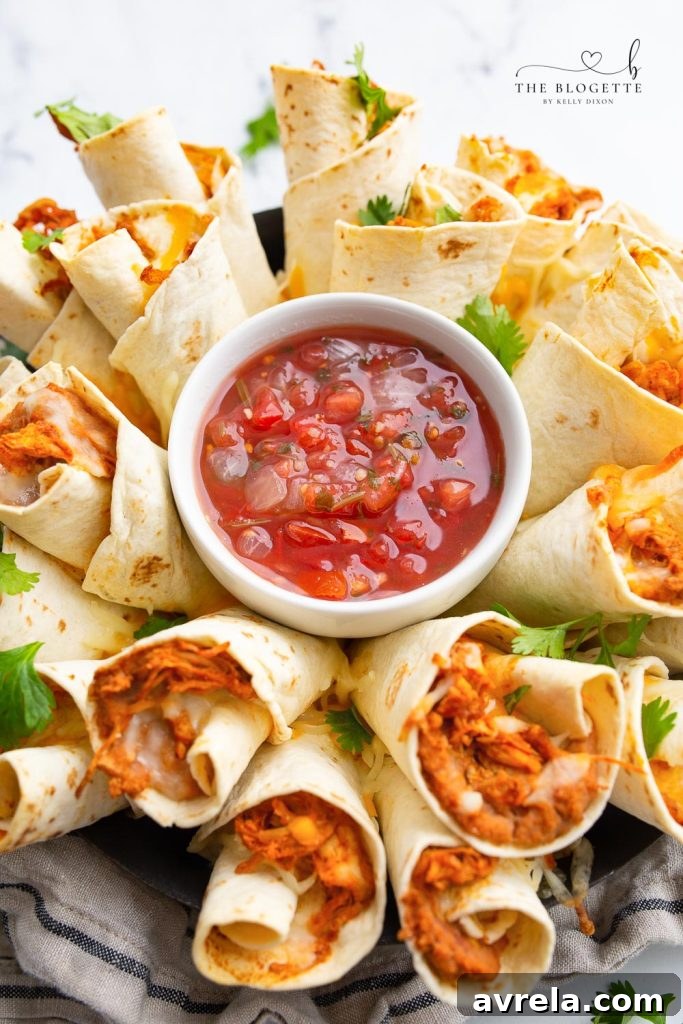
Why You’ll Fall in Love with This Blooming Burrito Ring
This recipe isn’t just another dish; it’s a testament to how simple ingredients can create something extraordinary. Here’s why the Blooming Burrito Ring deserves a permanent spot in your recipe collection:
- Irresistibly Delicious: Each mini burrito cone is packed with seasoned chicken, hearty refried beans, and a generous amount of melted cheese, all wrapped in a soft flour tortilla. The combination of textures and flavors is pure comfort food bliss.
- Visually Stunning: The “blooming” presentation makes it a showstopper. Arranged in a circular pattern around a central dip, it looks impressive and invites everyone to dig in. It’s a feast for both the eyes and the palate!
- Perfect for Sharing: Designed for communal dining, guests can easily pull off individual cones, making it a fantastic interactive appetizer for parties and gatherings. No plates or cutlery required – just happy hands!
- Simple to Make: Don’t let its sophisticated appearance fool you. This recipe is surprisingly straightforward, requiring minimal culinary skills. With a few simple steps, you can create a memorable dish that tastes like you spent hours in the kitchen.
- Highly Customizable: The basic framework is perfect for personalization. Swap out chicken for ground beef or a vegetarian filling, experiment with different cheeses, or add extra spices to suit your taste preferences.
- Versatile for Any Occasion: From casual family dinners to festive celebrations, the Blooming Burrito Ring fits right in. It’s hearty enough to be a main course for a family and light enough to be an appetizer for a crowd.
Ingredients You’ll Need
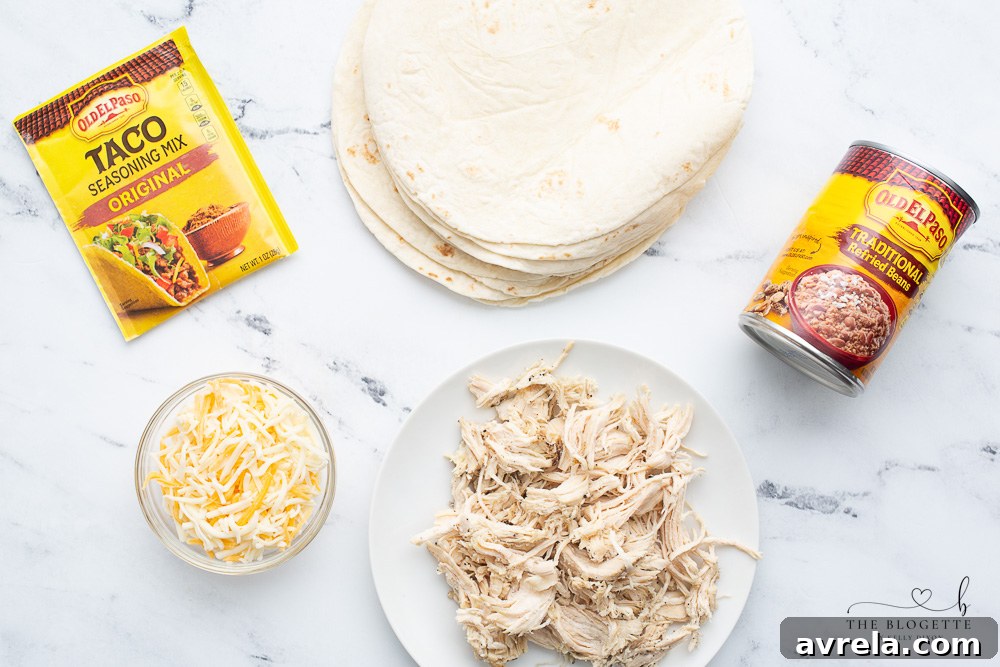
Creating this magnificent burrito ring starts with a handful of accessible and flavorful ingredients. Here’s what you’ll gather, along with some helpful tips for each:
- Taco Size Flour Tortillas: The foundation of our cones! Taco-sized (usually 6-inch) tortillas are ideal as they are easy to cut in half and roll into perfect, handheld portions. Make sure they are fresh and pliable to prevent cracking when rolling.
- Shredded Chicken: Cooked and shredded chicken is the star protein. You can boil chicken breasts, use a rotisserie chicken for a quick shortcut, or even repurpose leftover cooked chicken. For a hearty alternative, ground beef seasoned with taco spices works wonderfully too.
- Taco Seasoning: This essential spice blend brings all the vibrant Mexican flavors to your chicken. A store-bought packet is convenient, but you can also make your own mix with chili powder, cumin, paprika, garlic powder, onion powder, and a pinch of cayenne for heat.
- Water: Used to create a savory sauce with the taco seasoning, ensuring your chicken is moist and flavorful.
- Refried Beans: Creamy and rich, refried beans add substance and a classic Mexican taste. You can use traditional pinto refried beans or opt for black bean refried beans for a slightly different flavor profile. Warming them slightly before assembly makes them easier to spread.
- Mexican Shredded Cheese: A blend of cheeses like Monterey Jack, cheddar, and asadero offers the best melting quality and authentic flavor. If you prefer, a good quality shredded cheddar cheese or a spicy Pepper Jack can be used for a delicious twist. Freshly shredded cheese always melts better than pre-packaged varieties.
Supplies You’ll Need
Gathering your tools before you begin will make the assembly process smooth and enjoyable:
- Small Pot: For warming your refried beans to a spreadable consistency and preparing your seasoned chicken mixture.
- Baking Sheet: A large baking sheet provides a stable surface for your pie plate or skillet, catching any potential drips.
- Pie Plate or Oven-Safe Skillet: The star vessel for baking your burrito ring! A 9-10 inch pie plate or an equivalent oven-safe skillet (like cast iron) works perfectly to form the circular shape.
- Knife: Essential for cutting your tortillas in half and for any ingredient prep.
- Cutting Board: A sturdy surface for safe and efficient cutting.
- Non-Stick Spray or Parchment Paper: Crucial for preventing your delicious burrito cones from sticking to the baking dish, ensuring easy removal and a beautiful presentation.
- Measuring Spoons and Cups: For accurate ingredient measurements, though for the fillings, a general tablespoon amount is often sufficient.
- Small Bowl for Dip or Salsa: This will be placed in the center of your ring during assembly (and later, for serving!) to act as a guide for the perfect circle.
Step-by-Step Directions to Your Blooming Burrito Ring
Get ready to create a masterpiece! Follow these simple instructions to assemble your stunning Blooming Burrito Ring:
- Preheat Oven: Start by preheating your oven to 350°F (175°C). This ensures it’s ready to go when your ring is assembled.
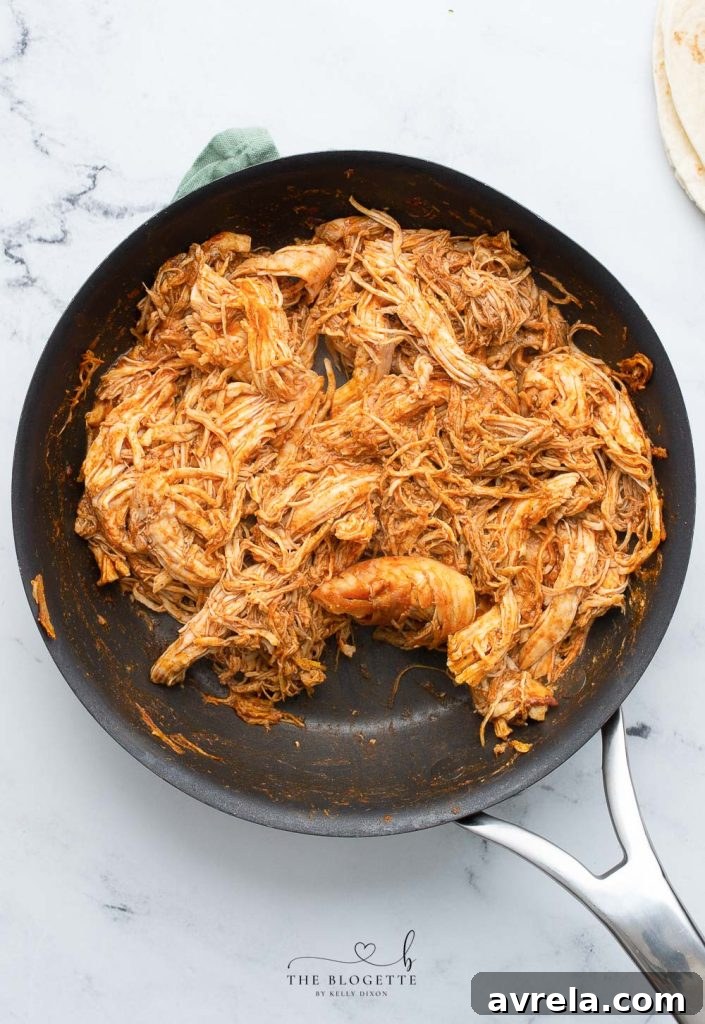
- Prepare Chicken Filling: If not already prepared, cook and shred your chicken. In a small pot or skillet, combine the shredded chicken with the taco seasoning and ½ cup of water. Simmer over medium heat for 5-7 minutes, stirring occasionally, until the liquid is mostly absorbed and the chicken is well-coated and fragrant. This step infuses the chicken with incredible flavor.
- Warm Refried Beans: Gently warm your refried beans in a small pot or microwave-safe bowl until they are soft and easy to spread. This prevents them from tearing the tortillas.
- Prep Tortillas: Lay your taco-sized flour tortillas flat on a cutting board. Using a sharp knife, cut each tortilla in half, creating semi-circles. Each tortilla half will become one burrito cone.
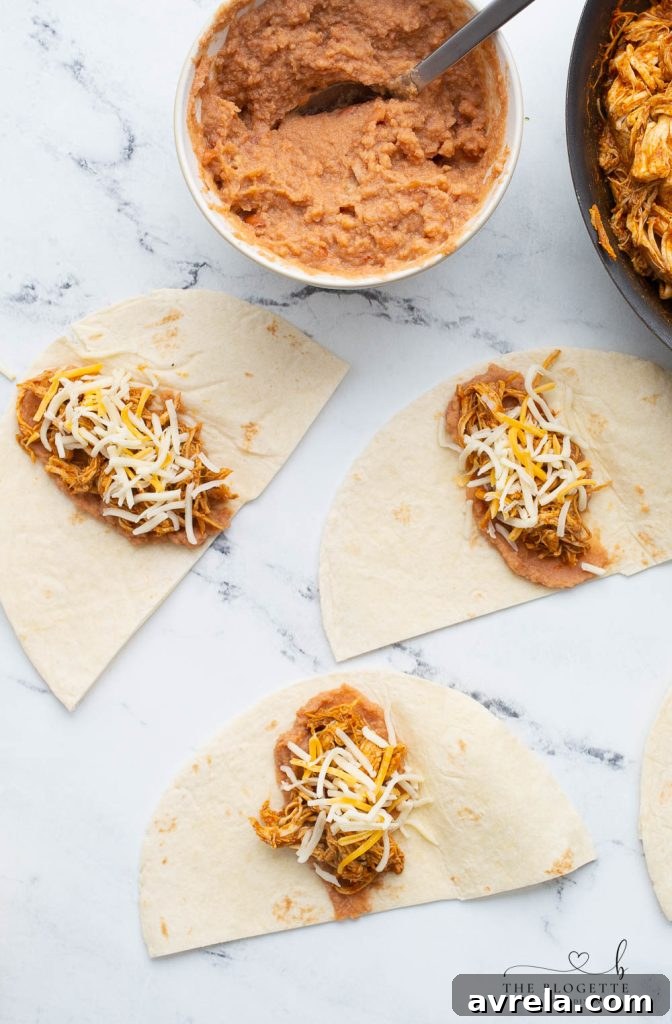
- Fill Tortilla Halves: Take one tortilla half. Near the straight edge (the cut side), place about a tablespoon of warm refried beans, then a tablespoon of the seasoned shredded chicken mixture, and finally, a sprinkle of shredded Mexican blend cheese. Don’t overfill, or it will be difficult to roll.
- Roll into Cones: Carefully roll each filled tortilla half into a cone shape, starting from one corner of the straight edge and rolling towards the rounded edge. Ensure the pointed end is tucked in and the open end forms a neat “cup” to hold the filling. The goal is a compact, stable cone.
- Prepare Baking Dish: Lightly grease your pie plate or oven-safe skillet with non-stick spray, or line it with parchment paper for easy cleanup.
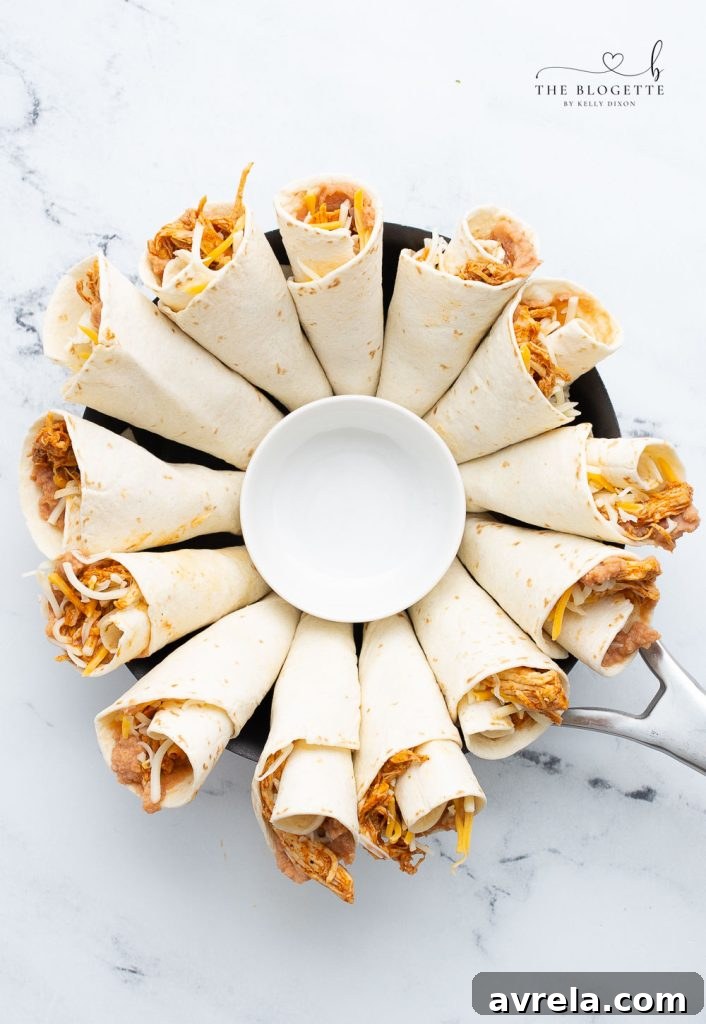
- Set Up Guide Bowl: Place a small, oven-safe bowl (about 3-4 inches in diameter) in the very center of your prepared pie plate or skillet. This bowl acts as a guide to help you arrange your burrito cones in a perfect circle.
- First Layer of Cones: Begin arranging the rolled tortilla cones around the central bowl, with the open, wider ends facing outwards and the pointed ends tucked snugly towards the center. Place them close together, slightly overlapping, to form a continuous ring. Ensure they are standing upright and stable.
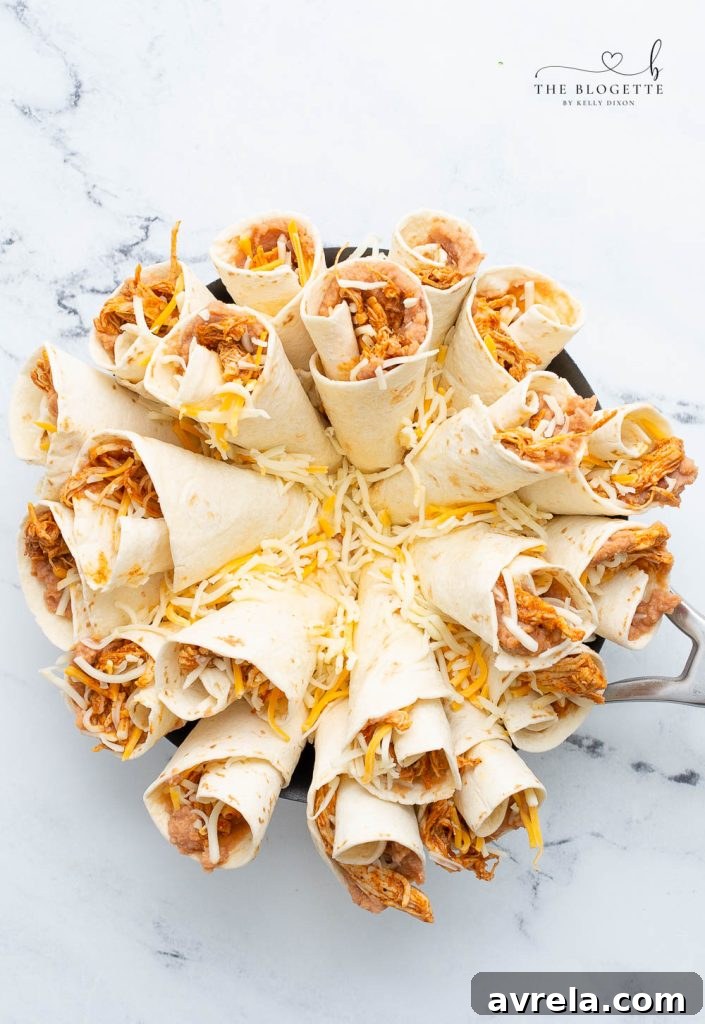
- First Cheese Sprinkle: Once the first layer of cones is complete, sprinkle about half of your remaining shredded cheese generously over the exposed bases and gaps between the rolls. This will create a delicious, gooey “glue” when melted.
- Second Layer (Optional, but recommended!): If you have enough cones (which you should if following the recipe quantities), create a second layer by placing the remaining rolled burritos on top of the first ring, filling in any gaps and building up the “blooming” effect.
- Final Cheese Sprinkle: Sprinkle the remaining shredded cheese over the top of the second layer. As I always say, the more ooey-gooey melted cheese, the better!
- Remove Guide & Bake: Carefully remove the small bowl from the center of the ring. Place the pie plate or skillet into your preheated oven. Bake for 20-25 minutes, or until the cheese is beautifully melted and bubbly, and the edges of the tortilla cones are golden brown and slightly crispy.
- Serve with Dip: Once baked, carefully remove the burrito ring from the oven. Replace the guide bowl with a serving bowl filled with your favorite dip, such as salsa, guacamole, or sour cream.
Customization & Variations: Make It Your Own!
One of the best aspects of the Blooming Burrito Ring is its incredible adaptability. Feel free to experiment with different fillings and flavor profiles to suit your preferences or dietary needs.
- Protein Power-Ups:
- Ground Beef: Brown ground beef with taco seasoning for a classic beef burrito flavor.
- Shredded Pork/Carnitas: Leftover pulled pork or slow-cooked carnitas would be absolutely divine.
- Steak: Thinly sliced and seasoned steak strips can elevate this appetizer for a more upscale feel.
- Vegetarian Delight:
- Black Beans & Corn: Replace chicken with seasoned black beans and roasted corn for a vibrant vegetarian option.
- Roasted Vegetables: Add sautéed bell peppers, onions, zucchini, or sweet potatoes for extra nutrients and flavor.
- Spicy Tofu/Tempeh Crumbles: For a plant-based protein alternative, season crumbled tofu or tempeh with taco spices.
- Cheese Choices: Don’t limit yourself to Mexican blend! Try Pepper Jack for a spicy kick, Colby Jack for mild creaminess, or a smoky provolone for a unique twist.
- Spice It Up: Incorporate diced jalapeños, a dash of hot sauce into the chicken mixture, or a pinch of red pepper flakes for those who love a bit of heat.
- Herbs & Aromatics: Add finely chopped cilantro, green onions, or even a squeeze of lime juice to the filling for fresh, zesty notes.
Garnishes and Topping Options: Elevate Your Ring
While the Blooming Burrito Ring is fantastic on its own, a few fresh garnishes and toppings can take it to the next level, adding color, texture, and bursts of flavor.
- Pico de Gallo: A fresh and zesty blend of diced tomatoes, onions, cilantro, and jalapeños.
- Jalapeño: Freshly sliced or pickled jalapeños for a spicy kick.
- Peppers: Finely diced bell peppers (red, green, or yellow) for a sweet crunch.
- Red Onion or Yellow Onion: Finely minced for a sharp, savory bite.
- Fresh Cilantro: Chopped fresh cilantro adds a vibrant, herbaceous finish.
- Avocado or Guacamole: Creamy avocado slices or a dollop of homemade guacamole.
- Shredded Lettuce: For a refreshing crispness.
- Black Olives: Sliced black olives add a salty, briny touch.
- Cotija Cheese: Crumbled cotija cheese for a salty, authentic Mexican flavor.
Dipping Sauces: The Perfect Companion
No burrito ring is complete without an array of delicious dipping sauces. The central bowl is designed for this very purpose!
- Salsa: Your favorite red or green salsa, from mild to extra hot.
- Guacamole: Rich, creamy, and always a crowd-pleaser.
- Taco Sauce: A classic condiment that complements the burrito flavors.
- Sour Cream: Cool and tangy, perfect for balancing any spice.
- Creamy Chipotle: A smoky, spicy, and incredibly addictive sauce.
- Queso Blanco: A warm, velvety cheese dip for ultimate indulgence.
- Ranch Dressing: A surprising but delicious option, especially for kids.
Tips for Success & Common Questions
To ensure your Blooming Burrito Ring turns out perfectly every time, keep these tips in mind:
- Don’t Overfill: While tempting, overfilling the tortilla halves can make them difficult to roll and prone to bursting during baking. A tablespoon of each filling component is usually sufficient.
- Warm Tortillas: If your tortillas seem stiff or prone to cracking, briefly warm them in the microwave for 10-15 seconds before cutting and rolling. This makes them more pliable.
- Snug Fit: Arrange the cones snugly in the pie plate. This helps them hold their shape as they bake and prevents them from falling over.
- Cheese is Key: Don’t skimp on the cheese! It not only adds incredible flavor but also helps bind the cones together and creates that irresistible golden-brown crust.
- Even Baking: If your oven has hot spots, consider rotating the dish halfway through baking to ensure even browning.
Frequently Asked Questions
- Can I make this vegetarian?
- Absolutely! Replace the shredded chicken with an equal amount of seasoned black beans, corn, or a mix of sautéed vegetables like bell peppers, onions, and zucchini. Lentil or mushroom crumbles also work well for a “meaty” texture.
- Can I use corn tortillas instead of flour?
- While flour tortillas are recommended for their flexibility and soft texture, corn tortillas can be used. However, they are more prone to tearing, so ensure they are warmed thoroughly (steamed or microwaved) to make them pliable before cutting and rolling.
- How far in advance can I prepare this?
- You can prepare the chicken and bean fillings a day in advance and store them separately in the refrigerator. You can also assemble the entire ring (without baking) and cover it tightly with plastic wrap, refrigerating it for up to 12 hours. Let it come to room temperature for about 20-30 minutes before baking.
- What’s the best way to store and reheat leftovers?
- Store any leftover burrito cones in an airtight container in the refrigerator for up to 3 days. To reheat, place them on a baking sheet and warm them in a 350°F (175°C) oven for about 10-15 minutes, or until heated through and crispy. Microwaving is also an option, but they may lose some crispness.
- Can I make this spicier?
- Certainly! Add a pinch of cayenne pepper or a dash of your favorite hot sauce to the chicken filling. You can also incorporate finely diced jalapeños or serrano peppers into the filling, or offer a spicier dip alongside.
More Appetizer Recipes to Explore
Cheddar Quick Bread
Chicken Enchilada Soup
Meatloaf Muffins
Whipped Lemonade
Blooming Burrito Ring Recipe Card
Blooming Burrito Ring
A spectacular and easy-to-make appetizer, this Blooming Burrito Ring features cheesy chicken and bean burritos arranged in a beautiful circle, baked to golden perfection, and served with your favorite dip. Perfect for parties, game nights, or a fun family meal!

Prep Time: 15 minutes
Cook Time: 20 minutes
Total Time: 35 minutes
Servings: 20 cones
Equipment
- Small pot
- Baking sheet
- Pie plate or oven-safe skillet (9-10 inch)
- Knife
- Cutting board
- Non-stick spray or parchment paper
- Measuring spoons and cups
- Small bowl (for the dip in the middle)
Ingredients
- 10 Soft Taco Size Flour Tortillas (6-inch)
- 4-5 cups Shredded Cooked Chicken (or ground beef)
- 1 packet (1 oz) Taco Seasoning
- ½ cup Water
- 15 ounce can of Refried Beans
- 1 cup Shredded Mexican Blend Cheese (or cheddar/Monterey Jack)
Instructions
- Preheat your oven to 350°F (175°C).
- In a small pot or skillet, prepare shredded chicken by combining it with the taco seasoning and ½ cup of water. Simmer for 5-7 minutes until heated through and flavors are melded.
- Gently warm the refried beans in a separate small pot or microwave-safe bowl until spreadable.
- Cut each flour tortilla in half, creating 20 semi-circles.
- Take one tortilla half. Near the straight edge, place about 1 tablespoon of warm refried beans, followed by 1 tablespoon of seasoned shredded chicken, and a sprinkle of shredded cheese.
- Carefully roll the filled tortilla half into a cone shape, starting from one corner of the straight edge and rolling towards the rounded edge. Ensure it’s compact and stands upright.
- Lightly grease a 9-10 inch pie plate or oven-safe skillet with non-stick spray or line with parchment paper.
- Place a small, oven-safe bowl in the center of the prepared dish as a guide for your ring.
- Arrange the rolled tortilla cones around the central bowl, open ends facing outwards, fitting them snugly together to form a continuous first layer.
- Sprinkle half of the remaining shredded cheese generously over the bases and between the cones of the first layer.
- If desired, create a second layer by placing remaining cones on top of the first, filling in gaps. Sprinkle the remaining cheese over the second layer.
- Carefully remove the small guide bowl from the center.
- Bake for 20-25 minutes, or until the cheese is melted and bubbly, and the tortilla edges are golden brown and slightly crisp.
- Remove from oven. Replace the central guide bowl with a serving bowl filled with salsa, guacamole, or your preferred dipping sauce. Serve warm and enjoy!
Final Thoughts on Your Blooming Burrito Ring
The Blooming Burrito Ring is more than just a recipe; it’s an invitation to create, share, and savor. This versatile dish proves that memorable meals don’t have to be complicated. With its easy preparation, crowd-pleasing flavors, and impressive presentation, it’s destined to become a staple for all your gatherings and family dinners.
So, gather your ingredients, follow these simple steps, and prepare to delight your taste buds and impress your guests. Whether you’re a seasoned chef or a kitchen novice, you’ll find joy in crafting this beautiful and delicious appetizer. Don’t wait for a special occasion – make any day a celebration with a Blooming Burrito Ring!