

Irresistible Chocolate Peanut Butter Fudge: Your New Go-To Recipe
Dive into the delightful world of homemade confections with this classic Chocolate Peanut Butter Fudge recipe. A timeless combination that universally delights, the rich harmony of chocolate and creamy peanut butter transforms into a velvety, melt-in-your-mouth fudge that’s simply irresistible. This vintage treat isn’t just easy to make; it’s a guaranteed crowd-pleaser, perfect for any occasion and a must-have in every home baker’s repertoire.
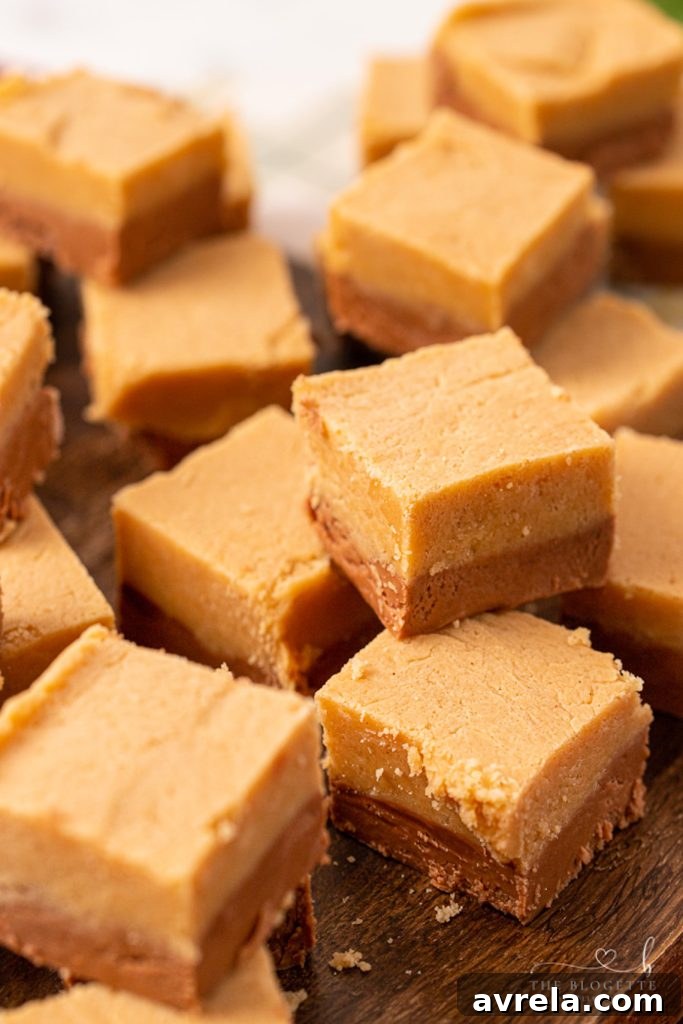
Why This Chocolate Peanut Butter Fudge Recipe Shines
Forget complicated candy thermometers and endless stirring! This easy Chocolate Peanut Butter Fudge recipe simplifies the art of fudge-making, delivering exceptional results with minimal fuss. Whether you’re whipping up a batch for a school bake sale, crafting thoughtful homemade gifts, bringing a show-stopping dessert to a potluck, or simply satisfying a sweet craving, this fudge is your answer. Its straightforward process and universally loved flavor profile make it an instant favorite.
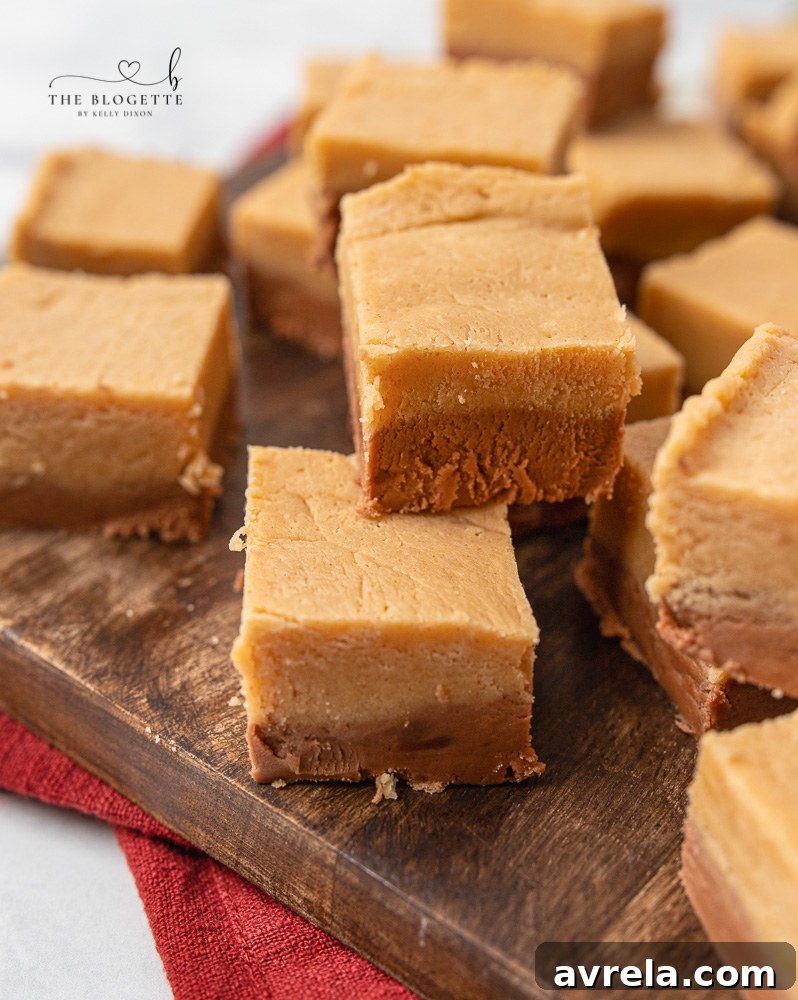
The magic lies in the perfect balance: a smooth, decadent chocolate layer complemented by a creamy, slightly salty peanut butter layer. Each bite offers that incredible chocolate-peanut butter synergy that has captivated taste buds for generations. It’s a nostalgic confection that brings joy and comfort, reminding us of simpler times while delivering gourmet flavor. Plus, the vibrant contrasting layers make for a visually appealing dessert that looks as good as it tastes.
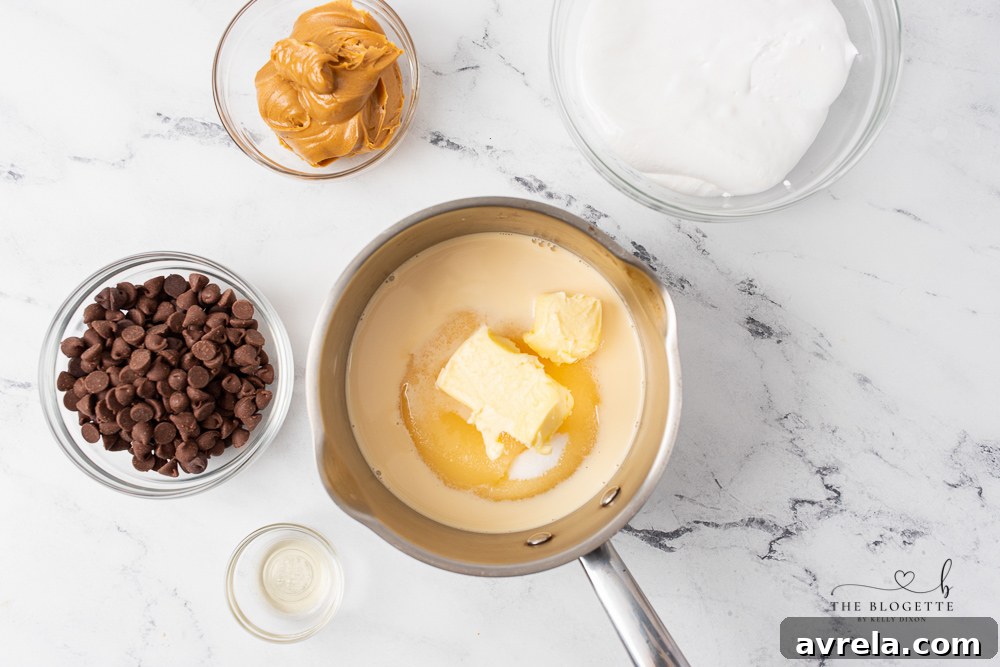
Essential Ingredients for Your Creamy Fudge
Creating this delightful homemade fudge requires just a handful of common pantry staples. The quality of your ingredients plays a significant role in the final texture and flavor, so opt for fresh and good-quality options where possible. Here’s what you’ll need:
- 3 cups granulated sugar: The foundation for sweetness and structure in your fudge.
- 3/4 cup butter, softened: Adds richness and helps create that smooth, creamy texture. Unsalted butter is usually preferred, allowing you to control the saltiness.
- 2/3 cup evaporated milk: Crucial for the fudge’s signature creaminess and body. It provides a richer flavor and consistency than regular milk.
- 6 ounces semi-sweet chocolate chips: The star of the chocolate layer. Semi-sweet offers a balanced sweetness, but you can adjust to milk chocolate for a sweeter fudge or dark chocolate for a more intense flavor.
- 1/2 cup peanut butter: The hero of the second layer. Creamy peanut butter works best for a smooth finish. Choose your favorite brand, but avoid natural peanut butter that separates, as it can affect the texture.
- 7 ounces marshmallow fluff (or marshmallow creme): This magical ingredient helps achieve that perfect, soft, and stable fudge texture without the need for intricate candy-making techniques.
- 1 teaspoon vanilla extract: A touch of vanilla enhances all the other flavors, adding depth and warmth to both layers. Pure vanilla extract is always recommended for the best taste.
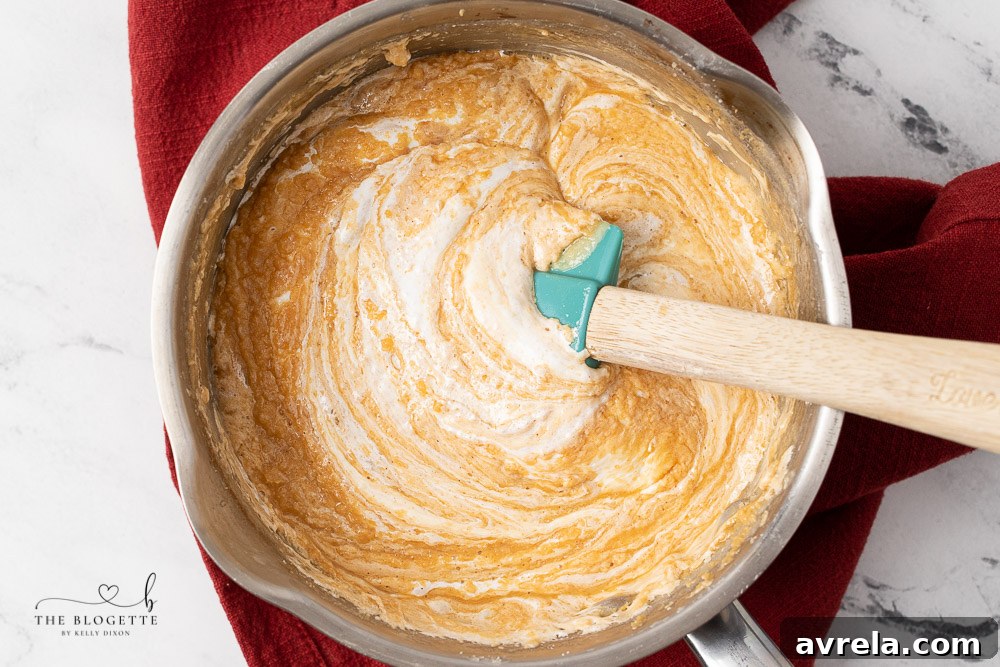
Crafting Your Own Chocolate Peanut Butter Fudge: Step-by-Step
Making this glorious peanut butter chocolate fudge is a wonderfully rewarding process. Follow these detailed instructions to achieve two distinct, delectable layers that come together in a symphony of flavor and texture. Precision and patience are your best tools here!
Preparation and The Chocolate Layer
- Prepare Your Pan: Begin by greasing a 9×9 inch baking pan thoroughly with butter or non-stick cooking spray. For effortless removal and clean cuts, line the pan with parchment paper, leaving an overhang on two sides to create “handles.” Set this prepared pan aside.
- Combine Base Ingredients: In a medium-sized, heavy-bottomed pot on your stovetop, combine 1 1/2 cups of the granulated sugar (half of the total), 6 tablespoons of softened butter (half of the total), and 1/3 cup of evaporated milk (half of the total).
- Bring to a Boil: Place the pot over medium-low heat. Whisk and stir this mixture constantly to ensure everything dissolves evenly and nothing sticks to the bottom and burns. Bring the mixture to a full, rolling boil. Once it reaches a boil, continue to whisk vigorously for precisely 4 minutes. This boiling time is crucial for the fudge’s texture.
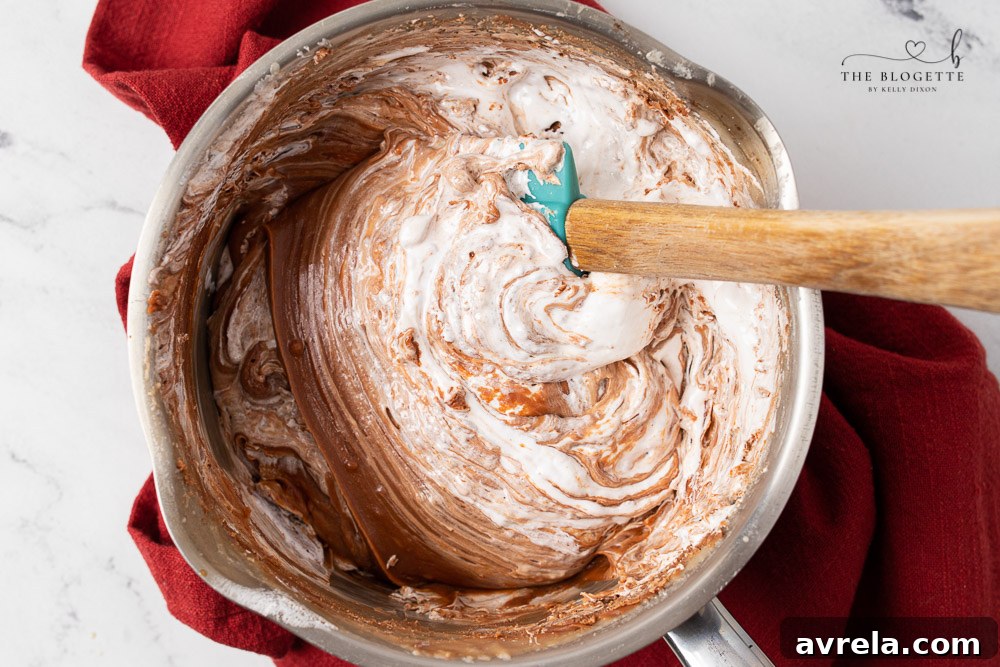
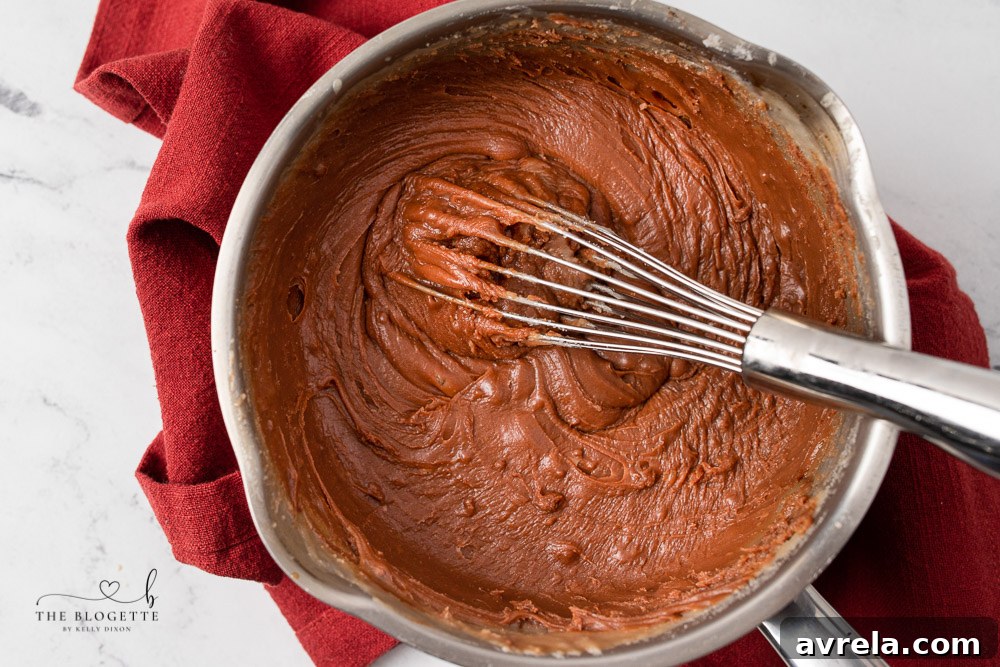
- Melt in Chocolate: Remove the pot from the heat immediately. Add the 6 ounces of semi-sweet chocolate chips to the hot mixture. Stir continuously until the chocolate chips are completely melted and the mixture is smooth and glossy.
- Add Flavor & Texture Enhancers: Quickly incorporate 3.5 ounces of marshmallow fluff (half of the total) and 1/2 teaspoon of vanilla extract (half of the total). Stir until these ingredients are fully combined and the mixture is uniformly smooth and creamy.
- Layer the Chocolate: Pour the rich chocolate mixture into your prepared 9×9 inch pan. Using a spatula, spread it quickly and evenly to form the bottom layer of your fudge.
Creating the Peanut Butter Layer
- Repeat the Base Process: Clean your pot (or use a second one if you have it). Repeat steps 2 and 3 using the remaining half of the sugar (1 1/2 cups), butter (6 tablespoons), and evaporated milk (1/3 cup). Bring this mixture to a full boil and continue whisking for 4 minutes.
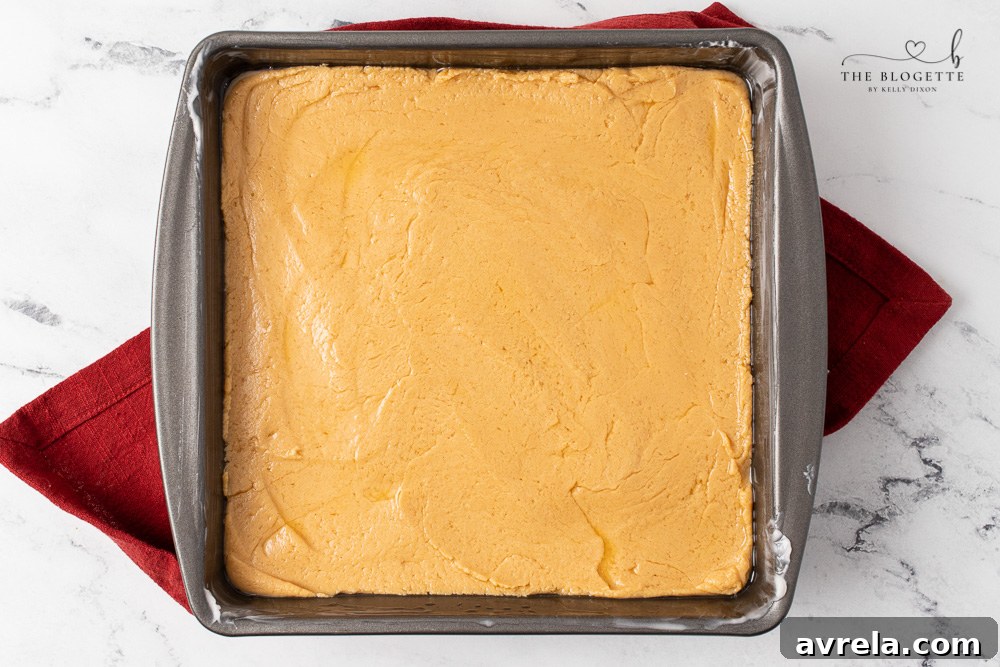
- Incorporate Peanut Butter: Remove the pot from the heat. Instead of chocolate chips, add the 1/2 cup of creamy peanut butter. Stir until the peanut butter is thoroughly melted and blended, creating a smooth and aromatic peanut butter base.
- Final Touches for Peanut Butter: Add the remaining 3.5 ounces of marshmallow fluff and 1/2 teaspoon of vanilla extract. Stir vigorously until the mixture is uniform and silky smooth.
- Layer the Peanut Butter: Carefully and quickly pour the warm peanut butter mixture over the chocolate layer in the baking pan. Gently spread it out with a spatula to create an even top layer.
Cooling and Serving Your Fudge
- Allow to Cool and Set: This is a critical step for perfect fudge texture. Allow the pan of fudge to cool completely at room temperature for at least 1-2 hours, or until it is firm and hardened throughout. Avoid refrigerating immediately, as rapid cooling can sometimes affect the texture.
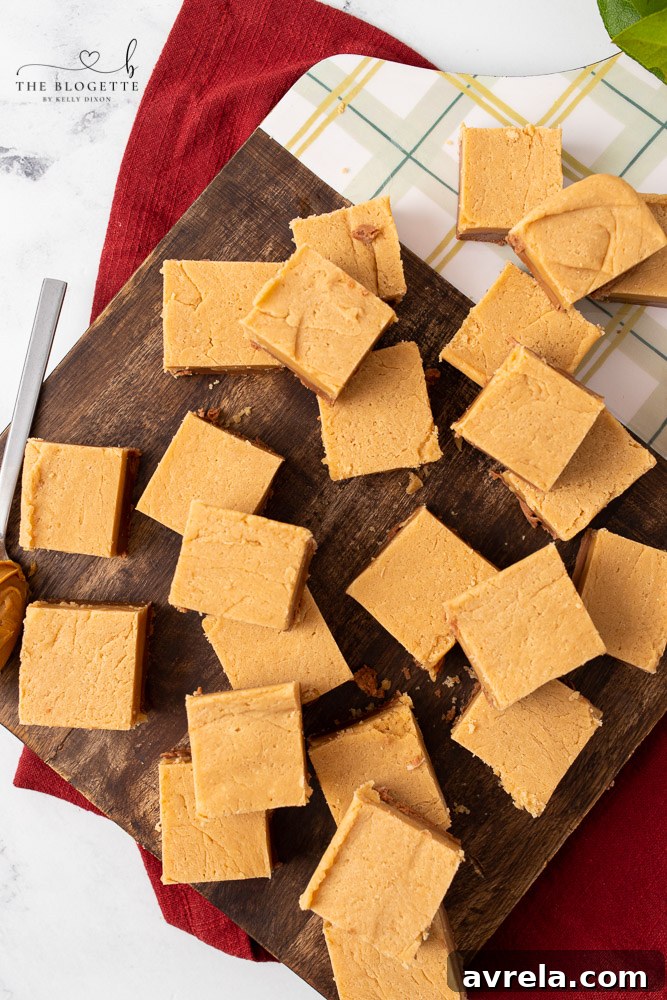
- Cut and Serve: Once the chocolate peanut butter fudge is fully set, use the parchment paper overhangs to lift the fudge out of the pan. Place it on a cutting board. Using a sharp knife, cut the fudge into desired squares. For cleaner cuts, you can lightly grease your knife with non-stick spray or wipe it with a damp cloth between cuts.
Expert Tips for The Perfect Chocolate Peanut Butter Fudge
While this recipe is straightforward, a few key tips can elevate your homemade fudge from good to absolutely spectacular.
- Don’t Rush the Boil: The 4-minute boiling time is essential. It ensures the sugar dissolves completely and reaches the right consistency, preventing grainy fudge. Set a timer!
- Stir Constantly: Especially during the boiling phase, continuous stirring prevents scorching and ensures even cooking.
- Use Room Temperature Ingredients (Butter): Softened butter incorporates more smoothly into the mixture, leading to a silkier fudge.
- Quick Work After Removing from Heat: Once you remove the pot from the heat and add the chocolate/peanut butter, marshmallow fluff, and vanilla, work quickly to stir everything together. The mixture will start to set as it cools.
- Clean Cuts: For neat squares, use a large, sharp knife. You can warm the knife under hot water and dry it between cuts to prevent sticking, especially when cutting through the two layers.
- Pan Size Matters: A 9×9 inch pan is recommended for the ideal thickness. If you use a different size, adjust cooling time accordingly.
- Avoid Humidity: Fudge can be sensitive to humidity, which can make it sticky. Try to make fudge on a dry day if possible.
Delicious Variations to Explore
This chocolate peanut butter fudge recipe is fantastic as is, but it also provides a wonderful canvas for creativity. Here are a few ideas to customize your next batch:
- Nutty Crunch: Fold in chopped peanuts, pecans, or walnuts into either the chocolate or peanut butter layer for added texture.
- Chocolate Variations: Experiment with different types of chocolate chips – milk chocolate for extra sweetness, dark chocolate for a richer, less sweet profile, or even white chocolate chips for a twist.
- Mini Chips: Use mini chocolate chips in the peanut butter layer for tiny bursts of chocolate in every bite.
- Swirl Effect: Instead of distinct layers, try pouring spoonfuls of the chocolate and peanut butter mixtures alternately into the pan, then gently swirl with a knife for a marbled look.
- Toppings Galore: Before the fudge sets, sprinkle the top with flaky sea salt (which beautifully enhances chocolate and peanut butter), mini chocolate chips, chopped nuts, or colorful sprinkles.
- Spicy Kick: For the adventurous, a pinch of cayenne pepper in the chocolate layer can add an unexpected and delightful warmth.
Storing Your Homemade Fudge for Maximum Freshness
Proper storage ensures your creamy fudge retains its wonderful texture and flavor for as long as possible.
- Short-Term (Up to 2 Weeks): If you plan to enjoy your fudge within a couple of weeks, refrigeration is ideal. Cut the fudge into individual squares and place them in an airtight container. For best results and to prevent sticking, separate the layers of fudge with sheets of parchment or wax paper. This keeps it fresh and prevents it from drying out or absorbing other refrigerator odors.
- Long-Term (Up to 3 Months): For extended storage, the freezer is your best friend. Wrap individual pieces or small blocks of fudge tightly in plastic wrap, ensuring no air can get in. Then, place the wrapped fudge into an airtight freezer-safe container or a heavy-duty freezer bag. This double layer of protection guards against freezer burn and preserves its quality. Thaw frozen fudge at room temperature for an hour or two before serving.
Remember, fudge is best stored in a cool, dark place even at room temperature, away from direct sunlight or heat, which can cause it to become soft and oily.
Frequently Asked Questions About Fudge Making
- Why is my fudge grainy? Grainy fudge is often caused by sugar crystallization. This can happen if the sugar doesn’t fully dissolve before boiling, or if you stir the mixture too much after it starts cooling. The key is to ensure complete dissolution during boiling and minimal disturbance during cooling.
- Can I use natural peanut butter? It’s generally not recommended for this type of fudge. Natural peanut butter tends to separate and can result in an oily or crumbly texture that doesn’t set properly. Stick to creamy, processed peanut butter for best results.
- My fudge didn’t set, what went wrong? This usually means the mixture didn’t boil long enough or at a high enough temperature. The 4-minute boil is crucial to reach the correct stage for setting. Also, ensure your evaporated milk isn’t expired.
- Can I double the recipe? Yes, you can double the recipe, but it’s important to use a larger, heavier pot to accommodate the increased volume and ensure even heat distribution. You may also need to slightly increase the boiling time.
- What kind of chocolate chips should I use? Semi-sweet chocolate chips provide a balanced flavor. You can use milk chocolate for a sweeter fudge or dark chocolate for a richer, more intense chocolate taste. Make sure they are good quality melting chips.
More Irresistible Desserts to Explore:
- Uncrustable Donuts
- Monster Cookie Balls
- Ice Cream Sandwich Cake
- Banana Pudding
- Chocolate Turtles
- Fluff Salad
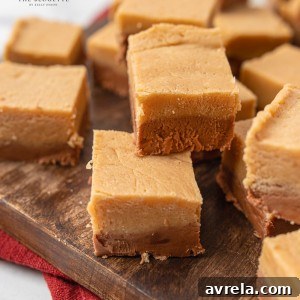
Chocolate Peanut Butter Fudge
Equipment
- 9″ x 9″ pan
- Non-Stick cooking spray or parchment paper
- Medium, heavy-bottomed pot
- Whisk and spatula
Ingredients
- 3 cups granulated sugar
- ¾ cup butter, softened
- ⅔ cup evaporated milk
- 6 ounces semi-sweet chocolate chips
- ½ cup peanut butter
- 7 ounces marshmallow fluff
- 1 teaspoon vanilla extract
Instructions
- Grease or line a 9×9 inch pan with parchment paper, leaving an overhang on two sides for easy removal, and set aside.
- In a medium pot on the stovetop over medium-low heat, combine 1.5 cups of the sugar, 6 tablespoons of butter, and 1/3 cup of evaporated milk. Bring to a full boil, whisking constantly to prevent burning. Continue boiling for 4 minutes.
- Remove the pot from heat. Add the 6 ounces of chocolate chips and stir until completely melted and smooth. Then, add 3.5 ounces of marshmallow fluff and 1/2 teaspoon of vanilla extract. Stir well until thoroughly combined.
- Pour the chocolate mixture into the prepared pan, spreading it into an even layer.
- Clean the pot (or use another). Repeat the process using the remaining 1.5 cups of sugar, 6 tablespoons of butter, and 1/3 cup of evaporated milk, boiling for 4 minutes.
- Remove from heat. Add the 1/2 cup of peanut butter and stir until melted. Then, add the remaining 3.5 ounces of marshmallow fluff and 1/2 teaspoon of vanilla extract. Stir well until smooth.
- Pour the peanut butter mixture evenly over the chocolate layer in the pan.
- Allow the fudge to cool at room temperature for 1-2 hours, or until completely hardened.
- Once set, use the parchment paper to lift the fudge from the pan. Cut into squares for serving. Enjoy!