
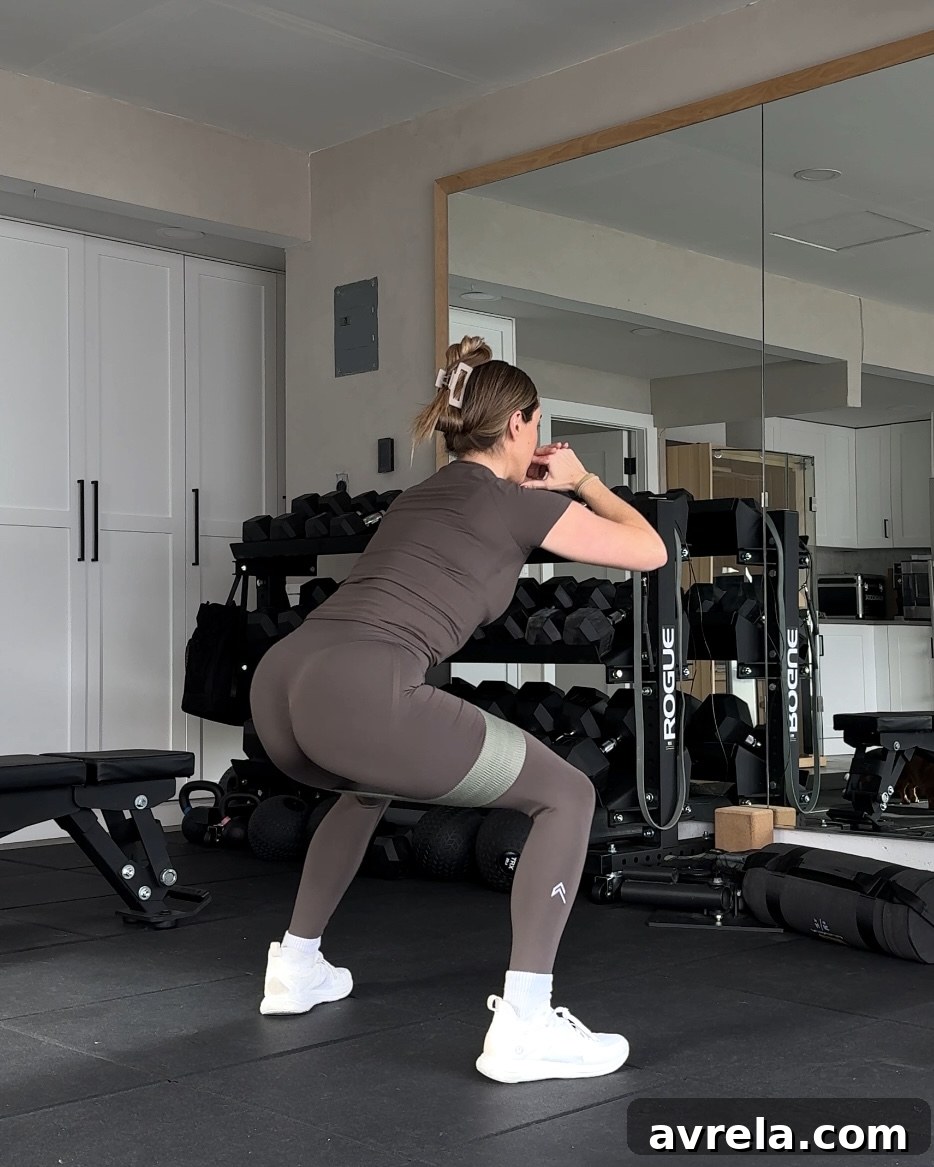
Are you struggling to keep your chest up in a squat? Do you find yourself leaning excessively forward as you descend into your squat, leading to discomfort, frustration, and stalled progress? You’re certainly not alone in this challenge. This common issue can make even light squats feel heavier, place undue stress on your lower back, and prevent you from unlocking your true strength potential.
The good news is that this is a highly fixable problem. Mastering an upright squat isn’t about brute force; it’s about understanding and addressing the underlying factors. The secret lies in a synergistic blend of enhanced mobility, robust core stability, and precise positioning. In this comprehensive guide, we will meticulously explore the various reasons why your chest might be falling forward during squats and provide you with actionable, step-by-step solutions. We’ll cover targeted mobility exercises, effective strength work, and crucial form adjustments designed to transform your squat technique.
Decoding the Forward Lean: Why Your Chest Falls Forward in a Squat
Understanding the root causes of a forward-leaning squat is the first step toward correcting it. It’s rarely a single issue but rather a combination of factors that contribute to this common problem. Here’s a detailed look at the primary culprits:
- Poor Thoracic Spine Mobility: Your thoracic spine, or upper back, needs to extend and remain rigid to support the barbell and keep your torso upright. If your upper back is stiff or rounded, it will naturally cause your chest to collapse forward, making it impossible to maintain a straight bar path. This stiffness often comes from prolonged sitting or lack of movement.
- Limited Ankle Dorsiflexion: Ankle dorsiflexion is the ability of your shin to move forward over your foot while your heel remains on the ground. When your ankles lack this crucial mobility, your knees can’t track sufficiently forward during the squat. To compensate, your body’s center of gravity shifts forward, forcing your torso to lean excessively to maintain balance.
- Weak Core Engagement and Stability: Your core acts as a vital brace, creating intra-abdominal pressure that stabilizes your spine and helps you maintain an upright posture under load. A weak or disengaged core cannot adequately support your torso, making it easier for your body to tip forward as you descend, especially with heavier weights.
- Tight or Weak Hips and Glutes: Imbalances in hip strength or tightness in the hip flexors can significantly impact your squat mechanics. If your glutes are weak, they may not effectively contribute to hip extension, leading your hips to shoot up prematurely and your chest to fall. Tight hip flexors can also pull your pelvis into an anterior tilt, making it harder to maintain a neutral spine and an upright position.
- Incorrect Bar Placement and Stance: Your setup plays a crucial role. The position of the barbell on your back (high bar vs. low bar) directly influences your torso angle. A low-bar squat naturally involves a slight forward lean, which can be exacerbated if your mobility isn’t adequate. Similarly, an inappropriate foot stance – too narrow, too wide, or with incorrect toe-out – can limit your depth and force compensations, including a forward lean.
- Improper Breathing and Bracing: Many lifters fail to implement a proper bracing technique, which involves taking a deep breath into the belly and creating intra-abdominal pressure. Without this “internal weight belt,” the core cannot effectively stabilize the spine, leading to a breakdown in form and a forward lean.
The Ultimate Guide to Maintaining an Upright Chest in Your Squat
Now that we’ve identified the potential culprits, let’s dive into the most effective strategies to correct your squat form and build a consistently upright, powerful squat.
1. Master Thoracic Spine Mobility
A stiff thoracic spine is a primary limiter for an upright squat. Improving its mobility allows for greater upper back extension and stability, enabling you to create a solid “shelf” for the bar and preventing your chest from collapsing forward. Incorporate these exercises regularly, ideally as part of your warm-up or on rest days.
Essential Exercises to Improve Upper Back Mobility:
- Wall Angels: Stand with your back flat against a wall, ensuring your lower back, shoulders, and head are in contact (or as close as possible). Keep your ribs down to avoid arching your lower back. Slowly raise your arms, keeping them against the wall, as if making a snow angel, until your hands touch above your head. Reverse the movement. Focus on keeping your wrists and elbows pressed against the wall throughout. Perform 2-3 sets of 10-12 controlled repetitions. This helps reinforce proper posture and shoulder retraction.
- Thoracic Extensions on a Foam Roller: Lie on your back with a foam roller positioned horizontally across your mid-back (just below your shoulder blades). Support your head with your hands. Gently extend your upper back over the roller, allowing your chest to open and your spine to arch. You can slowly roll up and down your thoracic spine, pausing at tight spots. Hold each extension for 10-15 seconds, repeating 5-6 times. This directly targets spinal extension and mobility.
- Open-Book Stretch: Lie on your side with both knees bent at 90 degrees and stacked on top of each other. Extend the arm that’s on the bottom directly forward. Bring the top arm over, resting your hands together. Keeping your knees together, slowly rotate your upper body, opening your top arm like a book page, until your shoulder blade approaches the floor. Follow your hand with your eyes. Hold for 20-30 seconds per side. This stretch improves rotational and extension mobility in the thoracic spine and opens up the chest.
2. Unlock Optimal Ankle Dorsiflexion
Restricted ankle mobility is a silent killer of squat depth and upright posture. Without adequate dorsiflexion, your knees cannot track sufficiently forward, forcing your torso to lean excessively to maintain balance and achieve depth. Addressing this will allow for a more natural and balanced squat.
Targeted Exercises to Improve Ankle Mobility:
- Knee-to-Wall Drill: Stand facing a wall, placing your big toe a few inches away. Keeping your heel firmly on the ground, drive your knee forward to touch the wall. If you can touch the wall, move your foot back slightly and repeat. Find the maximum distance you can achieve without lifting your heel. Perform 10-15 repetitions per leg, focusing on a slow, controlled stretch at the end range. This directly assesses and improves your functional ankle dorsiflexion.
- Banded Ankle Mobilizations: Loop a sturdy resistance band around your ankle, positioning it just above your foot and below your shin bone. Anchor the other end of the band to a sturdy object in front of you (e.g., a rack post). Step forward into a half-kneeling position or a lunge, gently rocking your knee forward over your foot while keeping your heel down. The band provides an anterior pull on your tibia, creating a distraction and allowing for deeper dorsiflexion. Rock back and forth for 1-2 minutes per leg.
- Elevated Heel Squats (Temporary Fix): While you diligently work on improving your ankle flexibility, placing small weight plates (10-25 lbs) or a specialized squat wedge under your heels can temporarily mitigate ankle restrictions. This allows your body to experience the correct upright squat pattern and depth, reinforcing good motor patterns. However, remember this is a temporary aid; the goal is to squat flat-footed without compensation.
3. Build a Fortress Core for Superior Squat Stability
Your core muscles are the unsung heroes of a stable, upright squat. They act as a crucial link between your upper and lower body, creating a rigid trunk that prevents your spine from rounding and your chest from falling forward. A weak core is a primary reason for form breakdown under load.
Core Exercises for a Stronger and More Upright Squat:
- Deadbugs: Lie on your back with your arms extended toward the ceiling and knees bent at 90 degrees over your hips. Slowly extend one arm overhead and the opposite leg straight out, hovering them just above the floor. Keep your lower back pressed into the ground and your core deeply engaged throughout the movement, preventing any arching of the spine. Return to the starting position and alternate sides. Perform 2-3 sets of 10-12 repetitions per side. This teaches anti-extension core control.
- Pallof Press: This is a powerful anti-rotation exercise that directly translates to squat stability. Attach a resistance band to a sturdy anchor at chest height. Stand perpendicular to the anchor, grasping the band with both hands. Step out to create tension in the band. Keeping your core tight and resisting any rotation, press the band straight forward from your chest, hold briefly, and slowly return. Ensure your hips and shoulders remain square. I highly recommend using quality resistance bands like the Recreation Sweat Power Bands for optimal tension and durability. Perform 2-3 sets of 10-12 reps per side.
- Goblet Squats: This exercise is not just a squat variation but also an excellent core-strengthening tool and a teaching mechanism for an upright torso. Hold a kettlebell or dumbbell vertically against your chest, keeping your elbows tucked in. As you squat, the anterior load naturally forces your torso to remain upright to counteract the weight. Focus on keeping your chest proud and your core braced. This is a fantastic way to reinforce proper squat posture and core engagement before moving to a barbell.
- Plank Variations: Basic planks and their variations (side plank, weighted plank) are fundamental for building isometric core strength, which is vital for maintaining a rigid torso during squats. Hold for 30-60 seconds, 2-3 sets, focusing on a straight line from head to heels and actively bracing your core.
4. Fortify and Mobilize Your Hips for Enhanced Depth and Stability
Your hips are the powerhouse of the squat. If they are weak, tight, or lack proper activation, your squat form, depth, and ability to stay upright will suffer. A combination of targeted hip mobility work and glute activation exercises will significantly improve your squat mechanics.
Hip-Focused Exercises for a Superior Squat:
- Cossack Squats: These dynamic side-to-side squats are excellent for improving hip mobility in the frontal plane, strengthening the adductors and abductors, and enhancing overall hip flexibility. Start with bodyweight, reaching one leg out to the side while squatting down into the other leg, keeping the heel of the extended leg on the ground. As you get stronger, progress to holding a kettlebell in the goblet position. Perform 2-3 sets of 8-10 reps per side.
- 90/90 Stretch: This is a potent hip opener that targets various muscles around the hip joint. Sit on the floor with one leg bent in front of you at a 90-degree angle (shin parallel to your body) and the other leg bent behind you at a 90-degree angle (shin perpendicular to your body). Keep your chest tall and gently lean forward over your front shin for a deeper stretch in the glute and external rotator. Hold for 20-30 seconds per side, gradually increasing your lean.
- Glute Bridges & Hip Thrusts: These exercises are paramount for glute activation and strength, which are crucial for driving out of the bottom of the squat and maintaining hip stability. Lie on your back for glute bridges, or sit with your upper back on a bench for hip thrusts. Drive through your heels, squeezing your glutes powerfully at the top. To maximize glute activation, I love incorporating a Recreation Sweat Glute Band around my knees to add external resistance and promote outward knee drive. Perform 3-4 sets of 10-15 repetitions.
- Spiderman Lunges with Thoracic Twist: This dynamic stretch combines hip flexor mobility with thoracic rotation, hitting multiple areas crucial for squatting. Step into a deep lunge, placing both hands inside the front foot. Then, rotate your torso and reach your inside arm toward the ceiling, following it with your eyes. Hold briefly and return. Alternate sides. Perform 5-8 reps per side.
5. Optimize Your Bar Position, Stance, and Setup
Even with great mobility and core strength, an improper setup can sabotage your squat. Minor adjustments to how you position the bar, where you place your feet, and how you engage your upper body can make a significant difference in keeping your chest upright.
Critical Adjustments for Squat Technique:
- High-Bar vs. Low-Bar Squat:
- High-Bar Squat: The bar rests higher on your traps, encouraging a more vertical torso angle. This style is generally more forgiving for those with limited hip or ankle mobility and naturally promotes an upright chest. If you consistently struggle with leaning forward, transitioning to a high-bar squat might be a beneficial starting point.
- Low-Bar Squat: The bar rests lower across your posterior deltoids, creating a longer lever arm and naturally requiring a slight forward lean of the torso to keep the bar over your midfoot. While not inherently “wrong,” if your mobility or core strength isn’t sufficient for this lean, it can easily devolve into excessive forward tipping. Ensure you have the requisite mobility and stability before heavily loading a low-bar squat.
- Foot Positioning (Stance Width & Toe Angle): Experiment with your stance width and the degree of your toe-out angle.
- Wider Stance: A slightly wider stance can sometimes provide more space for your hips, allowing for greater depth and reducing the need for excessive forward lean, especially for individuals with different hip anatomies.
- Toe-Out Angle: A slight toe-out (15-30 degrees) helps engage the glutes and allows your knees to track outward, aligning with your feet. This creates more space in the hip joint, enabling a deeper squat with a more upright torso. Find what feels most natural and allows for comfortable depth.
- Grip and Elbow Position: In back squats, your upper back engagement is paramount.
- Tight Grip: Grip the bar firmly, actively trying to bend it around your back (though it won’t move). This creates tension through your lats and upper back.
- Elbows Down and In: Pull your elbows slightly down and in towards your torso. This cue helps to engage your lats, which contributes significantly to upper back tightness and prevents your upper body from rounding forward under the bar. Think of “creating a shelf” for the bar with your traps and upper back.
- Breathing and Bracing: This is arguably the most critical component of stability. Before initiating your descent, take a deep, diaphragmatic breath into your belly (not just your chest). Then, brace your core as if preparing to take a punch. This creates intra-abdominal pressure, acting as an internal weight belt that stabilizes your spine and helps you maintain an upright, rigid torso throughout the entire squat. Exhale forcefully as you drive up.
Putting It All Together: A Holistic Approach to Squat Perfection
Correcting a forward lean in your squat is not about finding one magic bullet, but rather consistently applying a multi-faceted approach. Think of your body as an integrated system; weaknesses or restrictions in one area will inevitably impact others. Dedication to improving your mobility, strengthening your core and hips, and meticulously refining your technique will yield the most profound and lasting results.
Consistency is key. Incorporate mobility drills into your warm-ups, perform core and hip strengthening exercises regularly, and actively think about your technique cues during every set. Don’t be afraid to deload the weight to focus purely on form, especially when learning new movement patterns or addressing significant limitations. Remember, quality over quantity always wins when it comes to fundamental movements like the squat.
Common Mistakes to Avoid When Fixing Your Squat
- Rushing the Process: Improvement takes time. Don’t expect immediate overnight changes. Be patient and consistent.
- Ignoring Pain: Never push through sharp pain. Listen to your body and consult a professional if discomfort persists.
- Skipping Warm-ups: A proper warm-up that includes dynamic stretches and mobility drills prepares your body for the demands of squatting.
- Over-relying on Temporary Fixes: While heel elevation and specific shoes can help, they shouldn’t replace actual mobility work. Address the root cause.
- Neglecting Video Analysis: Film your squats from different angles. It’s incredibly insightful for identifying flaws you can’t feel.
Final Takeaways: Elevate Your Squat with an Upright Chest
To conquer the forward lean and maintain an upright chest in your squat, focus on these critical areas. Prioritize consistent work on your upper back and ankle mobility to unlock greater range of motion and allow for a more natural, vertical torso path. Simultaneously, build a strong, resilient core and powerful hips to provide the necessary stability and drive throughout the movement. Finally, don’t underestimate the impact of subtle adjustments to your bar placement and squat stance, tailoring them to your unique body mechanics. Utilize temporary fixes like goblet squats and heel elevation as teaching tools while you diligently work on long-term mobility and strength gains.
By integrating these targeted mobility exercises, foundational core work, and precise technique adjustments into your training regimen, you will not only be able to keep your chest proudly upright but also squat with significantly greater confidence, strength, and reduced risk of injury. Your journey to a stronger, more efficient squat begins now!
Ready for a Structured Workout Plan? Transform Your Strength!
If you’re seeking professionally designed strength programs crafted by certified trainers, look no further than my comprehensive workout guides available at shopgoodeats.com. My strength training guides are meticulously designed for effective gym use, featuring detailed exercise instructions and crucial video demonstrations for every movement. This ensures you feel absolutely confident in your form, allowing you to continually progress safely and effectively.
These programs are founded on the principles of progressive overload, and thousands of individuals, including myself, have experienced incredible results from following them. They are perfectly suited for anyone aiming to build substantial strength, dramatically improve movement quality, and develop superior squat mechanics. Take a moment to browse the descriptions and discover the perfect guide to align with and exceed your fitness goals!