
Craving more deliciousness? Explore our recipe reels on Instagram for quick inspiration!
The Ultimate 5-Ingredient Copycat Reese’s Peanut Butter Cups
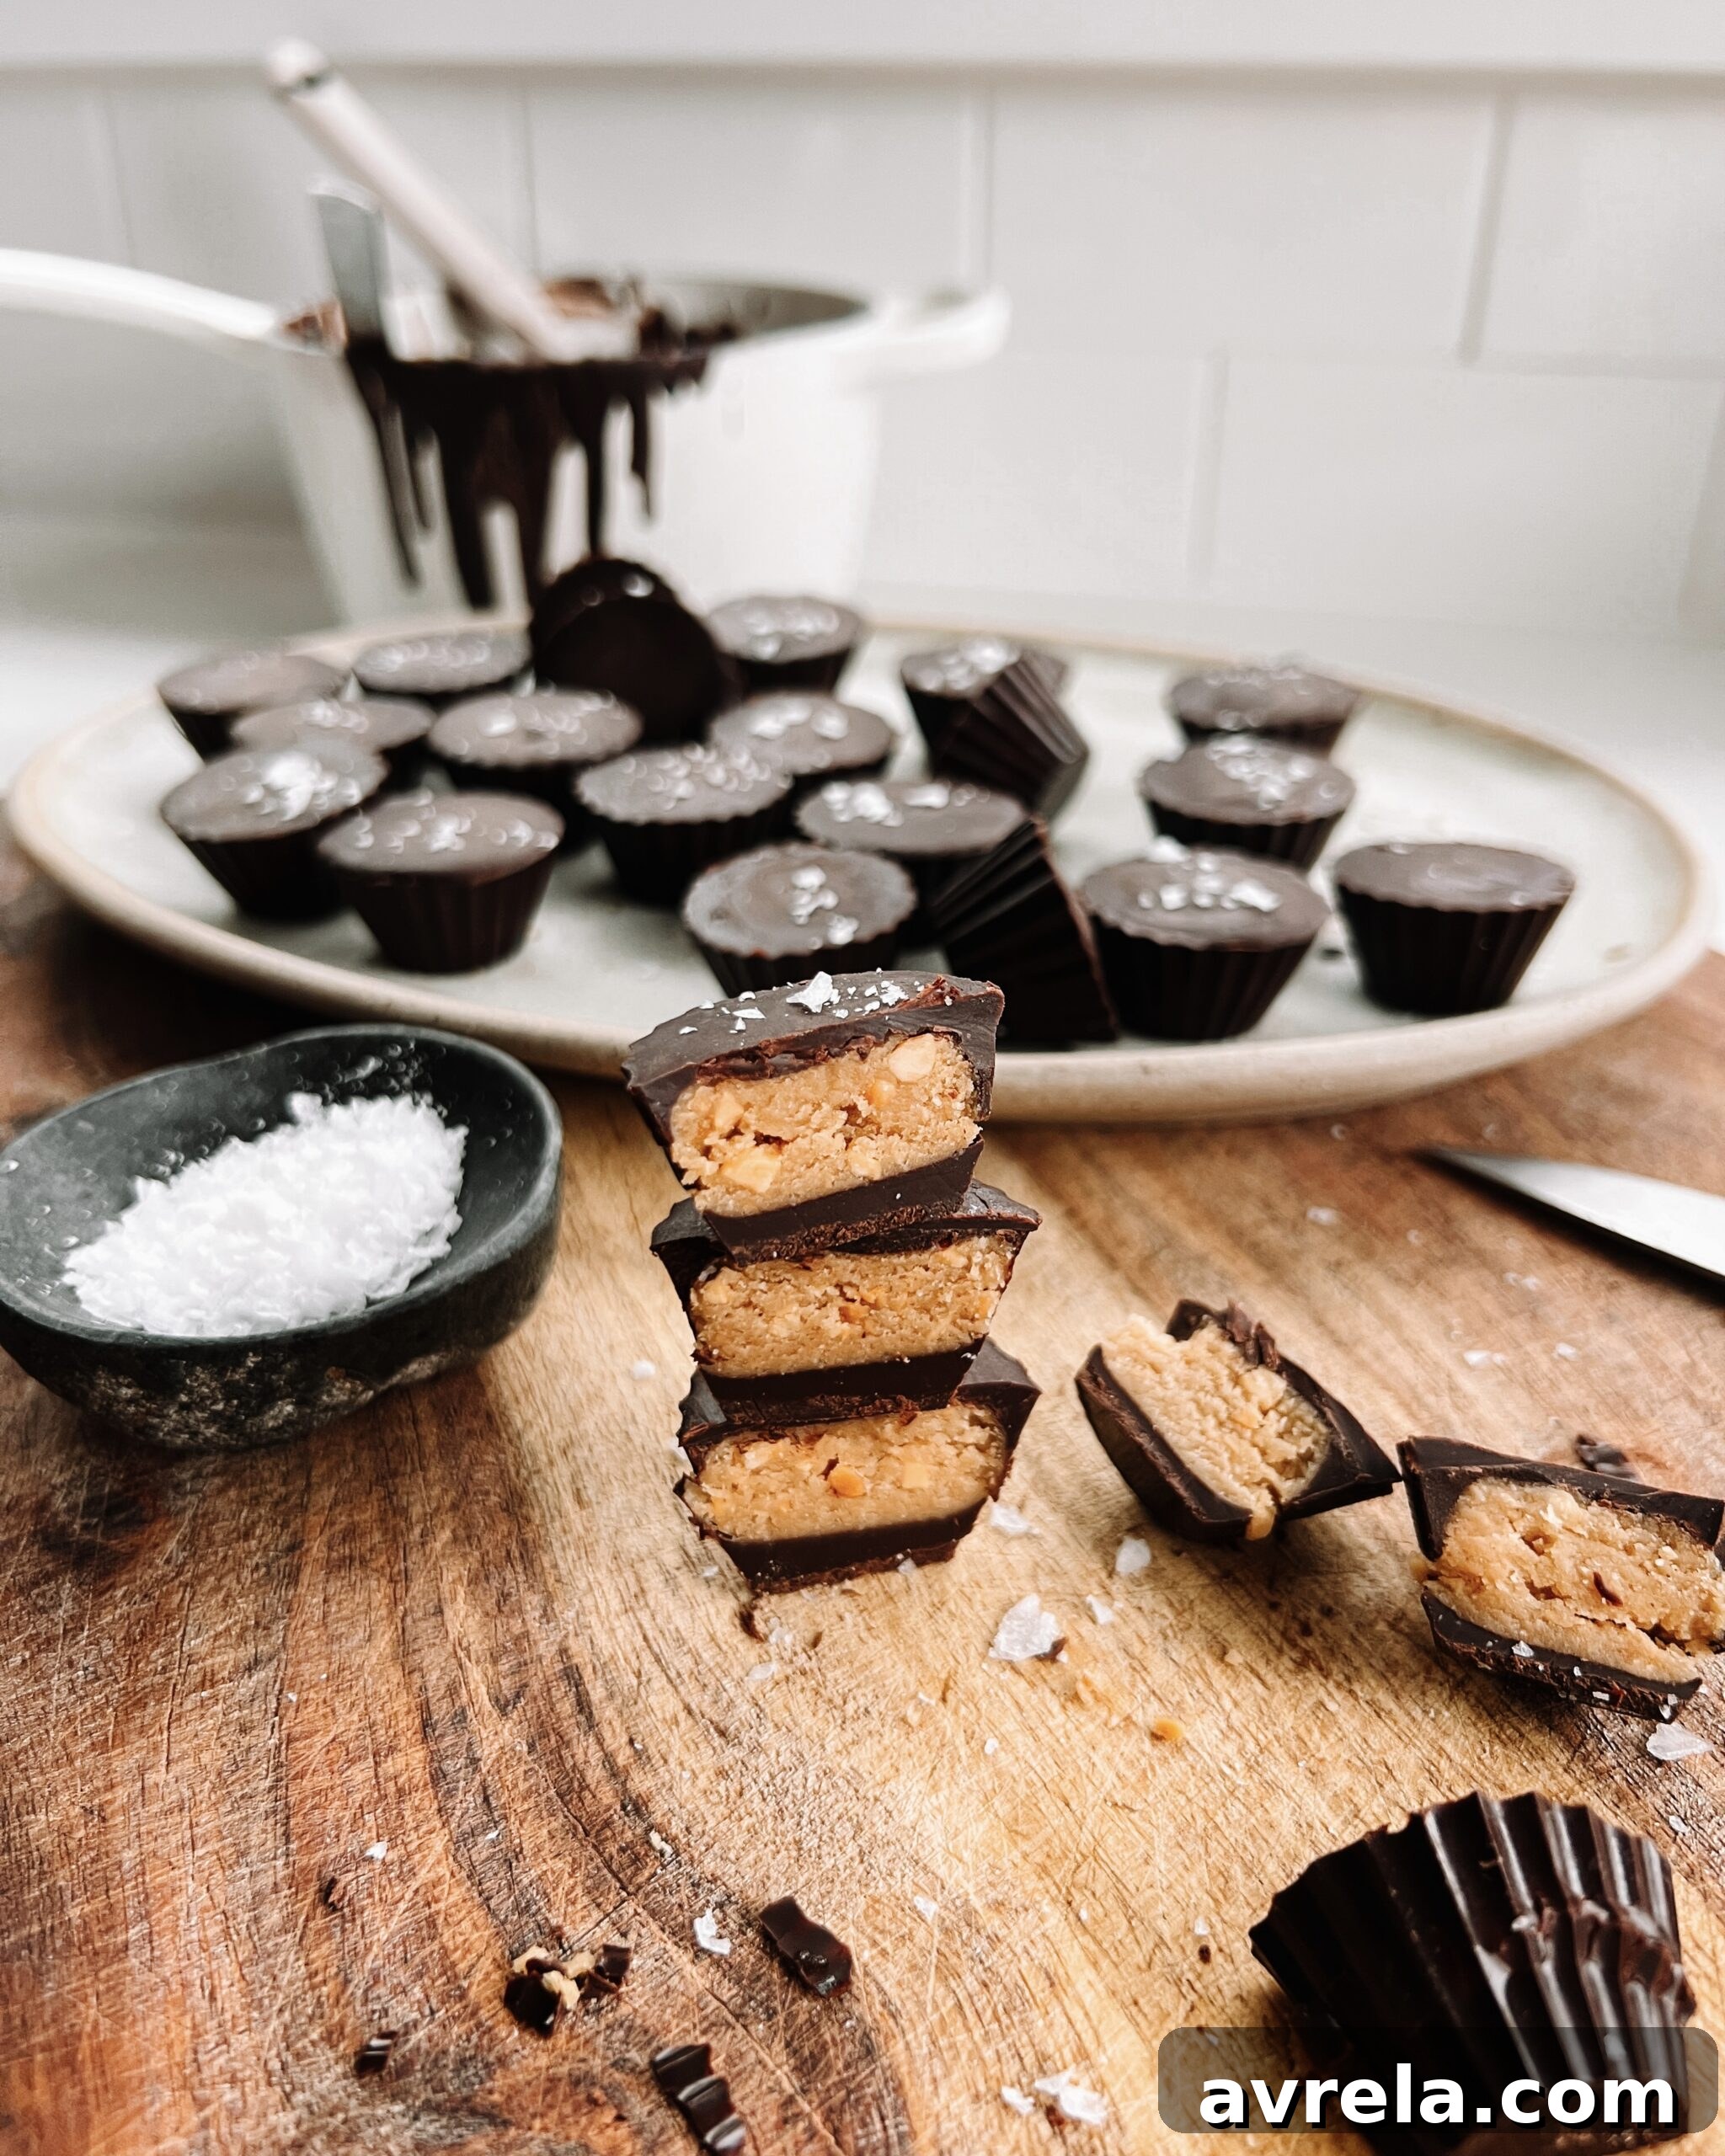
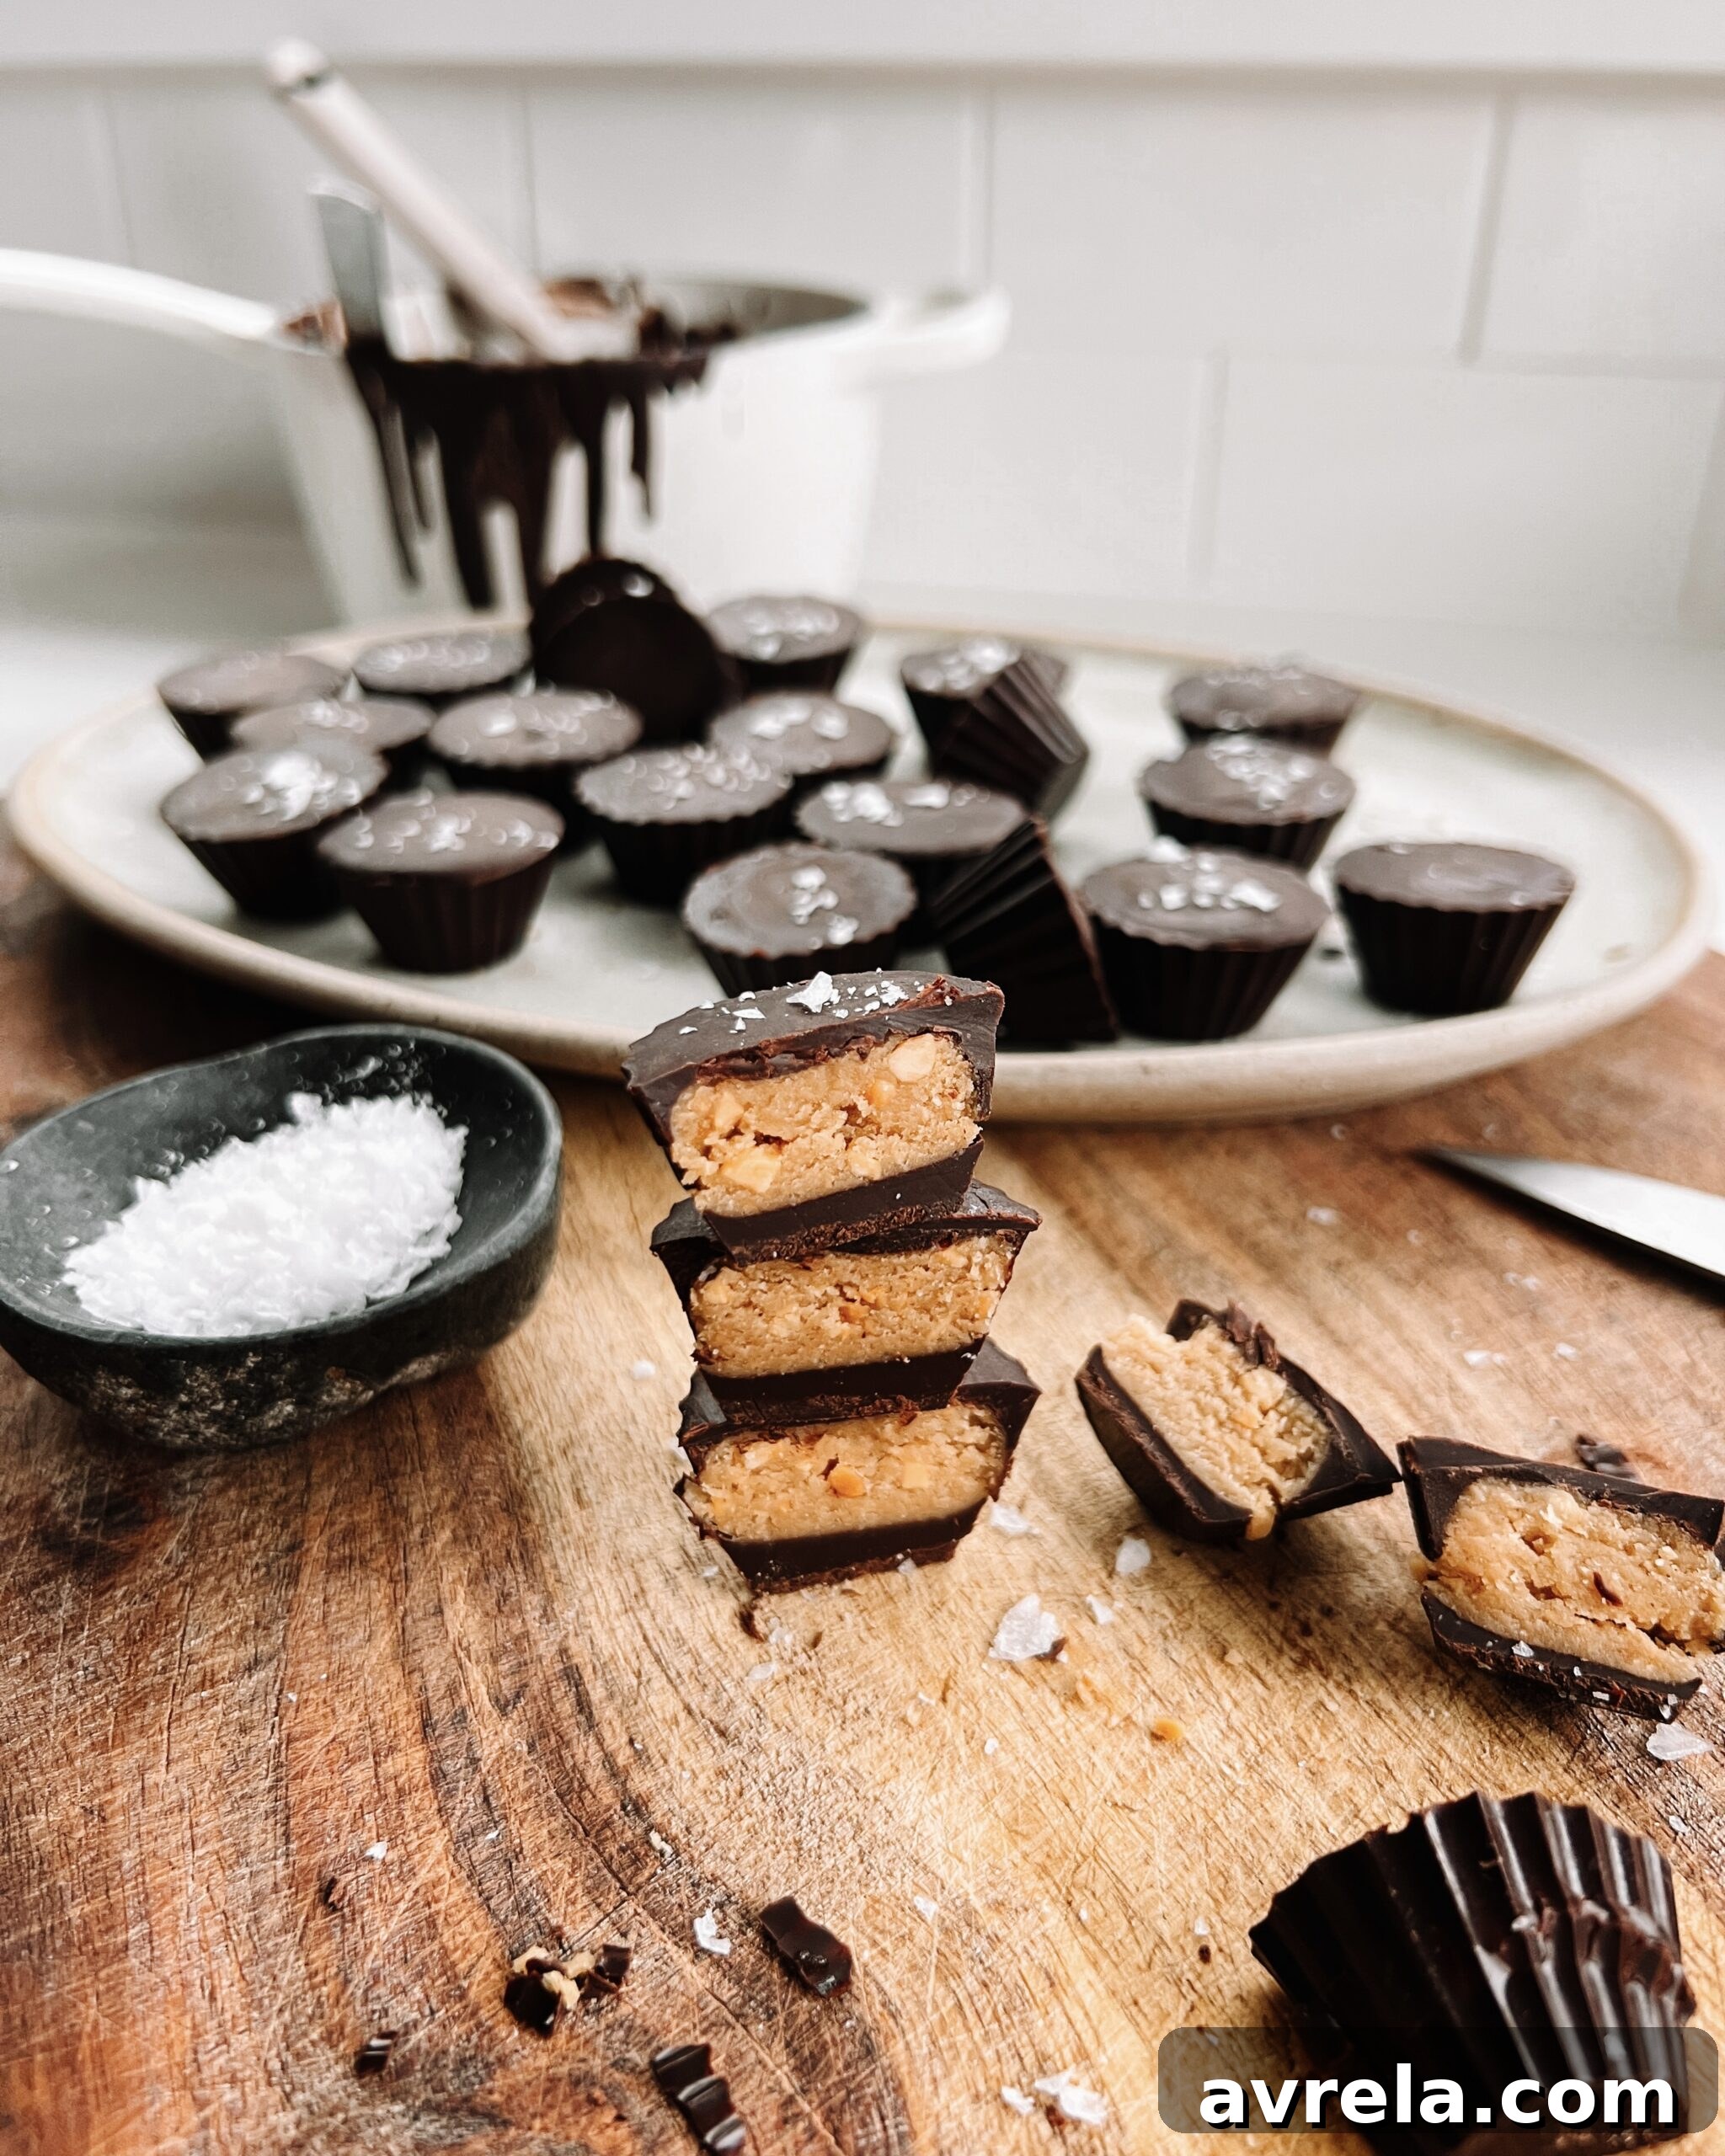
Satisfy your sweet tooth with these incredibly easy and delicious homemade peanut butter cups! Requiring just five simple ingredients, this recipe offers a healthier, customizable alternative to your favorite store-bought treat. Perfect for a quick dessert, a delightful snack, or a thoughtful gift.
Print Recipe
Ingredients You’ll Need
- 1 cup chocolate, melted – Use high-quality dark, milk, or semi-sweet chocolate chips or a chopped bar. For melting, a double boiler or microwave in 30-second intervals works best.
For the Creamy Peanut Butter Filling:
- 1/2 cup natural peanut butter, (or nut butter of choice) – Opt for natural, creamy peanut butter with no added sugar for the best flavor and texture. Almond or cashew butter are excellent alternatives.
- 3 tbsp maple syrup – A natural sweetener that adds a lovely depth of flavor without being overly sweet. Honey or agave nectar can be substituted.
- 4 tbsp coconut flour – This magical ingredient helps to bind the filling and create that classic crumbly, yet smooth, peanut butter cup texture. Don’t substitute with other flours, as coconut flour is unique in its absorbency.
- splash vanilla extract – Enhances the overall sweetness and brings out the nutty notes of the peanut butter. A little goes a long way!
Step-by-Step Instructions for Perfect Cups
-
Prepare the Chocolate Base: Using a silicone mini muffin mold or candy mold, pour enough melted chocolate into each cup to cover the bottom evenly. For a more authentic look, use the back of a small spoon to gently press some chocolate up the sides of each cup. This creates a protective chocolate shell. Transfer the mold to the freezer for about 15 minutes, or until the chocolate is fully hardened.
-
Mix the Peanut Butter Filling: While the chocolate sets, add all the peanut butter filling ingredients (peanut butter, maple syrup, coconut flour, and vanilla extract) to a medium-sized bowl. Mix vigorously with a spoon or spatula until all ingredients are thoroughly combined and you have a thick, dough-like consistency. It should be firm enough to roll.
-
Shape the Filling: Take small portions of the peanut butter mixture and roll them into compact balls. The size should be slightly smaller than the base of your chocolate cups. Gently press one ball of filling into the center of each hardened chocolate cup, flattening it slightly but leaving a small gap around the edges for the top chocolate layer.
-
Seal with Chocolate: Evenly pour the remaining melted chocolate over the top of each peanut butter filled cup, ensuring the filling is completely covered and the chocolate reaches the edges. Gently tap the mold on the counter a few times to release any air bubbles and create a smooth, even surface. Transfer the mold back to the freezer to harden for another 30 minutes.
-
Finish and Enjoy: Once the peanut butter cups are completely hardened, carefully remove them from the silicone molds. A gentle push from the bottom usually does the trick. For an extra gourmet touch, sprinkle a tiny pinch of flaky sea salt on top of each cup before serving. Enjoy your homemade, healthier Reese’s!
Pro Tips and Storage Suggestions
Filling Consistency: If your peanut butter filling feels too sticky, add a tiny bit more coconut flour. If it’s too dry, a splash more maple syrup or a tiny bit of melted coconut oil can help.
Storage: Store your homemade peanut butter cups in an airtight container. They can be kept on the counter for several days in a cool, dark place, but for optimal freshness and to maintain their firm texture, store them in the fridge for up to 2 weeks, or in the freezer for up to 3 months. Let them thaw slightly before enjoying if frozen.
Serving: These are fantastic as a post-dinner treat, a satisfying snack, or even a healthier option for a party dessert spread.
Why You’ll Absolutely Love This Homemade Reese’s Recipe
There’s something incredibly satisfying about recreating your favorite treats at home, especially when they come with added benefits. Our 5-ingredient copycat Reese’s recipe isn’t just easy; it’s a game-changer for anyone who loves the classic combination of chocolate and peanut butter.
- Simplicity at its Best: With only five core ingredients, this recipe minimizes shopping and prep time, making it perfect for even the busiest schedules.
- Healthier Indulgence: By using natural peanut butter, maple syrup, and controlling the quality of your chocolate, you’re ditching artificial additives and excessive refined sugars often found in commercial versions.
- Customization is Key: From the type of chocolate to your choice of nut butter, and even optional add-ins, you have complete control to tailor these treats to your exact preferences and dietary needs.
- No-Bake Bliss: Forget turning on the oven! This recipe requires no baking, just a little chilling time, making it ideal for warmer weather or when you just want a quick, delicious treat.
- Satisfyingly Delicious: Despite their simplicity, these homemade cups deliver a rich, creamy, and utterly irresistible flavor that rivals the original.
Unleash Your Creativity: Customization and Flavor Variations
One of the best parts about making your own treats is the freedom to experiment! These copycat Reese’s are incredibly versatile, allowing you to tweak them to your heart’s content.
- Chocolate Choices:
- Dark Chocolate: For a more intense, less sweet flavor and added antioxidants.
- Milk Chocolate: If you prefer the classic, sweeter profile of a traditional Reese’s.
- White Chocolate: A fun, sweet alternative for a different look and taste.
- Sugar-Free Chocolate: For those managing sugar intake, many excellent sugar-free options are available.
- Nut Butter Alternatives:
- Almond Butter: Offers a slightly milder, nutty flavor.
- Cashew Butter: For an incredibly creamy and subtly sweet filling.
- Sunflower Seed Butter (SunButter): A fantastic nut-free option for allergy sufferers.
- Exciting Add-ins:
- Flaky Sea Salt: A sprinkle on top elevates the flavor by balancing the sweetness and adding a gourmet touch.
- Chopped Nuts: Mix finely chopped peanuts or almonds into the filling for extra crunch.
- Mini Chocolate Chips: Fold into the peanut butter filling for double the chocolatey goodness.
- Espresso Powder: A pinch in the chocolate or filling can enhance the chocolate flavor.
- Dietary Modifications:
- Vegan: Ensure you use dairy-free chocolate. The rest of the ingredients are typically vegan-friendly.
- Gluten-Free: All ingredients are naturally gluten-free, making this a safe bet for those with sensitivities.
- Sugar-Free: Use sugar-free chocolate and a sugar-free liquid sweetener like stevia or erythritol-based syrup instead of maple syrup.
Expert Tips for Achieving Peanut Butter Cup Perfection
While this recipe is straightforward, a few insider tips can help you achieve professional-looking and tasting results every time.
- Quality Ingredients Matter: Since there are so few ingredients, the quality of each really shines through. Invest in good chocolate and natural peanut butter.
- Don’t Overheat Chocolate: When melting chocolate, low and slow is key. Overheated chocolate becomes thick and clumpy, making it difficult to work with.
- Chill Between Layers: Don’t rush the chilling process. Allowing the chocolate layers to fully harden ensures clean layers and prevents the filling from mixing with the chocolate.
- Silicone Molds are Your Friend: Silicone molds make removing the hardened cups incredibly easy without breakage. If you don’t have them, paper mini muffin liners in a tray can work, though they might not yield as perfectly smooth edges.
- Portion Control for Filling: Ensure your peanut butter balls are uniform in size for consistent results. Leave enough space for the top chocolate layer to fully encapsulate the filling.
- Smooth Tops: After pouring the final chocolate layer, gently tap the mold on the counter a few times. This helps to settle the chocolate and release any trapped air bubbles, resulting in a smooth, professional-looking top.
Frequently Asked Questions About Homemade Reese’s
- Q: Can I use powdered sugar instead of coconut flour for the filling?
- A: While powdered sugar can help bind the filling, coconut flour is unique in its absorbency and creates a specific texture that’s closer to a traditional Reese’s. Substituting it with powdered sugar will result in a sweeter, denser, and potentially greasier filling. We recommend sticking to coconut flour for the best results.
- Q: My chocolate is too thick to pour. What should I do?
- A: This can happen if the chocolate is slightly overheated or if it’s a type that’s naturally thicker. You can try adding a tiny amount (1/2 teaspoon at a time) of neutral oil, like coconut oil or vegetable oil, and stir until it reaches a pourable consistency. Be careful not to add too much, or the chocolate might not set properly.
- Q: How long do these last, and how should I store them?
- A: Stored in an airtight container, these peanut butter cups will last several days at room temperature (in a cool, dark place), up to 2 weeks in the refrigerator, or up to 3 months in the freezer. They are delicious straight from the fridge or freezer!
- Q: Are these truly a healthier alternative?
- A: While they are still a treat, these homemade cups are generally healthier than store-bought versions because you control the ingredients. You can choose natural, low-sugar peanut butter, dark chocolate, and a natural sweetener like maple syrup, avoiding artificial flavors, preservatives, and high-fructose corn syrup.
- Q: Can I make these without a silicone mold?
- A: Yes! You can use mini paper cupcake liners placed in a muffin tin. The process remains the same, though the shape might be slightly different, and they might not be as easy to remove without disturbing the chocolate shell.
Your New Favorite Treat Awaits!
There you have it – a straightforward, incredibly satisfying recipe for homemade copycat Reese’s peanut butter cups. Whether you’re a seasoned baker or a kitchen novice, this recipe proves that delicious, healthier treats are within everyone’s reach. Skip the store-bought versions and treat yourself to the rich, creamy, and utterly irresistible flavor of chocolate and peanut butter, perfected in your own kitchen. These easy-to-make, 5-ingredient wonders are sure to become a staple in your dessert rotation.